 Cannabis Grow Guide by Royal Queen Seeds
- Growing cannabis step by step
- Cannabis growing basics
- Choosing your seeds
- How to germinate seeds
- The cannabis vegetative stage
- The cannabis flowering stage
- Harvesting cannabis
- Trimming, drying, and curing
- Choosing pots and soil
-
Growing indoors
- A Complete Overview Of Growing Cannabis Indoors
- Cannabis Cultivation Tips: How To Set Up Indoor Grow Lights
- How Many Cannabis Plants Can You Grow Per Square Metre?
- Indoor Cannabis Growing: Relative Humidity and Temperatures
- Hydroponics Cannabis Growing Guide (with diagrams)
- Cannabis Micro Growing: Growing Great Weed in Tiny Spaces
- Growing outdoors
- How to grow autoflowering cannabis
- Cannabis nutrients and pH
- Cannabis troubleshooting: Nutrients
-
Cannabis troubleshooting: Growing
- Cannabis Seed Germination — Troubleshooting Guide
- How to Deal With Pythium (Root Rot) in Cannabis Plants
- Slow Cannabis Plant Growth And What You Can Do About It
- How to Deal With Leggy Cannabis Seedlings
- Watering Your Cannabis: How to Fix Overwatering and Underwatering
- Understanding Male, Female, And Hermaphrodite Cannabis
- Identifying and Treating Common Cannabis Ailments
- How To Revive a Sick Cannabis Plant
- How to Avoid Mouldy Weed During Drying and Curing
- How to Prevent and Treat Dry and Crispy Cannabis Leaves
- What Cannabis Leaves Can Tell You
- Causes and Solutions for Yellow Cannabis Leaves
-
Cannabis Strains Grow Report
- HulkBerry Automatic Grow Report
- Blue Cheese Auto Grow Report
- Purple Punch Automatic Strain Grow Report
- Triple G Automatic Grow Report
- Do-Si-Dos Automatic Grow Report
- Green Gelato Automatic Grow Report
- Haze Berry Automatic Grow Report
- Purple Queen Automatic Grow Report
- Cookies Gelato Automatic Grow Report
- Sherbet Queen Automatic Grow Report
- Sweet Skunk Automatic Grow Report
- Medusa F1 Grow Report
- Cannabis plant training
-
Weed growing tips
- The Cannabis Plant Anatomy
- How to preserve seeds
- How Much Sunlight Do Outdoor Cannabis Plants Need To Grow?
- How to Control and Prevent Stretching in Cannabis Plants
- My Cannabis Plants Are Growing Too Tall: What Should I Do?
- Should You Worry About Purple Or Red Cannabis Stems?
- What To Do When Your Indoor Cannabis Won’t Flower
- How To Protect Your Cannabis Plants From Heat Stress
- How To Tell If Your Female Cannabis Plant Has Been Pollinated
- Growing Medical Marijuana
- Bud Washing: How to Clean Your Weed
- Understanding Cannabis Yield per Plant
Choosing The Best Soil For Cannabis: A Home Grower's Guide
Home grower’s guide to the best soil for cannabis.
Contents:
When growing cannabis, using the right soil is crucial. Unfortunately, sourcing the best soil isn’t always straightforward. From cannabis-specific soils to bargain universal substrates and pre-fertilised types, the sheer amount of options can be overwhelming to novices. And what if you want to make your own soil from scratch?
Let’s talk about the best soil for growing cannabis.
What’s the Best Soil for Growing Weed?
Not every soil is suitable for growing cannabis, and not all cannabis requires the same type of soil. Picking the optimal soil depends on the type of cannabis you’re growing, your climate, whether you’re growing at home or in the wild, etc.
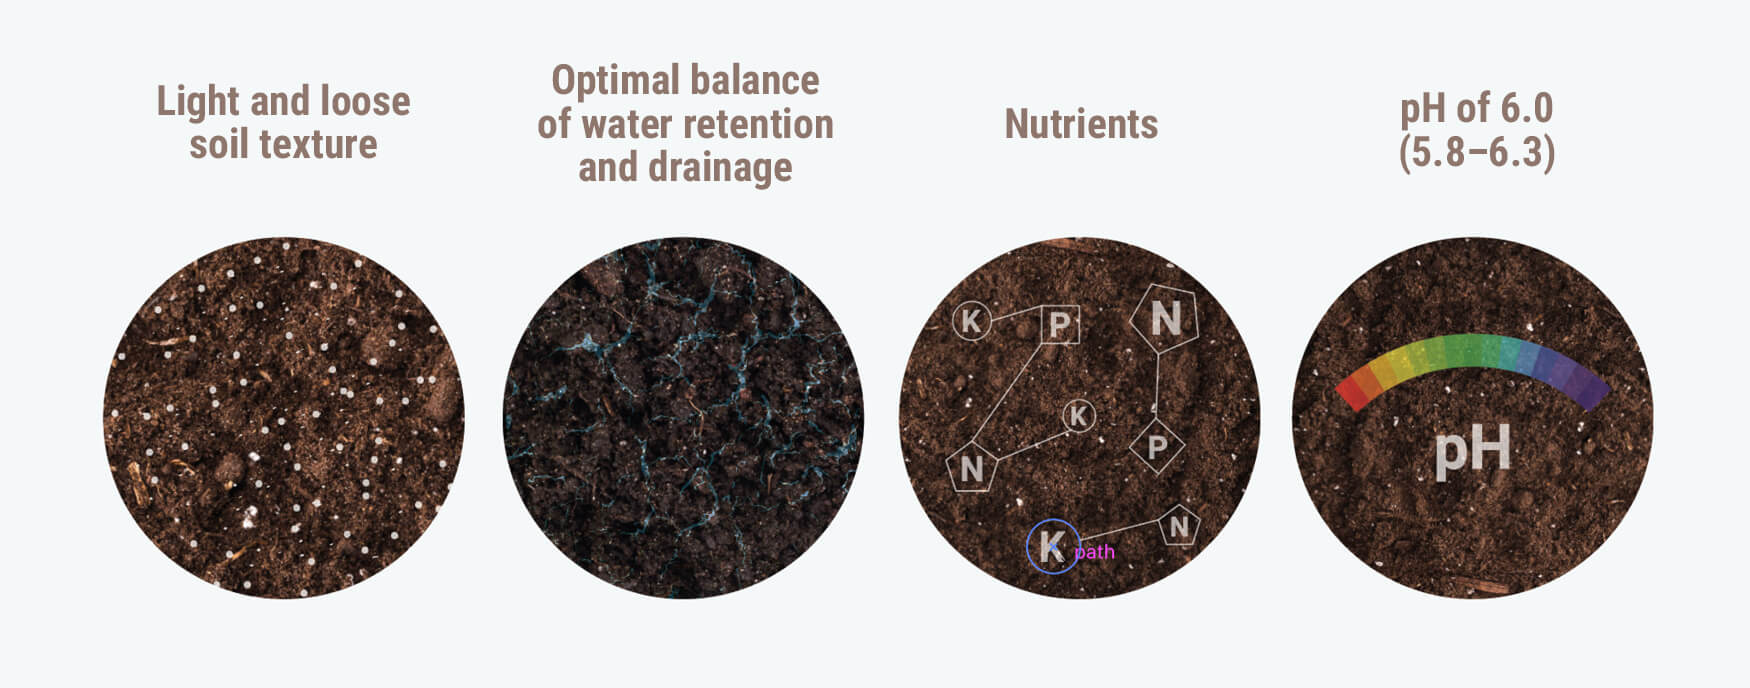
Aside from these factors, there are some common traits among all cannabis soils. Let's take a look at them:
- 1. Texture
- Cannabis prefers a light and loose soil texture. A light texture promotes root development, and it ensures more oxygen reaches the roots for optimal growth and health.
- 2. Drainage ability
- Cannabis soil needs to have excellent drainage. When you water your plants, it shouldn’t pool on top of the soil. If the soil has poor drainage, your plants will get sick and turn out subpar yields, or die.
- 3. Water retention
- Just as important as good drainage is water retention, which is the soil's ability to hold water. Good cannabis soil has an optimal balance of water retention and drainage.
- 4. pH value
- pH is a chemical scale that indicates how acidic or alkaline something is. This is important, as cannabis only does well within a small pH range A good soil for weed has a pH of about 6.0. A pH of 5.8–6.3 will be fine, but if it fluctuates too far outside of this range, you will get diminished yields. If the pH is seriously off, your plants will die.
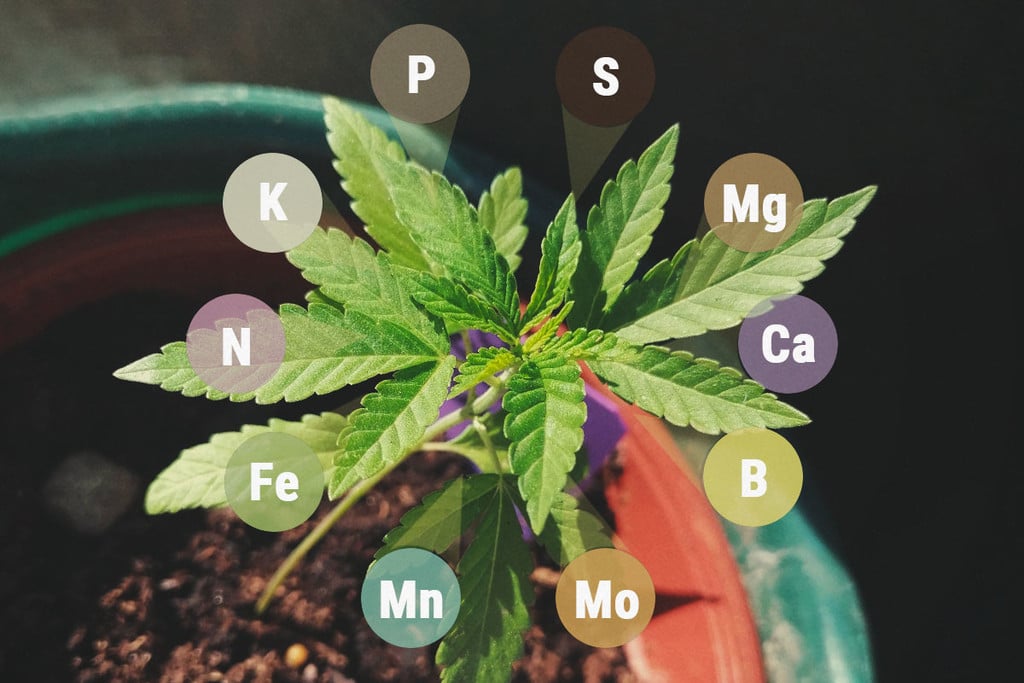
- 5. Nutrients
- Cannabis soil needs to contain nutrients so your plants can grow. Fortunately, almost all soils you can buy already feature them. Know, however, that these nutrients will often last only 3–4 weeks. Around the time your plants start to flower, the nutrients in commercial soils will likely be depleted. This is when you should begin to add nutrients.
If you’re growing without additional nutrients, your soil needs to contain organic substances such as humus, compost, worm castings, guano, etc. Microorganisms in the soil will turn these substances into nutrients for your plants to access on demand.
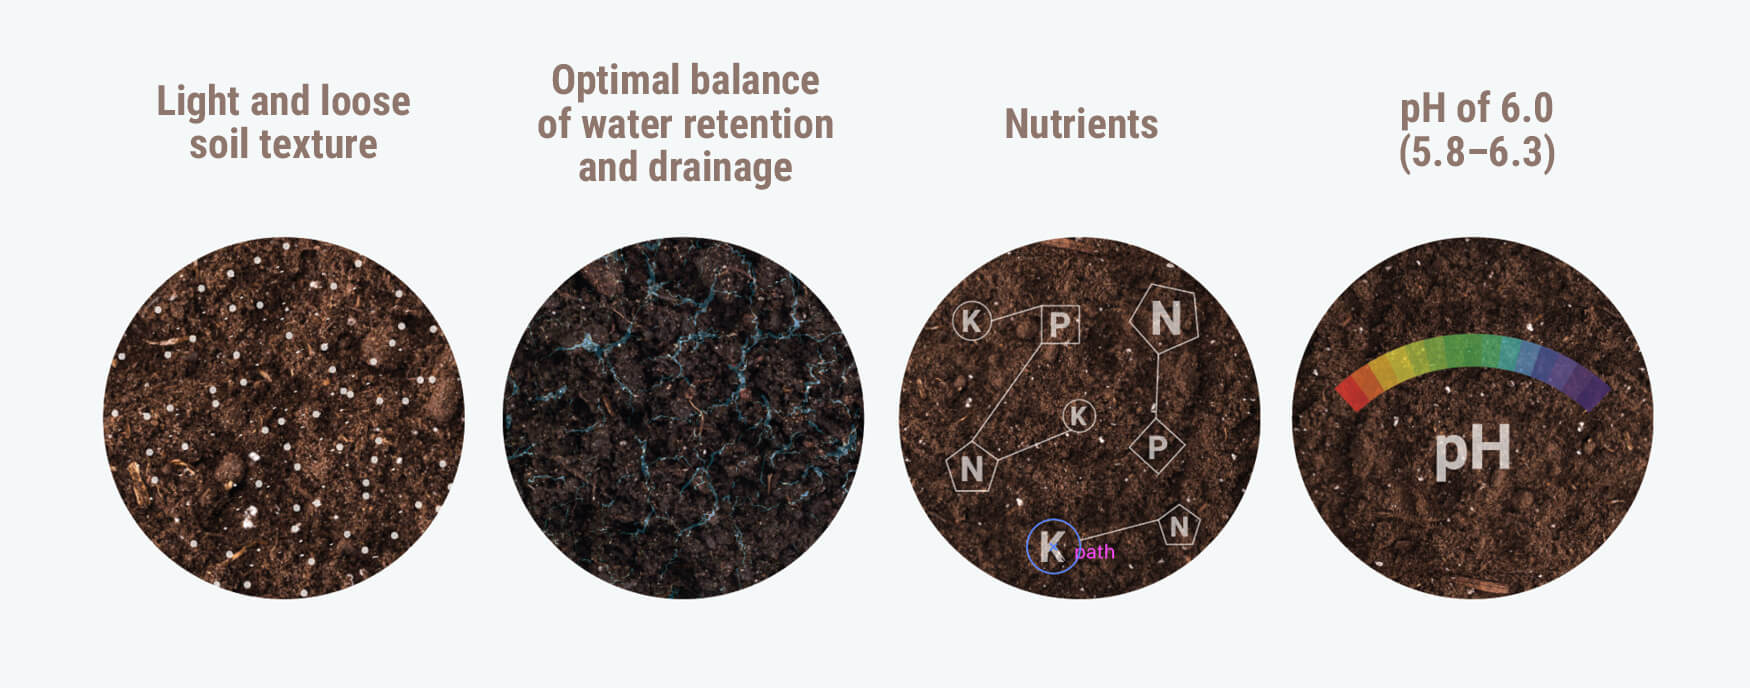
Traits of Quality Cannabis Soil
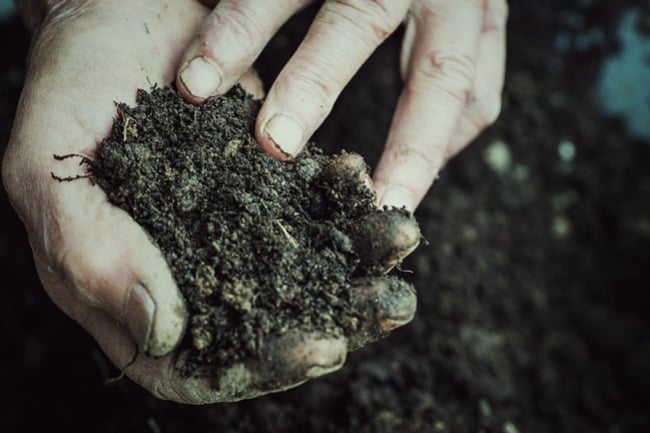
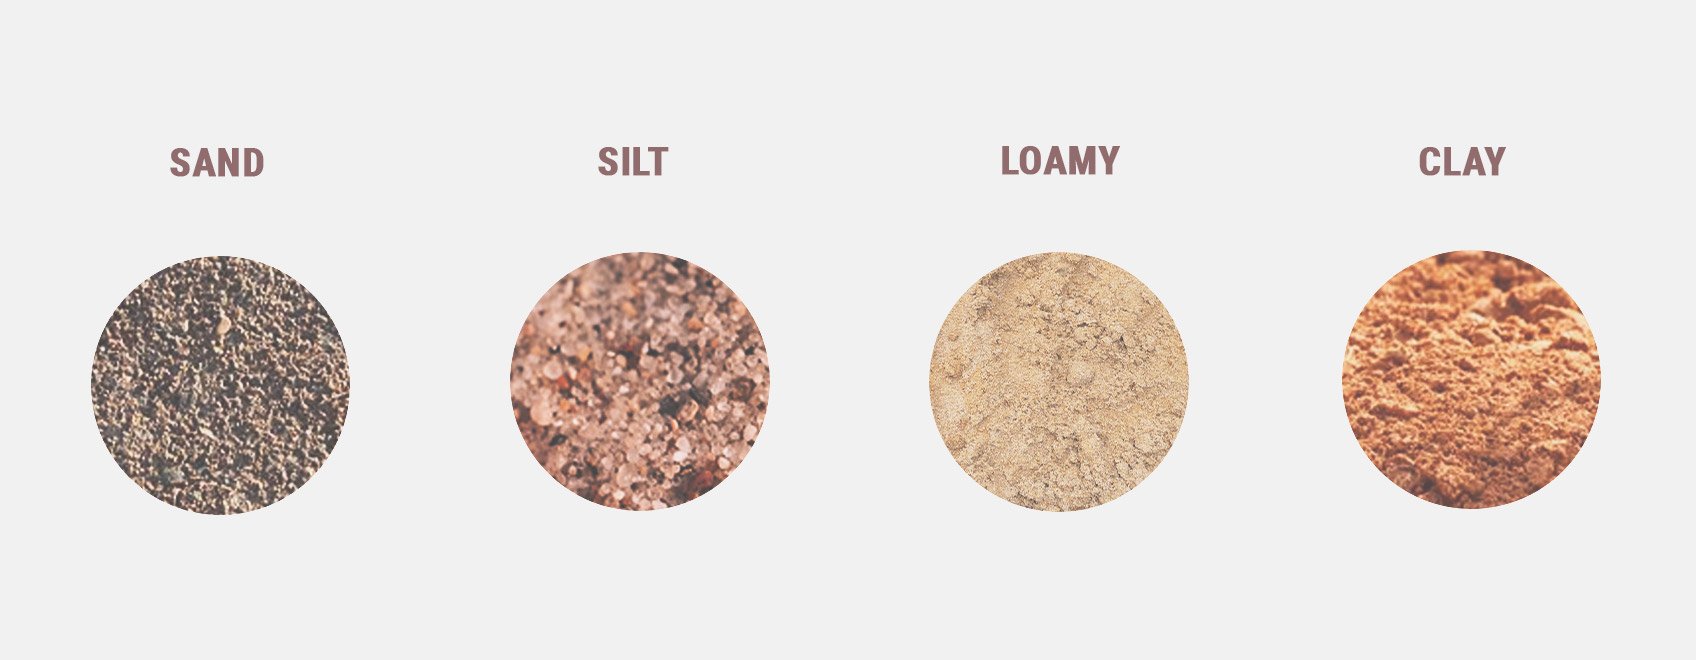
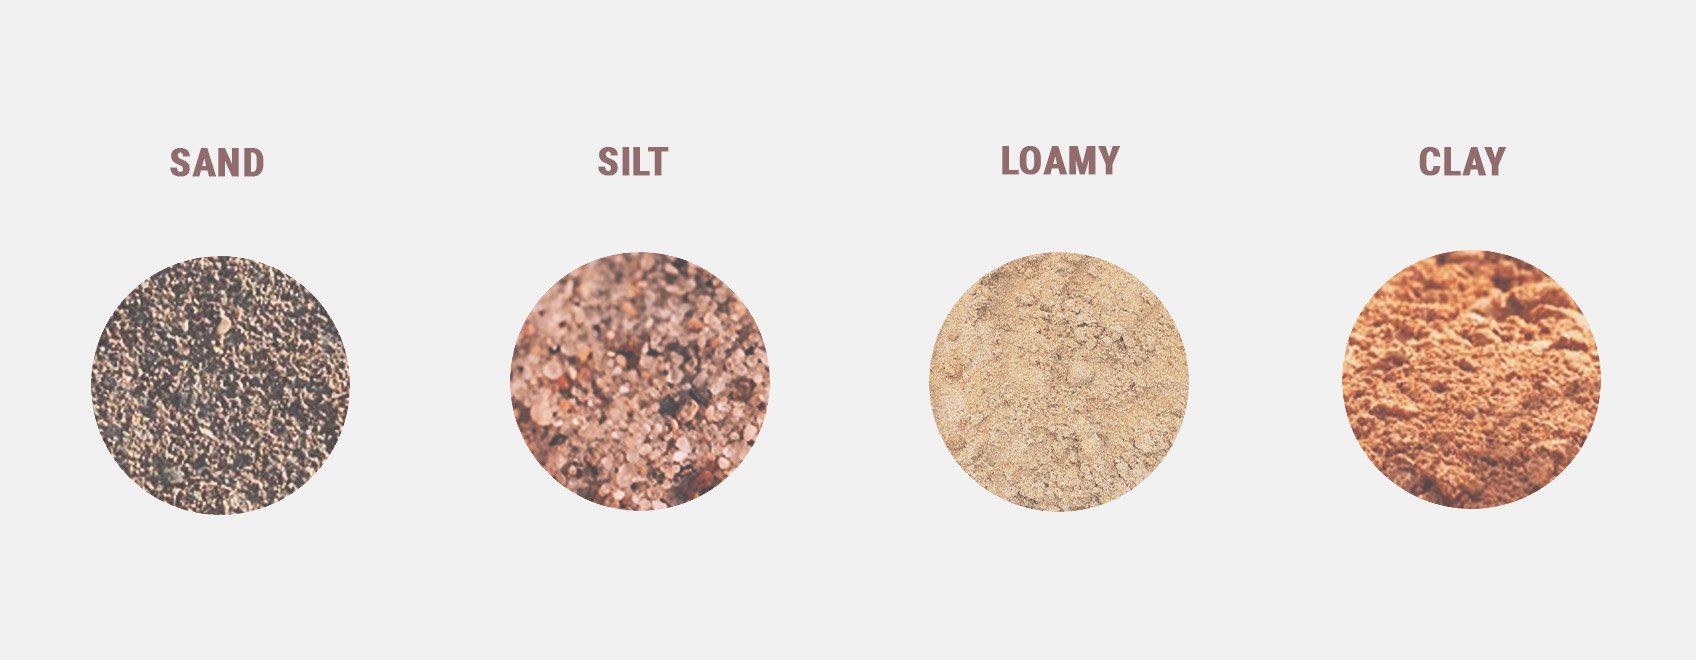
If you’re using shop-bought potting mixes, these are already optimally “tuned” for growing. Different story if you’re growing organically, though. Natural soil comes in four varieties: sandy, silty, loamy, and clay. But know that most soils consist of varying ratios of these soil types.
For example, a soil may be clay and loamy, or sandy and silty.
Sandy
Sandy soil is coarse with good drainage, but has poor water retention. When watered, nutrients such as nitrogen will also quickly get washed away. Sandy soil is easy to work with and is a viable choice for cannabis growers.
- Coarse structure
- Low pH
- Pros: Good drainage, keeps soil airy, high oxygen levels, easy to work with
- Cons: Poor water retention, needs frequent watering
Silty
Silty soil is a medium-coarse soil type that’s rich in minerals and organic particles. Its water retention is good, yet it has adequate drainage. Silty soils are very easy to work with. The minerals and organic substances within make it one of the most fertile soil types.
- Medium-coarse
- Pros: Contains minerals and nutrients, retains water well
- Cons: Fair drainage
Loamy
Loamy soil is a combination of sand, silt, and clay soils with added organic compounds. It is one of the best soil types for growing cannabis as it offers optimal water retention and drainage, and it’s rich in nutrients and oxygen. Downside: This type of soil can be expensive.
- Mixture of sand, silt, and clay
- Pros: Excellent water retention and drainage, contains nutrients, high oxygen levels
- Cons: Expensive
Clay
Clay soils consist of fine mineral particles. This type of soil is heavy and not easy to work with. It is very rich in nutrients and minerals, which makes it a good option to include in organic grows. Clay soil retains water well, but has poor drainage.
- Fine particle size
- High pH
- Pros: Rich in nutrients, retains water
- Cons: Poor drainage, heavy and compact, hard to work with
Now that you’ve explored soil options, it’s time to start your cannabis journey. Download our beginner-friendly guide to learn how to prepare your medium and kick off germination with ease!
Free RQS
Grow Guide!

Amendments to Improve Soil Quality
If you’re working with natural soil, chances are it won’t be perfect for growing cannabis—not from the start, at least. The texture may not be optimal or it may have poor drainage, for example. But you can improve any type of soil by adding amendments, most of which can be found in your local grow shop.
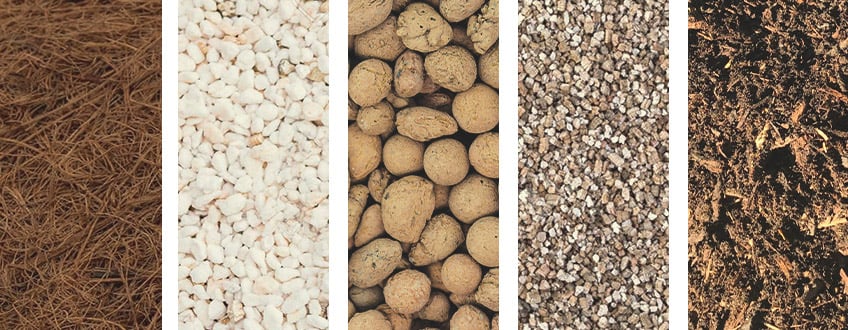
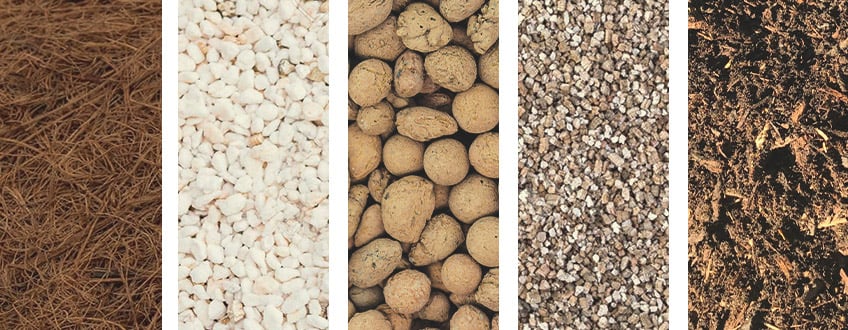
Coco Coir
Coco coir (coco fibre) is made from coconut husks. These light fibres provide excellent water retention and can lighten compact soils. Some use a pure coco substrate with special nutrients to cultivate their weed. But to amend existing soil, it’s a good idea to add anywhere up to 30% coco coir, depending on the composition of your base soil.
Perlite
Perlite is the most widely used soil amendment. Perlite consists of very light, bright-white rocks that greatly improve the drainage and airiness of the soil. Perlite also has decent water retention. To amend your soil with it, add 10–15% of perlite. You can add more, but then your soil may become too light and nutrients may leach out. Good-quality commercial soils often come with added perlite.
Clay Pebbles
Most cannabis growers are familiar with using clay pebbles as part of a hydroponic setup. But did you know they can also be used to enhance soil structure? Adding clay pebbles to the bottom of your raised beds and containers will assist with drainage and prevent water from pooling at the base—a large risk factor when it comes to root rot.
Growers can also add clay pebbles to the top of containers and beds to serve as a mulch. Here, they help to trap moisture in the growing medium by preventing excess evaporation. Clay pebble mulch also casts shade over the top layer of soil, suppressing weeds and keeping beneficial microbes sheltered from the hot rays of the sun.
Vermiculite
Vermiculite, just like perlite, is a heat-treated mineral you can use to make your soil lighter.It is also excellent at retaining water. Although vermiculite shares some characteristics with perlite, the two have opposite uses: Use perlite to increase drainage and airiness, and use vermiculite to increase water retention. Luckily, you can use both, as perlite and vermiculite work well together. Around 10% vermiculite is beneficial.
Worm Castings
Worm castings are normally seen more as a nutritional soil amendment as they contain a plethora of useful microorganisms that benefit growth. But worm castings will also improve the texture, drainage, and water retention of your soil. When amending your soil with worm castings, use about 25–30%.
Nutrients
If your DIY cannabis soil is rich in organic material, you will likely not need to add nutrients to it. As a matter of fact, some growers make the mistake of adding manure and vegetable scraps to their soil to "fertilise" it. This results in soil getting “too hot” for the plants, hurting their development in turn. If you want to put your vegetable scraps to good use in your garden, you first need to compost them.
If you think you need to amend your cannabis soil with nutrients, you can easily purchase bottled solutions tailored to a plant’s phase of growth.
Photoperiod Vs Autoflowering
One factor to consider when choosing the right soil for your weed is whether you’re growing photoperiod or autoflowering plants. Autoflowers prefer a light mix with fewer added nutrients. A great substrate for your autoflowering plants is a 50:50 mix of coco coir and a light, peat-based soil with some added perlite for drainage.
When growing autoflowers, stay away from heavily fertilised soils and certain amendments like bat guano, as these will be too hot and overload your plants with nutrients. The same is true for cannabis seedlings, which do not like high levels of nutrients.
Plant autoflowers in their final growing container in a cup-sized hole in the centre of the soil. Fill the hole with seedling/starter soil with no nutrients and place your seed in it. This way, your seedling can grow without being surrounded by the hot soil, which would otherwise burn it.
For photoperiod plants, start them out in small seedling pots/cups with soil that has little to no nutrients. Replant after a few weeks. More mature plants will tolerate higher nutrient levels much better than seedlings.
Shop-bought Vs Homemade
If you’ve just started growing cannabis, it may be best to simply get ready-made soil from the grow shop. The reason for this is that good-quality cannabis soil normally contains everything your plants need for healthy growth, in the optimal ratios. If you want, you can further improve your shop-bought soil with a handful of perlite for increased drainage, but otherwise you should be good.
Basic Cannabis Soil Recipe
On the other hand, there may come a time when you want to make your own soil. After all, why spend good money on soil if your homemade version is even better? Here is a recipe for a basic homemade cannabis soil.
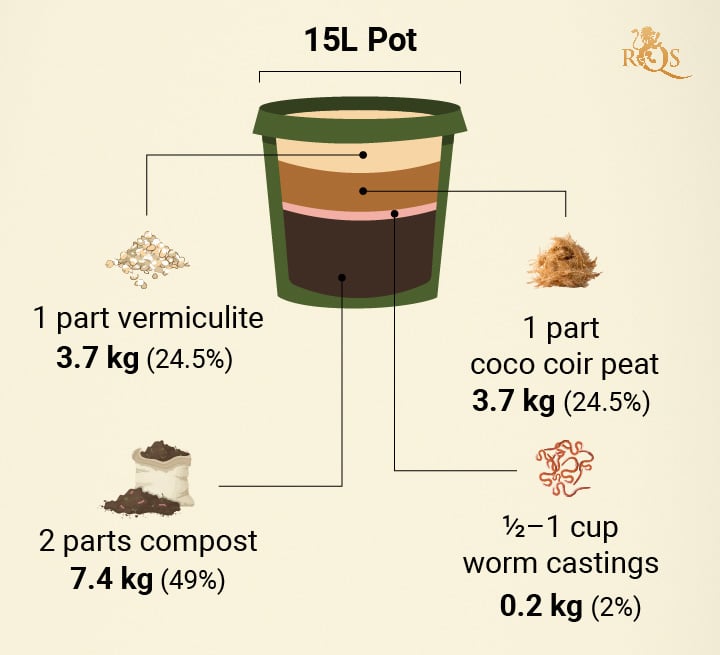
Ingredients
- 1 part vermiculite
- 1 part coco coir peat
- 2 parts compost
- ½–1 cup worm castings (or humus)

Directions
- Sieve the compost to remove larger chunks.
- Soak the coco coir peat in warm water. Check the directions of the product to see what kind of volume you will be getting.
- Use a bucket and mix the coco coir peat with the vermiculite.
- Add the compost.
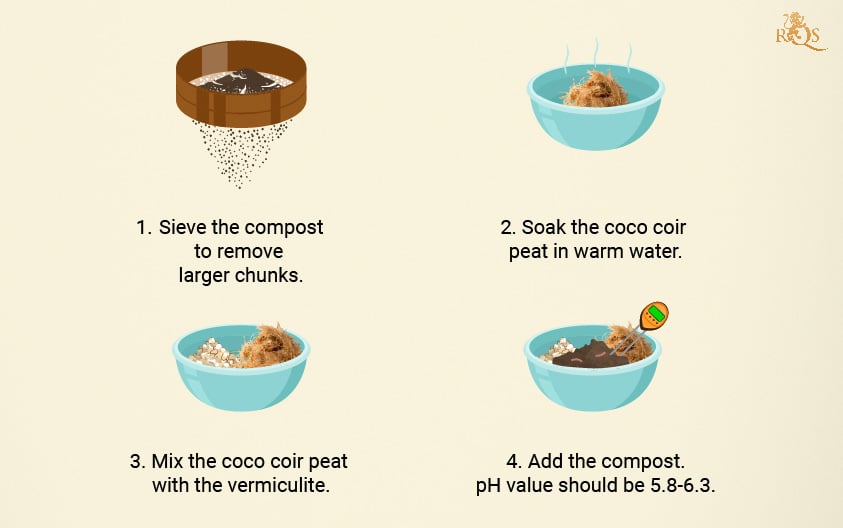
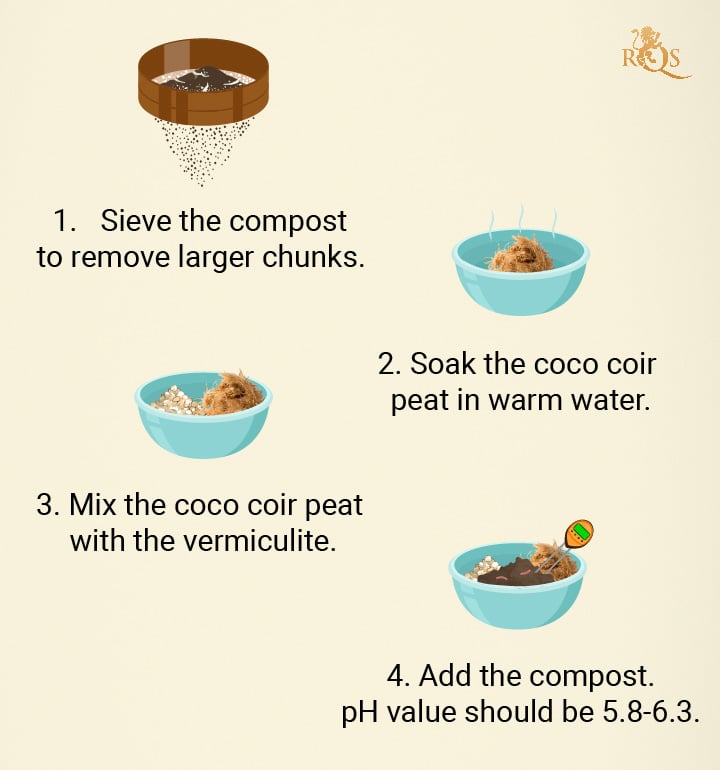
Done! Double-check the pH value of your homemade soil. It should be in the range of 5.8–6.3.
The above is a basic soil recipe that will serve you well for most grows, indoors and outdoors. But you can further enhance your soil mix by adding organic fertilisers.
Bat guano is an excellent and inexpensive organic fertiliser for flowering marijuana. You can add it to a soil mix or spread it on the topsoil and water in later. You can also look into time-release nutrients such as Easy Boost Organic Nutrition pellets. Add a cup of these to your soil to feed your plants for their whole life cycle—100g is enough for 2–3 cannabis plants. All that’s left to do is water!
The Best Soil Mix for Cannabis
Many home growers and large horticulture companies alike claim to have cracked the code when it comes to the best soil mix for cannabis. While there are many ways to grow great weed, we place our trust in one of the best cannabis scientists in the game: Dr Bruce Bugbee. This world-renowned professor and researcher at Utah State University's Crop Physiology Lab knows what it takes to create immaculate buds. Below, we’ll take you through Dr Bugbee’s cannabis soil mix. Discover the ingredients it takes to make the best potting soil for weed, and find out exactly why they’re included.
Bulk Substrate
The best soil mix for marijuana features two ingredients that make up the bulk substrate:
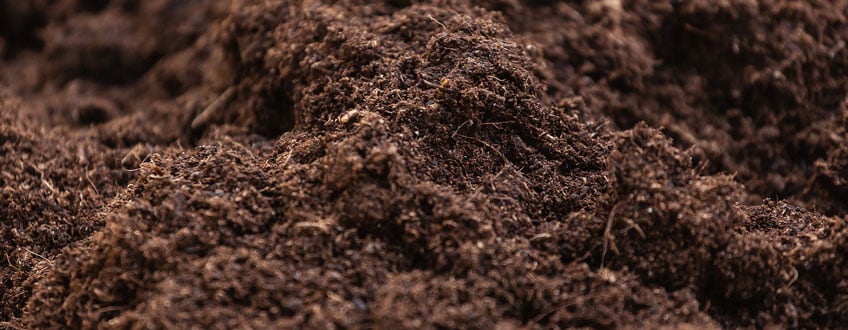
50% peat: Despite conservation concerns over peat harvesting in some parts of the world, it remains a popular component in growing media. Peat doesn’t contain a whole lot of plant nutrients, but it does serve as a good source of microorganisms, including Bacillus species of bacteria and Trichoderma species of fungi. Peat also helps to maintain soil structure and retain moisture. With a pH of 3.8, peat contributes to the acidity of a growing medium suitable for cannabis.
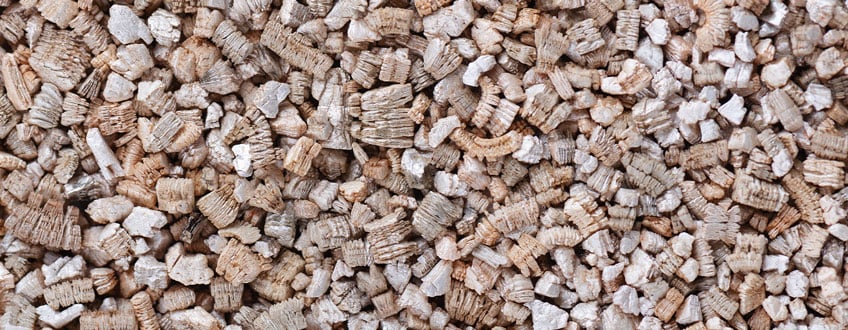
50% vermiculite: This naturally occurring mineral makes a superb addition to potting soil for marijuana. It can hold up to four times its own weight in water, which comes in handy during periods of low rainfall. Much like clay and organic matter fractions of soil, vermiculite also carries a net negative electric charge. This means the mineral helps to increase the cation exchange capacity of the soil. It attracts positively charged ions (cations) such as potassium, ammonium, magnesium, and calcium, and prevents them from leaching away. Vermiculite also contains high levels of silica, an element found in large quantities in cannabis trichomes. With an alkaline pH, vermiculite raises the pH of the growing medium to around 4.5. If you struggle to find a good source of the mineral, perlite makes a good substitute.
Additives
Dr Bugbee recommends the addition of two additives to the growing medium to regulate pH and provide key micronutrients:
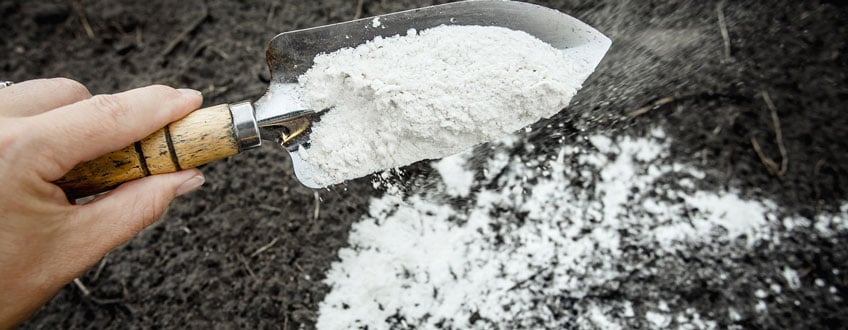
1. Dolomitic lime (40g per cubic foot): The alkaline nature of this substance brings the overall pH of the growing medium up to 5.5—perfect for cannabis cultivation. Dolomitic lime also works as a source of calcium (an important part of cell walls and membranes) and magnesium (the core of chlorophyll molecules).
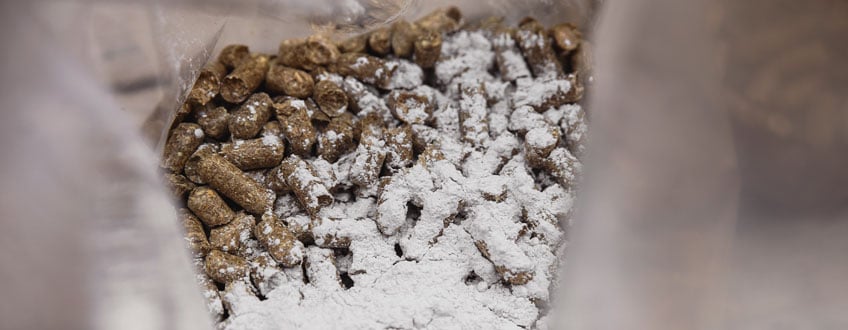
2. Gypsum pellets (10g per cubic foot): This common agricultural product serves as a source of calcium and sulphur (helps to form proteins). As a slow-release substance, it distributes these nutrients into the soil over the course of several months.
The Best Commercial Potting Soils for Cannabis
If you’d rather avoid making your own soil from scratch, there are plenty of excellent premade soils available. Below are some of the best options:
- Canna Terra Professional: Many cannabis growers find success with this soil mix. The combination of peat and perlite offers excellent moisture retention and cation exchange capacity. Additional high-value organic ingredients help to promote healthy roots and thick stems. This growing media has a slightly acidic pH of 6.0 and an N-P-K value of 12-14-24.
- Canna Terra Professional Plus: The addition of tree bark to this soil mix creates an antiseptic action that helps to deter plant pathogens. This blend also contains trace elements as well as lime, which keeps pH at a steady 6.0. This blend also has an NPK value of 12-14-24.
- Plagron All Mix: This cannabis soil mix features a trio of blonde peat, black peat, and fibrous peat to give the mix structure. The addition of perlite helps to retain moisture and promote aeration. Worm castings provide organic matter, beneficial microbes, and key nutrients. This formula has a pH of 6.4–7.5 and an NPK value of 5-11-5.
- Top Crop Complete Mix: Designed to see plants through the vegetative phase, this mix contains coconut fibre, worm castings, vegetable compost, and perlite. It features an ideal pH of 6.5.
- Biobizz All Mix: Biobizz is known throughout the world of cannabis cultivation for their organic nutrients. Their All Mix cannabis potting soil leverages peat and perlite for structure, earthworm humus for nutrients and microbes, and arbuscular mycorrhizal fungi for root development and pathogen defence. Overall, this blend features a pH of 6.6.
- Cannabiogen New Mix: This combination of blonde peat, black peat, coconut, and perlite provides good drainage, aeration, and structure. The addition of humic and fulvic acids boosts root growth and enhances nutrient uptake. This potting soil features a slightly acidic pH of 6.0.
No-till Cultivation
No-till cultivation is a gardening method that allows the soil to remain undisturbed (no digging, stirring, overturning, etc.). This way, microorganisms in the soil can create a thriving ecosystem that replenishes the soil with good bacteria, helpful fungi, and other living organisms. No-till cultivation promotes organic matter retention and water absorption because nutrients are constantly being recycled throughout the soil.
Amendments for Arid/drought Conditions
If you’re growing outdoors in a hot climate such as Southern Spain or a similar location, you don’t want to “cook” the root zone of your plants. If you’re using pots, choose white plastic containers, as these help to keep the soil temperature at a reasonable level under the beating sun. You can also look to air pots or smart pots to keep the roots of your cannabis plants cool. As an additional measure to protect the soil from fluctuating temperatures, you can add layers of dry straw onto the topsoil.
If you’re growing in drought conditions where your plants may at times go weeks without rain, or if you can’t make daily trips to your guerrilla grow location, use water-absorbent polymers to keep them hydrated! You can get these from hydroponic grow shops or can cut them out of diapers.
For a guerrilla grow in dry conditions, dig a hole about 60cm deep and 30cm in diameter. Add a few cups of polymer crystals to the bottom of the soil mix and fill up with the remaining soil. Place your plant into the soil and water liberally. As your plant grows, the roots will soon reach the polymers so it can drink even during drought. Tip: Soak the polymers in a light nutrient solution for a double benefit!
 Grow Guide Topic Finder
- Growing cannabis step by step
- Cannabis growing basics
- Choosing your seeds
- How to germinate seeds
- The cannabis vegetative stage
- The cannabis flowering stage
- Harvesting cannabis
- Trimming, drying, and curing
- Choosing pots and soil
-
Growing indoors
- A Complete Overview Of Growing Cannabis Indoors
- Cannabis Cultivation Tips: How To Set Up Indoor Grow Lights
- How Many Cannabis Plants Can You Grow Per Square Metre?
- Indoor Cannabis Growing: Relative Humidity and Temperatures
- Hydroponics Cannabis Growing Guide (with diagrams)
- Cannabis Micro Growing: Growing Great Weed in Tiny Spaces
- Growing outdoors
- How to grow autoflowering cannabis
- Cannabis nutrients and pH
- Cannabis troubleshooting: Nutrients
-
Cannabis troubleshooting: Growing
- Cannabis Seed Germination — Troubleshooting Guide
- How to Deal With Pythium (Root Rot) in Cannabis Plants
- Slow Cannabis Plant Growth And What You Can Do About It
- How to Deal With Leggy Cannabis Seedlings
- Watering Your Cannabis: How to Fix Overwatering and Underwatering
- Understanding Male, Female, And Hermaphrodite Cannabis
- Identifying and Treating Common Cannabis Ailments
- How To Revive a Sick Cannabis Plant
- How to Avoid Mouldy Weed During Drying and Curing
- How to Prevent and Treat Dry and Crispy Cannabis Leaves
- What Cannabis Leaves Can Tell You
- Causes and Solutions for Yellow Cannabis Leaves
-
Cannabis Strains Grow Report
- HulkBerry Automatic Grow Report
- Blue Cheese Auto Grow Report
- Purple Punch Automatic Strain Grow Report
- Triple G Automatic Grow Report
- Do-Si-Dos Automatic Grow Report
- Green Gelato Automatic Grow Report
- Haze Berry Automatic Grow Report
- Purple Queen Automatic Grow Report
- Cookies Gelato Automatic Grow Report
- Sherbet Queen Automatic Grow Report
- Sweet Skunk Automatic Grow Report
- Medusa F1 Grow Report
- Cannabis plant training
-
Weed growing tips
- The Cannabis Plant Anatomy
- How to preserve seeds
- How Much Sunlight Do Outdoor Cannabis Plants Need To Grow?
- How to Control and Prevent Stretching in Cannabis Plants
- My Cannabis Plants Are Growing Too Tall: What Should I Do?
- Should You Worry About Purple Or Red Cannabis Stems?
- What To Do When Your Indoor Cannabis Won’t Flower
- How To Protect Your Cannabis Plants From Heat Stress
- How To Tell If Your Female Cannabis Plant Has Been Pollinated
- Growing Medical Marijuana
- Bud Washing: How to Clean Your Weed
- Understanding Cannabis Yield per Plant


