 Cannabis Grow Guide by Royal Queen Seeds
- Growing cannabis step by step
- Cannabis growing basics
- Choosing your seeds
- How to germinate seeds
- The cannabis vegetative stage
- The cannabis flowering stage
- Harvesting cannabis
- Trimming, drying, and curing
- Choosing pots and soil
-
Growing indoors
- A Complete Overview Of Growing Cannabis Indoors
- Cannabis Cultivation Tips: How To Set Up Indoor Grow Lights
- How Many Cannabis Plants Can You Grow Per Square Metre?
- Indoor Cannabis Growing: Relative Humidity and Temperatures
- Hydroponics Cannabis Growing Guide (with diagrams)
- Cannabis Micro Growing: Growing Great Weed in Tiny Spaces
- Growing outdoors
- How to grow autoflowering cannabis
- Cannabis nutrients and pH
- Cannabis troubleshooting: Nutrients
-
Cannabis troubleshooting: Growing
- Cannabis Seed Germination — Troubleshooting Guide
- How to Deal With Pythium (Root Rot) in Cannabis Plants
- Slow Cannabis Plant Growth And What You Can Do About It
- How to Deal With Leggy Cannabis Seedlings
- Watering Your Cannabis: How to Fix Overwatering and Underwatering
- Understanding Male, Female, And Hermaphrodite Cannabis
- Identifying and Treating Common Cannabis Ailments
- How To Revive a Sick Cannabis Plant
- How to Avoid Mouldy Weed During Drying and Curing
- How to Prevent and Treat Dry and Crispy Cannabis Leaves
- What Cannabis Leaves Can Tell You
- Causes and Solutions for Yellow Cannabis Leaves
-
Cannabis Strains Grow Report
- HulkBerry Automatic Grow Report
- Blue Cheese Auto Grow Report
- Purple Punch Automatic Strain Grow Report
- Triple G Automatic Grow Report
- Do-Si-Dos Automatic Grow Report
- Green Gelato Automatic Grow Report
- Haze Berry Automatic Grow Report
- Purple Queen Automatic Grow Report
- Cookies Gelato Automatic Grow Report
- Sherbet Queen Automatic Grow Report
- Sweet Skunk Automatic Grow Report
- Medusa F1 Grow Report
- Cannabis plant training
-
Weed growing tips
- The Cannabis Plant Anatomy
- How to preserve seeds
- How Much Sunlight Do Outdoor Cannabis Plants Need To Grow?
- How to Control and Prevent Stretching in Cannabis Plants
- My Cannabis Plants Are Growing Too Tall: What Should I Do?
- Should You Worry About Purple Or Red Cannabis Stems?
- What To Do When Your Indoor Cannabis Won’t Flower
- How To Protect Your Cannabis Plants From Heat Stress
- How To Tell If Your Female Cannabis Plant Has Been Pollinated
- Growing Medical Marijuana
- Bud Washing: How to Clean Your Weed
- Understanding Cannabis Yield per Plant
Growing cannabis with the SCROG (Screen of green) method
Everything you need to know about the screen of green (ScrOG) technique.
Contents:
Training cannabis plants enables growers to increase yields, reduce pathogen risk, and improve the vibrancy of their crop. ScrOG—or screen of green—is a training technique that forms an even and horizontal canopy. There are myriad benefits to creating this botanical structure.
WHAT IS THE SCROG TECHNIQUE?
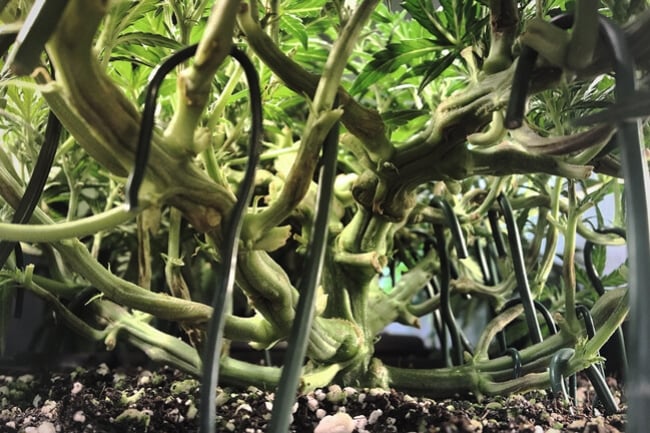
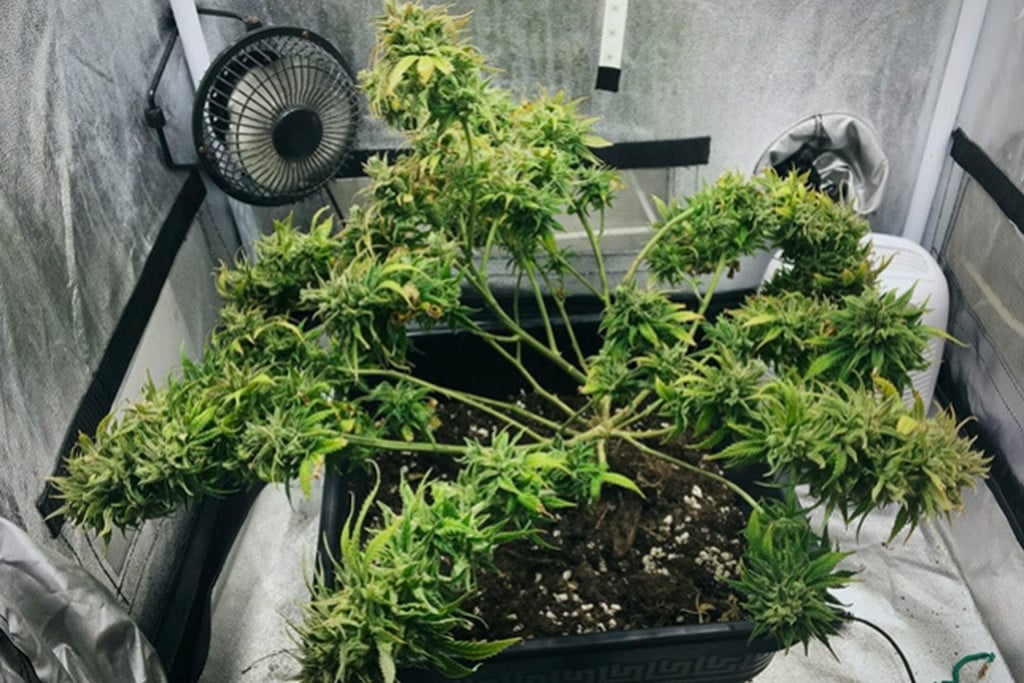
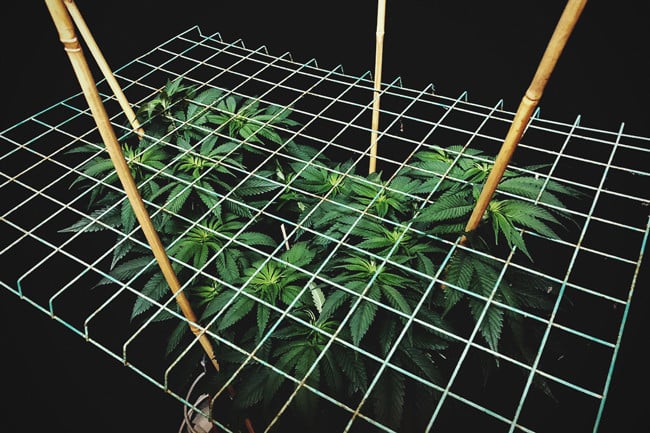
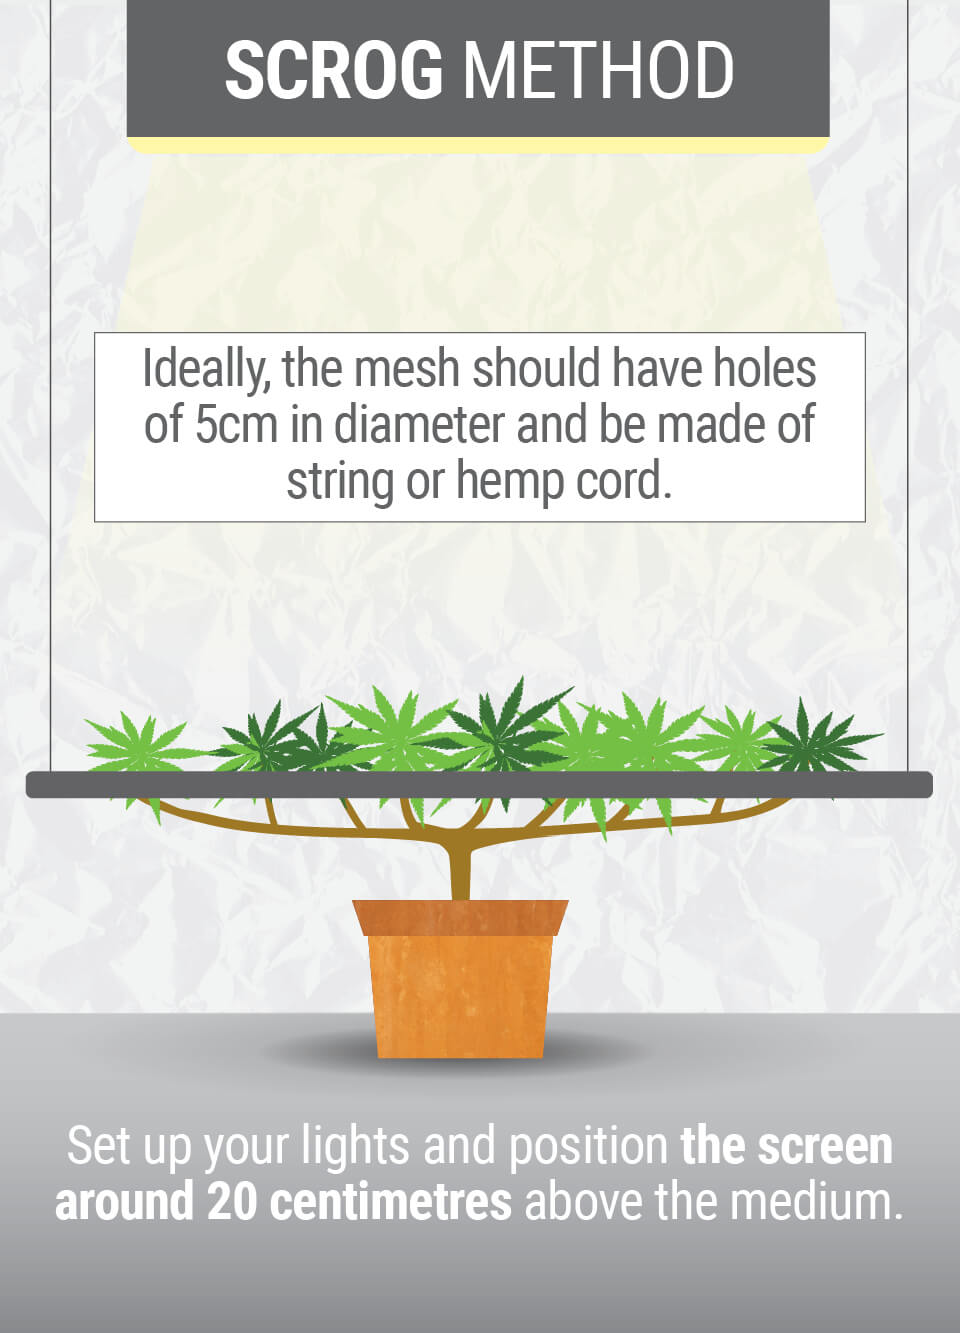
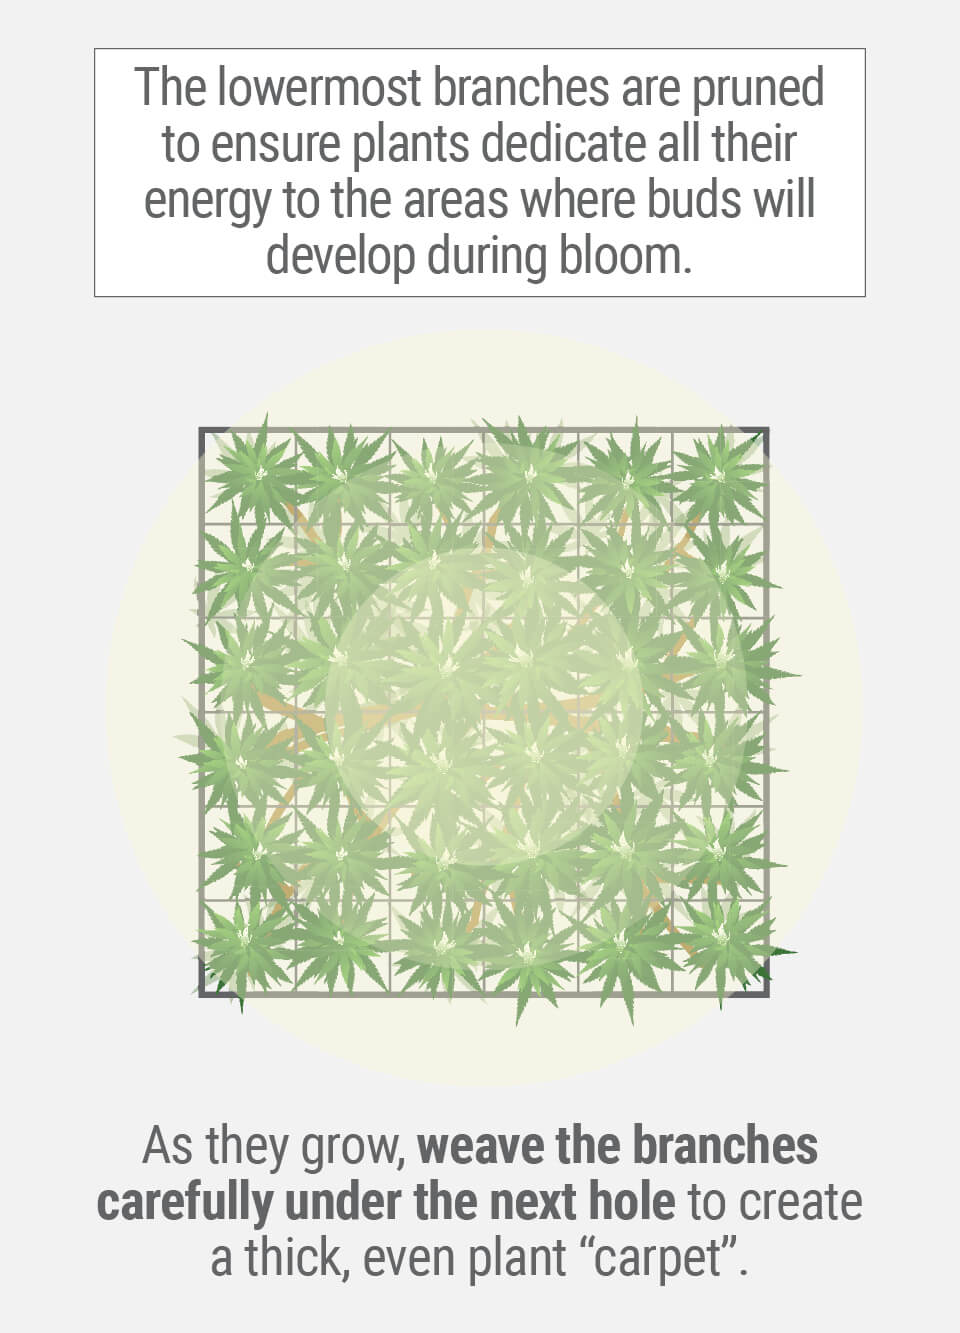
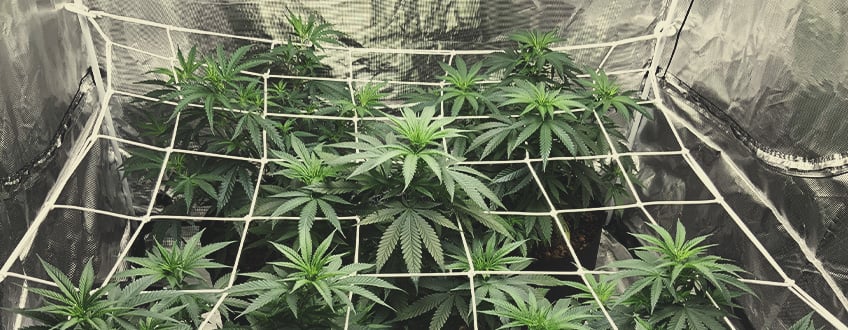
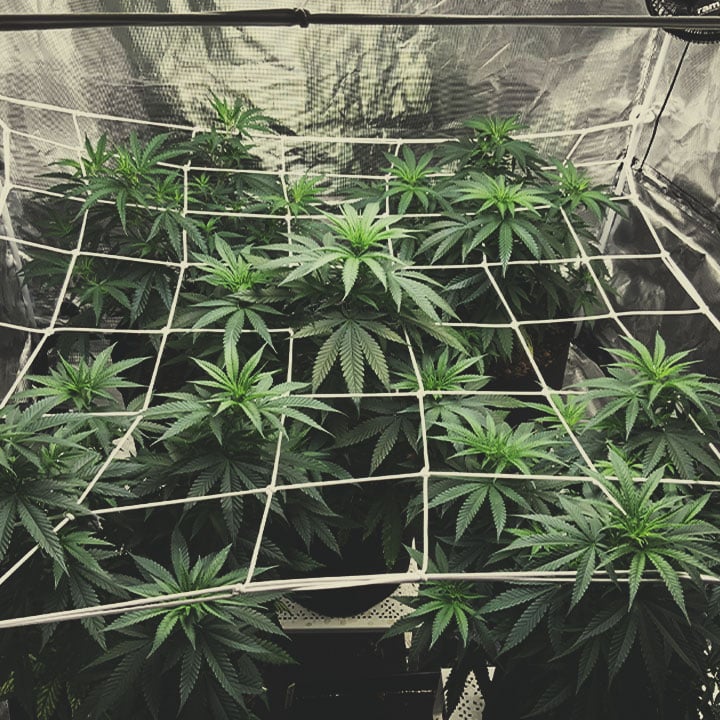
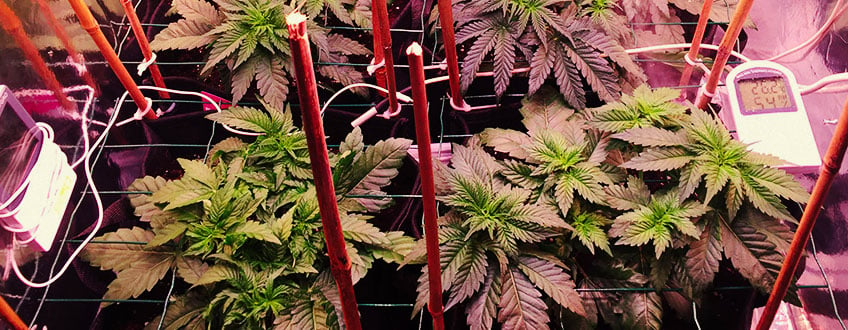
Left to their own devices, cannabis plants grow taller than they do wide. The ScrOG technique aims to bring the lower branches up and the upper branches down, stretching them across an evenly distributed plane. By placing a screen above the growing medium, cultivators can weave branches through the mesh as plants grow and mature. By redirecting individual branches and running them lengthwise across the screen, growers achieve a flat horizontal canopy.
ADVANTAGES OF GROWING CANNABIS IN A SCROG
But why ScrOG in the first place? Well, the technique offers plenty of advantages, including:
- Light exposure: A ScrOG canopy receives even light exposure. Untrained cannabis plants feature one main cola that rises above the rest of the plant, meaning the light rig must remain above this point. In contrast, the lighting rig can hang directly above every flower in a ScrOG setup.
- Yield: Because each bud site receives adequate light, they maximise their photosynthetic potential, leading to an increase in size and resin production. This level of training also transforms the main stem and central cola into a multitude of both.
- Aeration: The horizontal screen of green receives adequate airflow above and below the canopy. The addition of a fan will further enhance this benefit, reducing the risk of fungal pathogens.
- Maximise space: Many growers manage to obtain a larger yield from a single scrogged plant in a small space than with numerous smaller, untrained plants. Covert home-growers can maximise their output with this method. Cultivators can even train several plants and merge them into a single ScrOG.
Download our Pro Growing Guide for pro-level LST, super-cropping, and defoliation strategies that sculpt an even canopy and skyrocket your yields, perfect for any screen-of-green method.
Free Advanced
Growing Guide!

WHEN TO SCROG
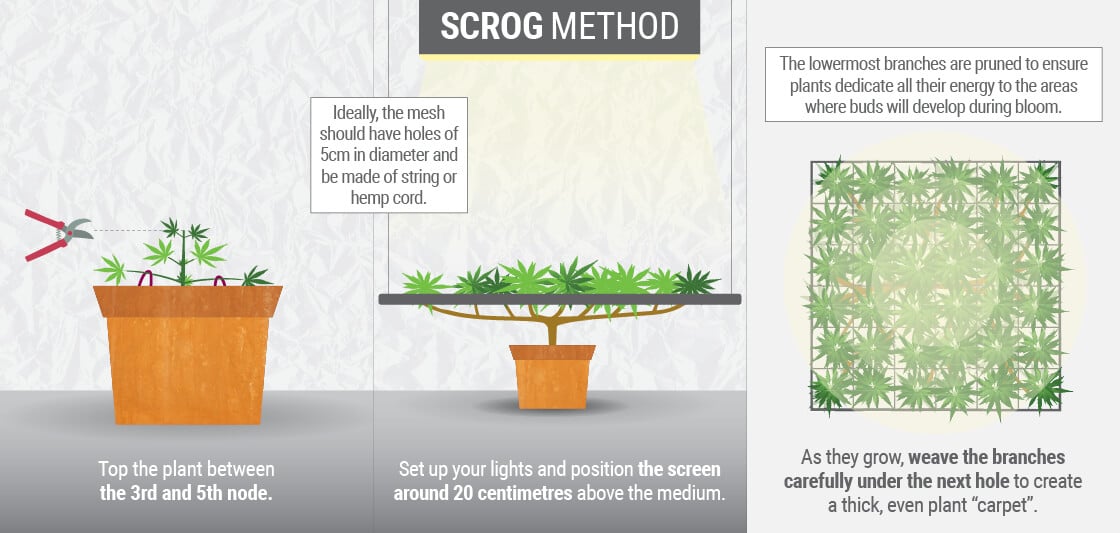
You’ll start to guide your plants through the screen as soon as they start making contact with it. We recommended positioning the screen around 20cm above the base of your plants, so their rate of growth will determine when exactly you start to ScrOG.
Start the “tucking” process as the apex of each plant begins to grow through the screen. Wait for each tip to grow 5cm above the screen. Proceed to tuck each individual shoot under the screen and direct them through the next square away. Tucking will lay the foundation of the ScrOG process, so be mindful of the direction you want each branch to grow towards.
Continue this process throughout the vegetative phase. Switch to a 12/12 light cycle to induce flowering when the screen becomes mostly filled.
Continue to tuck and weave each branch over the next 2–3 weeks as your plants begin to stretch. This increase in growth will allow you to fill out the screen before your plants enter the true flowering stage and slow their growth.
WHEN NOT TO SCROG
Avoid tucking and weaving your plants too early. It might be tempting to rush ahead, but they’ll only grow well beyond the screen. Training your plants into the mesh too early—during the early vegetative phase—will lead to extra work. You might even run out of room on your grid.
HOW TO SCROG: MAJOR CONSIDERATIONS
Although ScrOG setups can look complex, the technique requires little work. Even if you have limited experience growing cannabis, you can jump right into the technique and produce good results. Just make sure to follow the guidance below, and you’ll be in for a happy harvest.
SELECT THE RIGHT STRAINS
With or without training, growers should always tailor strains to their preferences, spatial limitations, and climate. Some genetics are far more compatible with the ScrOG technique than others. Check out the best characteristics for the job below.
- Stretchy sativas: Sativa-dominant cultivars are lanky, tall, and stretchy in nature. Growers can easily weave their branches and fill out a ScrOG. Of course, you can select smaller and bushier indicas too—just utilise more plants to maximise the potential of your space.
- Strain matching: Growers can cultivate several different strains in the same ScrOG setup for a nice variety of flowers. Try to choose strains that reach a similar average height to minimise the work you have to do.
CHOOSE THE RIGHT POTS
You’ll need to select the correct pot size to optimise your grow. This variable will shift depending on how many plants you want to incorporate into your ScrOG. Consider the following factors:
- Multiple plants: If you want to grow several plants in a smaller space, you need to consider spacing (more on that below). For this reason, each plant will require a smaller pot. An 11l pot will make the most of the space while optimising plant growth.
- Single plants: You can increase the pot size when using a single plant in your ScrOG setup. A 25l pot will give your plant enough room to establish a substantial root system and large canopy.
- Fabric pots: The ScrOG technique greatly improves aeration of the canopy—using a fabric pot greatly increases aeration of the growing medium. The RQS Fabric Pot features a proprietary Aqua Breathe layer, resulting in increased oxygen levels and enhanced moisture retention.
SPACE PLANTS APPROPRIATELY
Growing multiple plants in a ScrOG means you can harvest several of your favourite strains. You can grow high-THC and high-CBD varieties together, and even match plants based on their terpene profiles.
As one of the most important factors when growing several plants, the correct spacing will help minimise mould formation while encouraging the best yield possible. The goal: Fit in as many plants as possible for best results, while keeping them far enough apart to increase light exposure and aeration.
You’ll get away with squeezing four small/medium-sized plants per m² in a maximum pot size of 11l.
SCREEN: HEIGHT, SIZE, AND MATERIALS
Building a ScrOG screen is easy peasy. If you’ve ever constructed flat-pack furniture or hung a picture on the wall, you’re more than qualified. Make sure you have the following resources and equipment, and you’re good to go.
- Size: This depends on how many plants you want to grow, and their size. Your canopy needs to be completely even, so an oversized screen will cause fewer problems than an undersized one. If you're not sure of the dimensions, overshoot a little. If you’re really limited in space, build a screen as big as your area can handle.
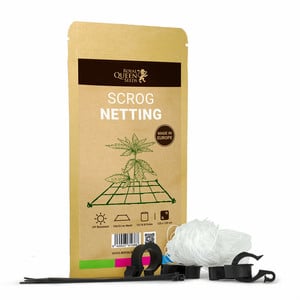
- Screen: String or hemp cord does the job perfectly. Cannabis branches almost stick to the coarse texture of string, and you can easily dispose of the material afterwards.
- Frame: Make a square (or rectangular) frame using four pieces of timber which are slightly smaller than your growing space. Cut four evenly sized legs and attach them with screws from the top of the frame. You can also create the same design using PVC piping. Screw eye hooks into the top of the frame with 6cm in between. Attach the string.
HOW TO SCROG: PROCEDURE
After a couple of weeks in the seedling stage, your plants will enter the vegetative phase. You’ll need to tick the following tasks off your checklist to ensure your plants are fully compatible with the ScrOG method.
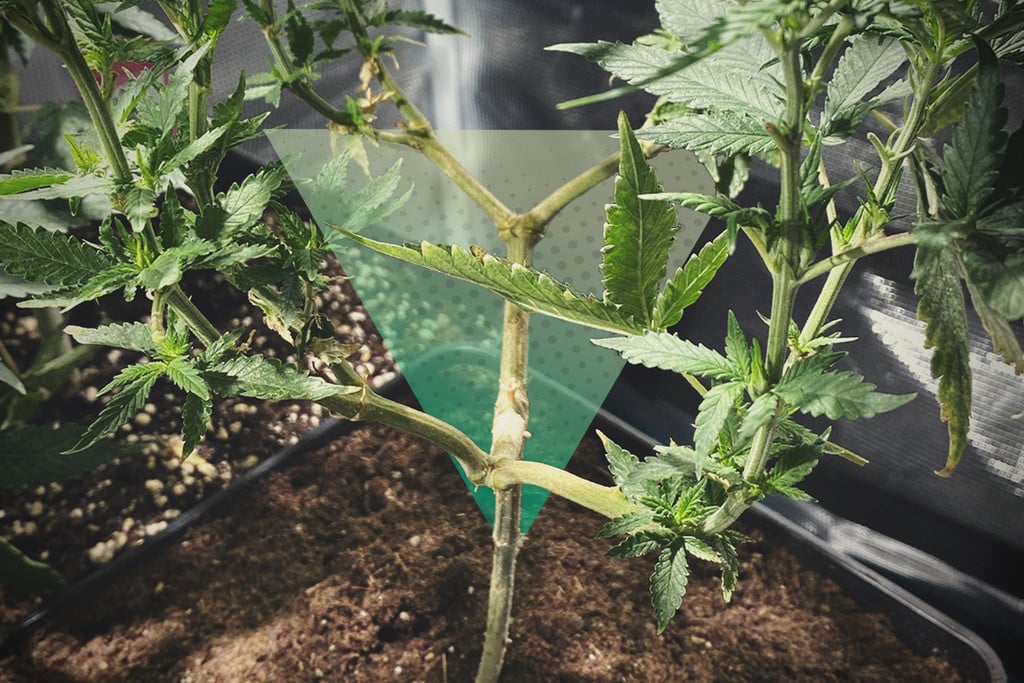
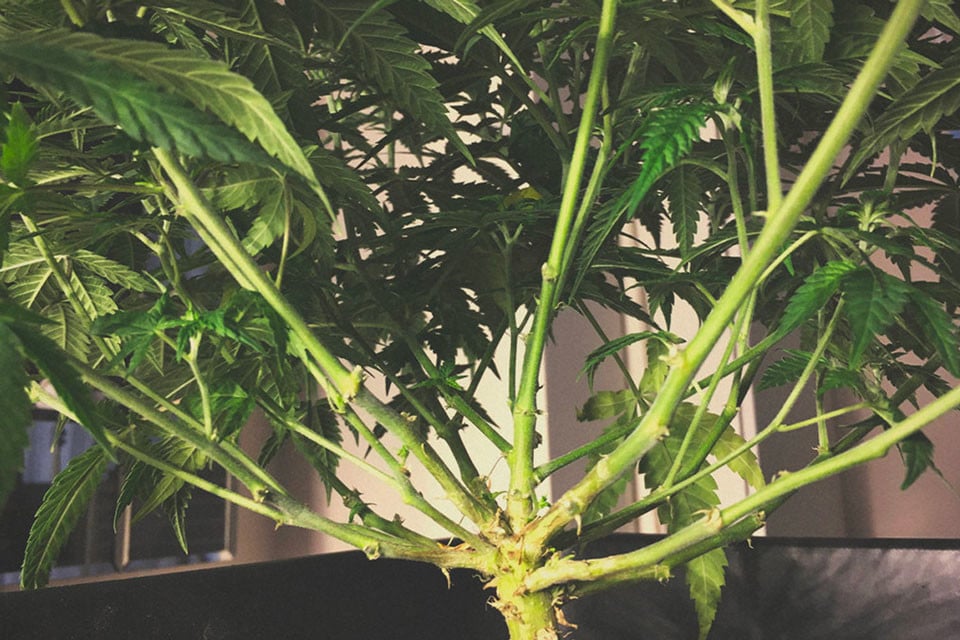
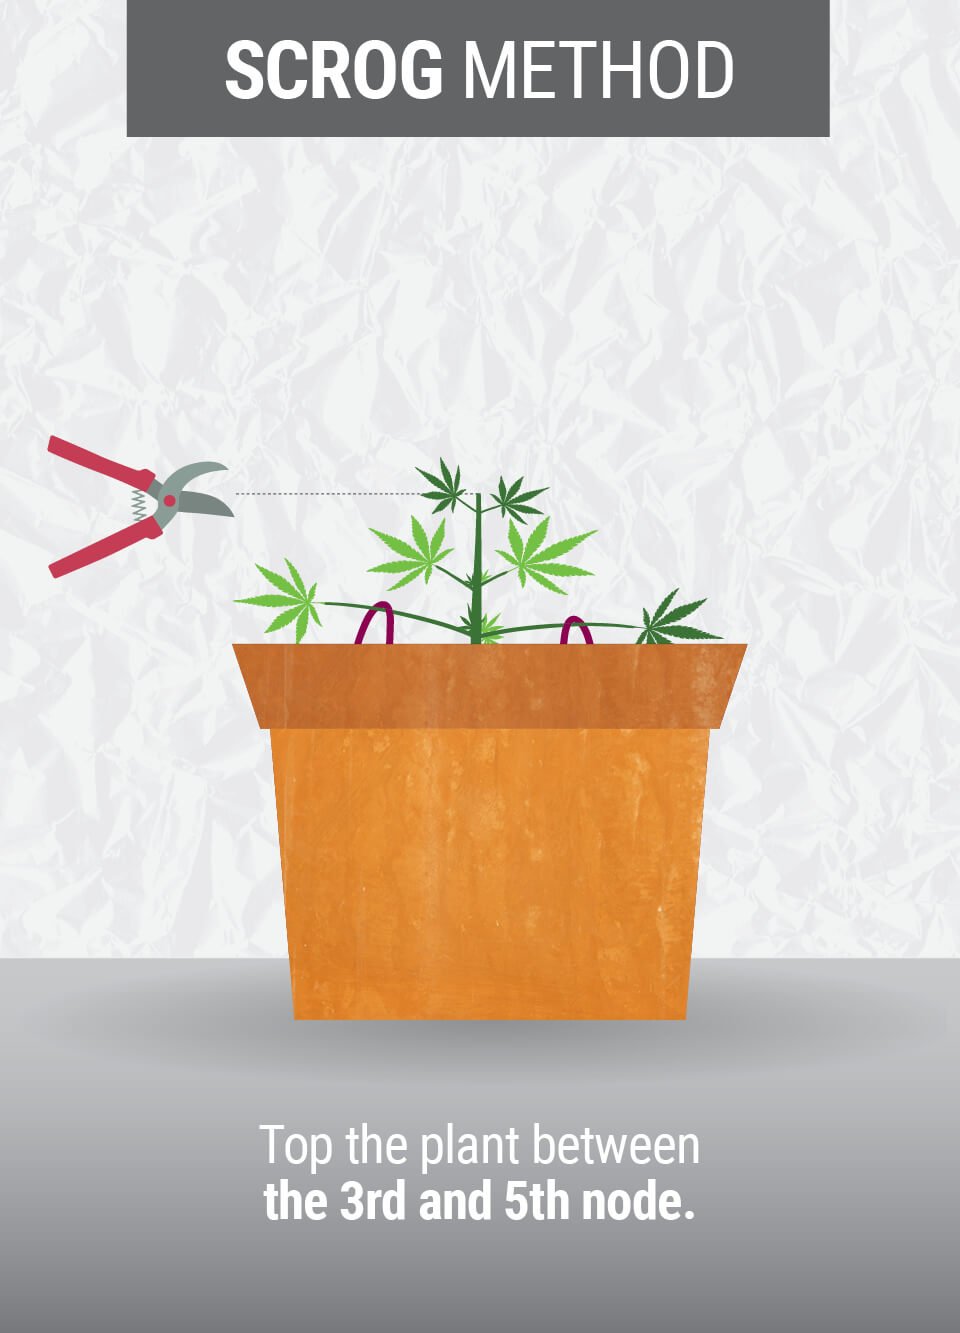
- Topping: After each plant has developed 5 nodes (the point at which a branch meets the stem) you’ll need to top your plants at the highest node. Clean a pair of sharp scissors and snip the main stem just above the intersection. Topping forces plants to divert their growth into several main stems as opposed to one. This encourages lateral growth more suitable to the ScrOG method.
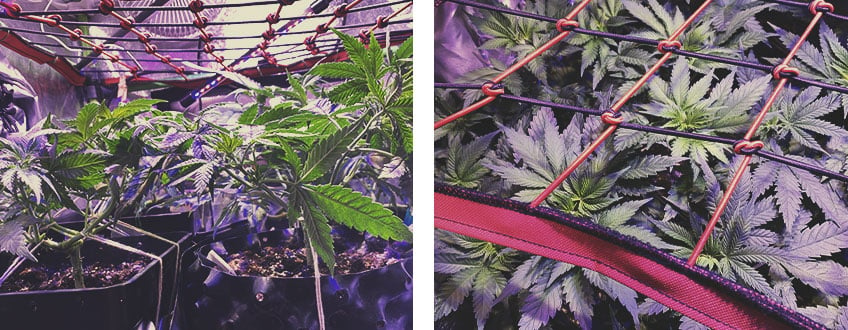
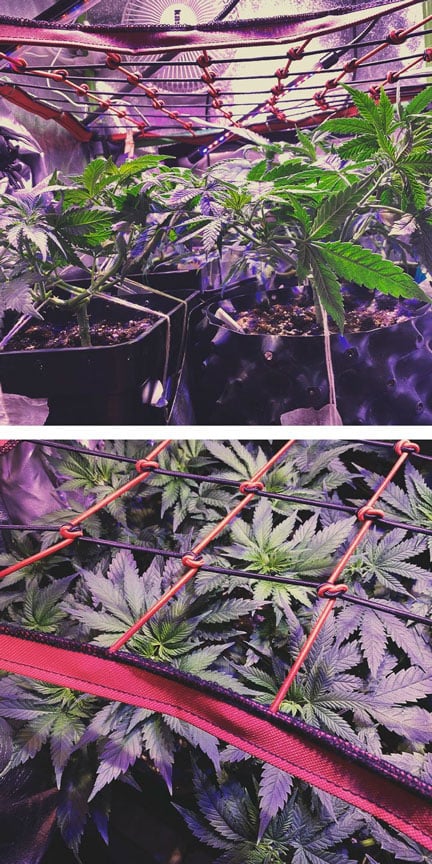
- Setup: Position the screen approximately 20–40cm (depending on the type of plant you are growing) above the top of the growing medium. Position your lights in a way that offers even light exposure over the screen.
- Weaving: Unlike runner beans and hops, cannabis branches don’t act like vines. You’ll need to manually weave them through the screen. Aim to fill each square with an individual branch to avoid overcrowding. Be gentle yet effective. If you feel a branch doesn’t want to go in a certain direction, don’t risk breaking it. Direct branches in different directions to fill out the screen and prevent overshadowing and crowding.
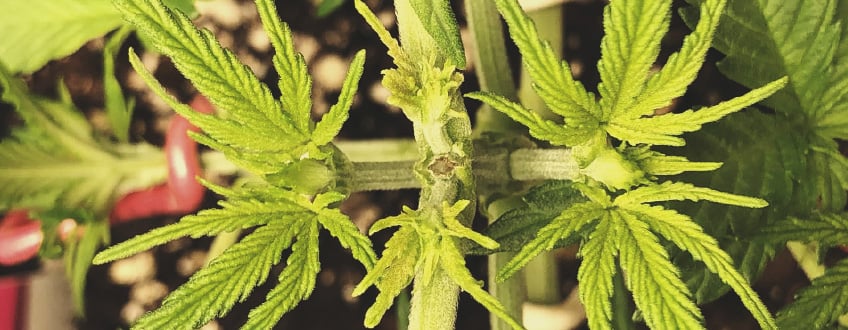
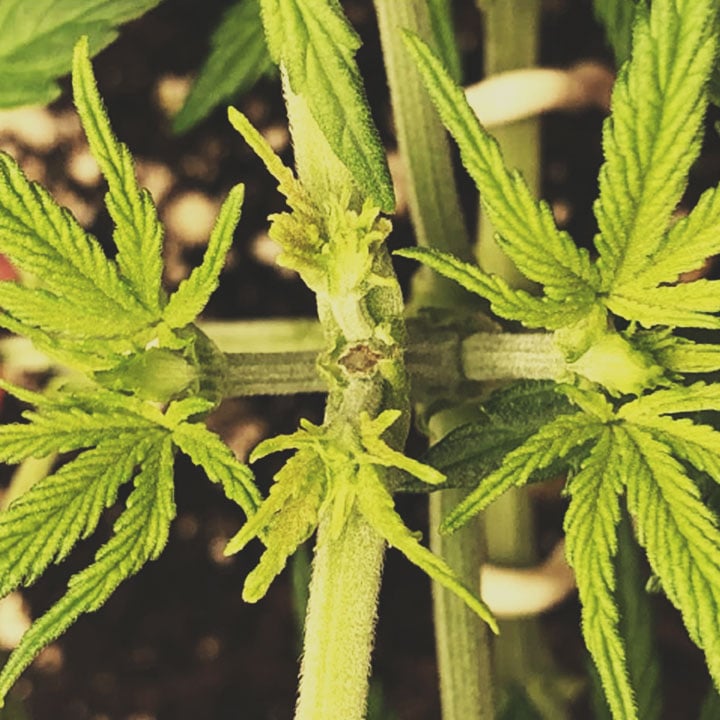
Keep weaving throughout the early flowering phase until your screen becomes filled. Secure branches in place using soft garden ties.
- Pruning: Remove the branches from below the point where you topped your plant. This will force your plant to direct all of its available energy to the canopy. These limbs require their own supply of nutrients and water. Remove them from the plant to free up resources.
- Maintenance: Cannabis plants often feel stressed throughout the ScrOG process. Make sure to water them immediately after every weaving session. Going forward, only water the soil when the top 3–4cm is completely dry. Keep your plants well-fed with optimal nutrients to avoid deficiencies.
ENHANCE SCROG WITH OTHER CANNABIS TRAINING TECHNIQUES
ScrOG produces fantastic results when used in isolation, but combining it with other techniques can help bring results to another level. Here are some of the most effective.
LST
Low-stress training involves gently bending and tying down cannabis branches to manipulate the shape of the plant. The lack of significant stress doesn’t impede growth, so plants need little time to recover after the process.
LST can be used in several ways during a ScrOG. By tying down the tip of the plant and positioning the main stem parallel to the soil, growers force the side branches to shoot upwards to form a much more productive canopy. Alternatively, utilise LST to tie down the four primary branches after topping, forming an “X” shape. This will force your plants to grow laterally and fill out the screen.
LOLLIPOPPING
Lollipopping is a form of defoliation that involves removing the lower foliage and bud sites from branches. As a result, aeration is boosted and energy is diverted towards bigger and more productive buds elsewhere in the canopy.
This technique is ideal for the ScrOG method as it benefits the buds growing on the screen while limiting the presence of inferior "popcorn" buds on the lower parts of the branches. A win-win! This technique should be performed using clean, sharp scissors at the end of the vegetative stage, and combines well with LST and main-lining.
MAIN-LINING
This technique involves sequentially topping and tying your plants to create a canopy loaded with evenly sized buds. Main-lining goes hand-in-hand with ScrOG by forming an open and well-distributed canopy that slots into the mesh screen from below.
To complete the process:
- Top each plant at the third node, creating two diverging main stems. Remove all of the growth below this point to direct growth hormone and energy towards the remaining stems.
- Using soft garden ties, position the two stems at a right angle to the soil.
- After allowing your plant to produce some new growth, top all of the main shoots once again to double the number of main stems.
- Tie down the new main stems and remove all other new growth. You’ll notice a perfectly symmetrical canopy begin to take shape on both sides of your plant.
- Continue, topping a total of five times on each side of the plant to create a total of 32 main shoots ready for the ScrOG technique.
SUPER CROPPING
Make your branches more pliable and easy to weave using super cropping. This high-stress method involves carefully squeezing and pinching branches to bend them down to the point where they almost snap. This not only increases light penetration, but also makes plants more compatible with ScrOG.
Super cropping aims to damage the inner plant tissue to make stems easier to manipulate, without creating an open wound on the outside. Of course, it comes with a relative amount of risk. Perform the technique during the vegetative stage, before your plants enter the screen. Follow these steps to super-crop your plant:
- Select the branches you want to train. Choose a section from an older area of the plant where the tissue feels pliable and bendy.
- Grasp the branch between your thumb and forefinger and gently squeeze. Roll the tissue between your fingers for around 10 seconds as you feel the inside of the branch soften.
- Bend the branch into the direction you want to grow in. Bandage the branch with tape if you accidentally rip the outside of the structure.
Ultimately, super cropping allows you to begin shaping your plant and priming it for entering the screen later in the process.
STRAINS SUITED TO SCROG
GREEN GELATO
Green Gelato is one of those strains that is spoken about with longing amongst cannabis growers and connoisseurs. Growers enjoy the ease of maintenance and the thrill of watching dense nuggets form as the 12-12 progresses. Striking purples and mauves develop as the fragrances reach their tell-tale Kush, mint biscuit, and fruity dessert crescendo. Green Gelato is certainly the most flavoursome way to introduce a far-out 25%+ THC into your system. In combination with a unique terpene profile, this strain will whisk your brain away and give your muscles a case of the jellies.
A slight indica dominance gives Green Gelato a number of characteristics that take well to the ScrOG. A high flower-to-leaf ratio means more light exposure to nuggets as there is minimal shading by excessive leaf production. Minimal leaf production also means less need for time-consuming under-shucking. Tight flower clusters form at each node, rather than forming long colas, which creates an evenly exposed canopy of homogeneous buds. Lower flowers that might otherwise be small on an untrained plant are given the opportunity for maximum growth.
Green Gelato
|
|
Sunset Sherbet x Thin Mint Girl Scout Cookies |
|
|
500 - 700 gr/m² |
|
|
80 - 120 cm |
|
|
55 - 65 days |
|
|
THC: Up to 27% |
|
|
Sativa 45% Indica 55% |
|
|
800 gr/plant |
|
|
150 - 200 cm |
|
|
Early October |
|
|
Clear, Physically Relaxing |
OG KUSH
OG Kush quickly became a much sought-after strain the moment it was introduced in the US. Then, it wasn’t long until it found equal appreciation in the global cannabis scene. The fragrance, look, potency, and palate of this plant continues to thrill cannabis fans on every continent. Striking citrus top notes predominate over gentler sweets and sours, and an enjoyable aftertaste lingers long after spliffs are finished—extracts are a pure flavour sensation. Euphoria and mental clarity with a bone-deep physical effect make it a favourite for recreational and therapeutic use.
The healthy stretch between nodes of OG Kush makes it an apt selection for the ScrOG. Topping a number of times and exchanging apical dominance for area allows buds at each site to reach their full potential, creating a carpet of Kush with enough distance between nuggets to prevent shading and allow airflow. Cannabis in general responds with vigour to training, and OG Kush is no exception, producing evenly-sized and equally dense flowers across the whole light footprint. OG Kush delivers great yields for a plant that is so undemanding to grow.

OG Kush
|
|
Chemdawg x Lemon Thai x Pakistani Kush |
|
|
425 - 475 gr/m2 |
|
|
90 - 160 cm |
|
|
50 - 60 days |
|
|
THC: Up to 19% |
|
|
Sativa 25% Indica 75% |
|
|
500 - 550 gr/plant |
|
|
180 - 220 cm |
|
|
October |
|
|
Calming, Uplifting |
 Grow Guide Topic Finder
- Growing cannabis step by step
- Cannabis growing basics
- Choosing your seeds
- How to germinate seeds
- The cannabis vegetative stage
- The cannabis flowering stage
- Harvesting cannabis
- Trimming, drying, and curing
- Choosing pots and soil
-
Growing indoors
- A Complete Overview Of Growing Cannabis Indoors
- Cannabis Cultivation Tips: How To Set Up Indoor Grow Lights
- How Many Cannabis Plants Can You Grow Per Square Metre?
- Indoor Cannabis Growing: Relative Humidity and Temperatures
- Hydroponics Cannabis Growing Guide (with diagrams)
- Cannabis Micro Growing: Growing Great Weed in Tiny Spaces
- Growing outdoors
- How to grow autoflowering cannabis
- Cannabis nutrients and pH
- Cannabis troubleshooting: Nutrients
-
Cannabis troubleshooting: Growing
- Cannabis Seed Germination — Troubleshooting Guide
- How to Deal With Pythium (Root Rot) in Cannabis Plants
- Slow Cannabis Plant Growth And What You Can Do About It
- How to Deal With Leggy Cannabis Seedlings
- Watering Your Cannabis: How to Fix Overwatering and Underwatering
- Understanding Male, Female, And Hermaphrodite Cannabis
- Identifying and Treating Common Cannabis Ailments
- How To Revive a Sick Cannabis Plant
- How to Avoid Mouldy Weed During Drying and Curing
- How to Prevent and Treat Dry and Crispy Cannabis Leaves
- What Cannabis Leaves Can Tell You
- Causes and Solutions for Yellow Cannabis Leaves
-
Cannabis Strains Grow Report
- HulkBerry Automatic Grow Report
- Blue Cheese Auto Grow Report
- Purple Punch Automatic Strain Grow Report
- Triple G Automatic Grow Report
- Do-Si-Dos Automatic Grow Report
- Green Gelato Automatic Grow Report
- Haze Berry Automatic Grow Report
- Purple Queen Automatic Grow Report
- Cookies Gelato Automatic Grow Report
- Sherbet Queen Automatic Grow Report
- Sweet Skunk Automatic Grow Report
- Medusa F1 Grow Report
- Cannabis plant training
-
Weed growing tips
- The Cannabis Plant Anatomy
- How to preserve seeds
- How Much Sunlight Do Outdoor Cannabis Plants Need To Grow?
- How to Control and Prevent Stretching in Cannabis Plants
- My Cannabis Plants Are Growing Too Tall: What Should I Do?
- Should You Worry About Purple Or Red Cannabis Stems?
- What To Do When Your Indoor Cannabis Won’t Flower
- How To Protect Your Cannabis Plants From Heat Stress
- How To Tell If Your Female Cannabis Plant Has Been Pollinated
- Growing Medical Marijuana
- Bud Washing: How to Clean Your Weed
- Understanding Cannabis Yield per Plant


