Grow Guide Topic Finder
Medusa F1 Grow Report
Video id: xae1ts6

Join me as I detail my experience growing Medusa F1, one of the first true cannabis F1 hybrids. If you’re curious about growing this variety or simply want to see how F1 hybrids perform, I cover each week thoroughly below, from feeding regimens to lighting and watering.
Medusa F1 Grow Report: Equipment List
- Box: Secret Jardin DS120W 120 × 60 × 178
- Lights: MIGRO 200+
- Ventilation: TT Silent-M100
- Filter: Prima Klima filter PK 100/125
- Fan: Oscillating Koala Fan (×2)
- Humidifier: Beurer LB 45
- Soil: Biobizz Light Mix
- Pot: 11l Air-Pot
- Seed: Royal Queen Seeds
- Nutrition: RQS Organic Nutrition
Medusa F1 Grow Report: Seedling Stage (Week 1)
To grow Medusa F1, I had to start with germination! I set about putting together a nourishing soil mix before directly sowing my seed into its first and final pot.
- Growing medium: I added 5l of Biobizz Light Mix into my 11l Air-Pot. Next, I added the following ingredients:
After mixing thoroughly, I added another 5l of Light Mix into the Air-Pot and mixed again. Then, I soaked the growing medium with 2l of water.
- Germination: After preparing the growing medium, I made a small 1cm hole in the centre of the surface. I decided to sow my seed directly into the medium to avoid transplant stress and take advantage of Medusa F1’s enhanced disease resistance. I covered the seed with a thin layer of soil and lightly misted it.
- Lighting: Using the ratchet straps provided, I hung my MIGRO 200+ lamps from the support bars of my Secret Jardin grow box. To achieve optimal light spread, I positioned each lamp 35cm horizontally from the midline—one on either side. I adjusted the straps to allow them to hang 35cm vertically from the rim of my Air-Pot. I set my lamps to run for 20 hours each day as soon as sprouts emerged from the soil.
- Plant status: I had myself a healthy seedling by the end of week 1. It stood several centimetres tall and had a short and thick stem—a sign of good light exposure. My seedling had also started to develop its first true leaves, marking the beginning of the vegetative phase.
Medusa F1 Grow Report: Vegetative Stage (Week 2–4)
Welcome to the vegetative stage! During this time, I took the necessary steps to facilitate leafy growth. I remained mindful of the position of my lamps and provided enzymes and growth stimulants designed to drive the development of new tissues. Find out exactly what I did to achieve a healthy vegging plant.
Week 2
With its hybrid vigour on full display, my Medusa F1 plant started to surge in growth during the second week. I encountered no signs of disease or deficiency, and my plant had an overall vibrant appearance.
- Lighting: I maintained a light cycle of 20 hours on and 4 hours off. I repositioned my lamps to hang 35cm above the top of my plant.
- Nutrients: At this stage, my plant had enough nutrients available from the growing medium I prepared the previous week. On day 1, I applied 1l of water adjusted to a pH of 6.0.
- Environment: With my fans and dehumidifier running, my grow box maintained a humidity of 65% and a temperature of 22°C.
- Plant status: By the end of week 2, my plant’s stem had thickened considerably. It stood at a height of 8.5cm and had produced several new sets of dark green true leaves.
Week 3
Welcome to week 3 of my Medusa F1 grow journal! Growth continued to accelerate, and my plant packed on some serious size during this period. I also noticed preflowers starting to emerge during the latter part of the week.
- Lighting: I continued to run my lights for 20 hours per day and repositioned them 35cm above the top of the canopy.
- Nutrients: I decided to start feeding my plant during week 3 to facilitate speedy growth. I added 1.2ml of Bigger Flowers to 1.5l of water and applied it on day 2 of the week. Suitable for the vegetative phase, this formula contains an array of enzymes, vitamins, and growth stimulants that promote optimal growth.
- Environment: Humidity sat around 65% and temperature averaged 22°C.
- Plant status: My plant put on some good size and ended the week at a height of 19cm. It had developed several new sets of fan leaves and several preflowers are certain nodes. Overall, it seemed healthy with no signs of nutritional deficiency or stress.
Week 4
Week 4 marked the end of the vegetative phase stage, and my plant certainly passed the threshold into blooming during this time. It packed on another 10cm in height, and the preflowers started to swell into more mature buds.
- Lighting: I continued to run my lamps for 20 hours per day and readjusted them to hang 35cm above the top of the canopy.
- Nutrients: I decided to feed my plant on day 2 of the week. I poured 2l of water into a watering can and mixed in 1ml of Bigger Flowers. I also added 0.2ml of Thicker Flowers, a source of potassium and phosphorus designed to assist flower development.
- Environment: Humidity hovered around 60% and temperature averaged 22°C.
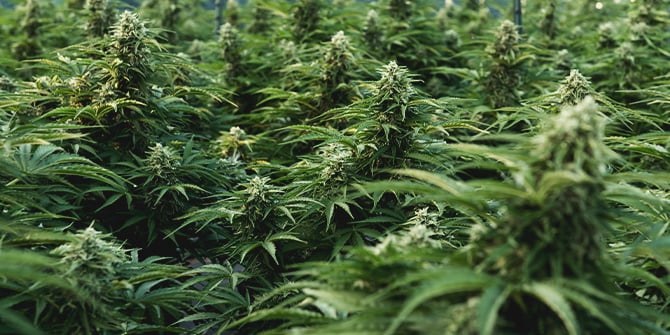
- Plant status: My plant started to churn out plenty of small, light green buds that housed many bright white stigmas. I detected a slight smell of terpenes in the air during my routine checks in the grow box. By the end of the week, my plant had reached a height of 32cm.
Medusa F1 Growing Report: Flowering Stage (Week 5–9)
I made it to the flowering stage! Things started to get very exciting during this time. The increase in aroma gave me a good idea of how Medusa F1 would taste further down the line. My plant continued to become bushier and stretched slightly during bloom.
Weeks 5 & 6
My Medusa F1 plant cruised through the next two weeks. She started to develop a pungent aroma, and her colas became much thicker and began to develop a dense coating of trichomes.
- Lighting: I maintained the same light cycle throughout the following two weeks: 20 hours on and 4 hours off. I also kept a distance of 35cm from my lamps and the top of the canopy.
- Nutrients: I applied 3l of pH-adjusted water to my plant on day 2 of both weeks. On day 6 of both weeks, I mixed 1ml of Bigger flowers and 0.2ml of Thicker Flowers into 2l of pH-adjusted water and fed my plant.
- Environment: I removed my humidifier from the grow tent to reduce the chance of mould during bloom. During the first two weeks of flowering, humidity averaged 45% and temperature remained consistent at 25°C.
- Plant status: My plant looked truly healthy and vibrant. The buds started to swell quickly—an indication that my plant appreciated the additional phosphorus and potassium in its nutrient regimen. I still had not encountered any signs of pests, disease, or deficiency.
Week 7
I could sense the finish line closing in during week 7. I didn’t want to get too excited just in case, but the hybrid vigour of Medusa F1 made me feel extremely confident. Here’s what unfolded during week 7 of this grow journal.
- Lighting: My lamps remained running for 20 hours per day and hung at a distance of 35cm from the top of the canopy.
- Nutrients: I restricted feeding this week, as my flowering plant seemed healthy with all of her needs met. Instead, I applied only 3l of pH-adjusted water on day 2 of the week, and again on day 6. I let the water sit for 24 hours each time before applying to offgas the chlorine.
- Environment: Humidity dropped slightly to 40%, whereas the temperature remained at a consistent 25°C.
- Plant status: My plant started to smell seriously strong. The flowers continued to fill in nicely, and some of the stigmas started to turn orange—a sign of maturity.
Week 8
I could tell at this stage that my Medusa F1 plant would make it. Harvest time seemed extremely close, but I needed to flush my plant first to improve the flavour and smoothness of the buds.
- Lighting: My lamps stayed running for 20 hours per day and hung 35cm from the highest point of my plant.
- Nutrients: My plant received nothing but pH-adjusted water from here on out. I applied 3l on day 2 of the week, followed by an additional 3l on day 5.
- Environment: Humidity and temperature clocked in at 40% and 25°C, respectively.
- Plant status: My plant had finished growing at this point and stood at a height of 50cm. I inspected both the trichomes and stigmas with a handheld microscope. More of the trichomes appeared milky and opaque as opposed to translucent, proving that my flowers were close to optimal ripeness.
Week 9
Welcome to the final week of flowering! Little changed during this period. More stigmas turned orange and more trichomes became milky. Outside of this, I pretty much repeated the same process of the previous week.
- Lighting: Remained the same as the rest of the growing cycle.
- Nutrients: I applied 3l of pH-adjusted water on day 2 and day 5 of the week.
- Environment: I blasted my fans to cause humidity to drop to 35%. The temperature rose slightly to 26°C.
- Plant status: My plant showed yellow and shrivelled leaves—typical signs of flushing. However, the buds appeared thick, resinous, and put on some length.
Medusa F1 Grow Journal: Harvest
We made it! The vigour of Medusa F1 allowed it to sail smoothly through the entire growing cycle without any issues whatsoever. I cut my plant at the base and hung it upside down in my grow box with the lamps off and fans running. Once cracker-dry, I trimmed the buds and placed them into curing jars. Overall, I harvested 58g from this small and stealthy plant.
Genetic Attributes of Medusa F1
Medusa F1 holds the prestigious title of one of the first true cannabis F1 hybrids. She results from a long breeding project that involved the development of two distinct pure lines. Eventually, breeders crossed these parent lineages together, creating an F1 hybrid that outperforms conventional strains when it comes to yield, cannabinoid concentration, disease resistance, and uniformity.
Growing Characteristics of Medusa F1
Medusa F1 maintains a short height and will rarely exceed 90cm, even if grown within a large pot or directly in the ground. Her superior pest and disease resistance means she’s capable of thriving with minimal intervention. She flourishes in practically any environment, from dry and hot to humid and rainy. Expect her to return a large and satisfying yield without taking up much space.
Effects, Aroma, and Flavour of Medusa F1
Medusa F1 produces high levels of farnesene, myrcene, and ocimene. Together, these terpenes create tastes of blueberry, diesel, fruit, mint, and pepper. High levels of THC converge with these flavourful molecules to impart a balanced, creative, and physically relaxing effect. She makes a great smoke during the day for extra motivation, and on relaxed evenings when you want to wind down.