 Cannabis Grow Guide by Royal Queen Seeds
- Growing cannabis step by step
- Cannabis growing basics
- Choosing your seeds
- How to germinate seeds
- The cannabis vegetative stage
- The cannabis flowering stage
- Harvesting cannabis
- Trimming, drying, and curing
- Choosing pots and soil
-
Growing indoors
- A Complete Overview Of Growing Cannabis Indoors
- Cannabis Cultivation Tips: How To Set Up Indoor Grow Lights
- How Many Cannabis Plants Can You Grow Per Square Metre?
- Indoor Cannabis Growing: Relative Humidity and Temperatures
- Hydroponics Cannabis Growing Guide (with diagrams)
- Cannabis Micro Growing: Growing Great Weed in Tiny Spaces
- Growing outdoors
- How to grow autoflowering cannabis
- Cannabis nutrients and pH
- Cannabis troubleshooting: Nutrients
-
Cannabis troubleshooting: Growing
- Cannabis Seed Germination — Troubleshooting Guide
- How to Deal With Pythium (Root Rot) in Cannabis Plants
- Slow Cannabis Plant Growth And What You Can Do About It
- How to Deal With Leggy Cannabis Seedlings
- Watering Your Cannabis: How to Fix Overwatering and Underwatering
- Understanding Male, Female, And Hermaphrodite Cannabis
- Identifying and Treating Common Cannabis Ailments
- How To Revive a Sick Cannabis Plant
- How to Avoid Mouldy Weed During Drying and Curing
- How to Prevent and Treat Dry and Crispy Cannabis Leaves
- What Cannabis Leaves Can Tell You
- Causes and Solutions for Yellow Cannabis Leaves
-
Cannabis Strains Grow Report
- HulkBerry Automatic Grow Report
- Blue Cheese Auto Grow Report
- Purple Punch Automatic Strain Grow Report
- Triple G Automatic Grow Report
- Do-Si-Dos Automatic Grow Report
- Green Gelato Automatic Grow Report
- Haze Berry Automatic Grow Report
- Purple Queen Automatic Grow Report
- Cookies Gelato Automatic Grow Report
- Sherbet Queen Automatic Grow Report
- Sweet Skunk Automatic Grow Report
- Medusa F1 Grow Report
- Cannabis plant training
-
Weed growing tips
- The Cannabis Plant Anatomy
- How to preserve seeds
- How Much Sunlight Do Outdoor Cannabis Plants Need To Grow?
- How to Control and Prevent Stretching in Cannabis Plants
- My Cannabis Plants Are Growing Too Tall: What Should I Do?
- Should You Worry About Purple Or Red Cannabis Stems?
- What To Do When Your Indoor Cannabis Won’t Flower
- How To Protect Your Cannabis Plants From Heat Stress
- How To Tell If Your Female Cannabis Plant Has Been Pollinated
- Growing Medical Marijuana
- Bud Washing: How to Clean Your Weed
- Understanding Cannabis Yield per Plant
Purple Punch Automatic Strain Grow Report
Contents:
- Purple punch automatic strain grow report: equipment list
- Purple punch automatic strain grow report: seedling stage (week 1)
- Purple punch automatic grow strain diary: vegetative stage (weeks 2, 3, and 4)
- Purple punch automatic strain grow diary: flowering stage (weeks 5–11)
- Purple punch automatic strain post-harvest review
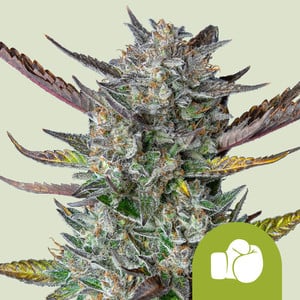
Purple Punch strain is a popular modern hybrid that combines genetics from Larry OG and Granddaddy Purple. Royal Queen Seeds' Purple Punch Automatic strain promises the same aromas and physically relaxing effects as the original, but in a simple, fast, and compact auto seed. Wondering whether Purple Punch Automatic deserves a spot in your garden? Read my full grow report below to find out.
Purple Punch Automatic Strain Grow Report: Equipment List
As with some of my other grow reports, I decided to use a fairly simple setup to grow Purple Punch Auto strain. Here's what I used:
- Box: Secret Jardin DS120W 120 × 60 × 178
- Lights: MIGRO 200+
- Ventilation: Blauberg Turbo - E 100
- Filter: Prima Klima filter PK 100/125
- Fan: Oscillating Koala Fan
- Humidifier: Beurer LB 45
- Soil: Biobizz Light Mix
- Pot: 11-litre AirPot
- Nutrition: Biobizz and RQS Organic nutrition
- pH solution: Plagron Lemon Kick
Note: My local water is quite basic, so I use Plagron Lemon Kick to bring its pH down to anywhere between 6–6.5. I also let my water sit undisturbed in open containers for at least 24 hours before using it to help rid it of chlorine (which damages roots and natural soil organisms).
Purple Punch Automatic Strain Grow Report: Seedling Stage (Week 1)
I chose to germinate my Purple Punch Auto seeds directly in their growing medium. While it's by no means necessary, I've found that germinating auto seeds directly in the soil (rather than in paper towels or water) helps to minimise stress during the all-important seedling phase.
To kick things off, I prepared 2x 11l AirPots with the following soil mix:
- 10l Biobizz Light Mix
- 50g Easy Boost Organic Nutrition pellets
- 10g Easy Roots Rhizobacter powder
- 5g Easy Roots Mycorrhiza Mix
Note: To ensure all my soil ingredients were well-mixed, I first half-filled my pots with the Biobizz mix, then added in the nutrition pellets, Rhizobacter, and mycorrhiza. I then mixed everything together by hand and gradually added in more soil, taking care to mix everything evenly. Once my soil was ready, I soaked it liberally with pH-regulated, unchlorinated water.
Germinating Purple Punch Automatic Seeds
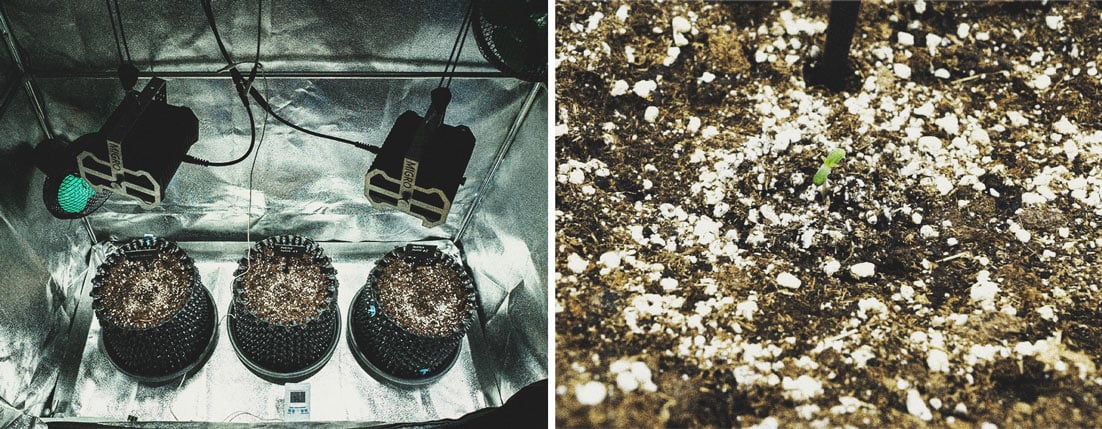
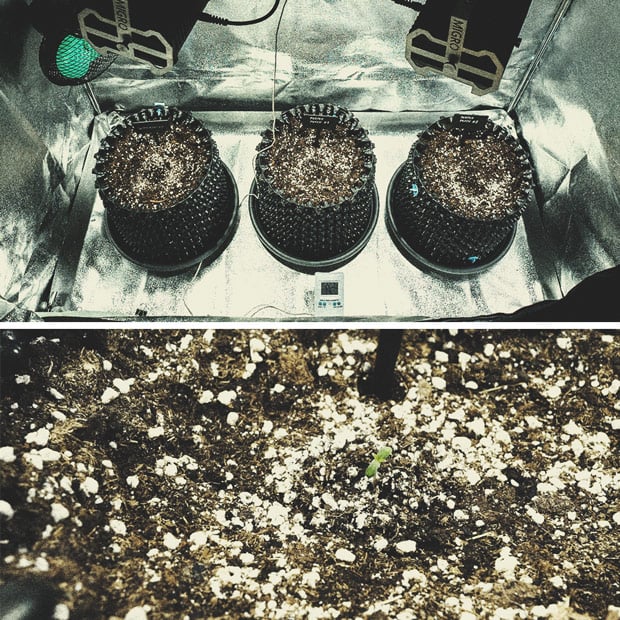
After preparing my soil mix, I made a small hole (roughly 2cm deep) in the middle of each pot. To promote faster germination and stronger root growth, I also sprinkled 1g of Royal Queen Seeds Easy Roots Mycorrhiza Mix inside the hole before adding in the seeds and gently covering them with soil. I then applied a little more water to help trigger germination, labelled the pots, and moved them into their new home on Butterfly Farm.
To ensure faster germination and promote the growth of strong seedlings, here's how I set up my tent during the seedling phase:
- Lighting: I kept my lights 35cm above the rim of my AirPots and ran them on 24 hours to maximise photosynthesis early on.
- Environment: Throughout week 1, I kept the temperature in my tent between 23–25°C and relative humidity at 45–60%. Both the temperature and RH in my tent were a little low during the first two days, but I was able to raise both by day 4.
- Nutrients: None.
- Water: I sprayed my seeds multiple times during the first three days to ensure their soil didn’t dry out.
The first Purple Punch Auto seed sprouted by day 4. As the second seed didn't sprout, I germinated a backup seed on a cotton pad with water. On day 7, since the second seed still hadn't sprouted, I planted the now-germinated backup seed in its pot. By day 9, the new seed had popped out of the soil. Both seeds looked strong, with only slight etiolation, and displayed bright green cotyledons. Thirteen days after germination, both Purple Punch Auto seedlings had developed two sets of true leaves and officially entered their vegetative phase.
Purple Punch Automatic Grow Strain Diary: Vegetative Stage (Weeks 2, 3, and 4)
Both of my Purple Punch Automatic plants vegetated for a total of three weeks. Below I've outlined my growing process for each week of veg in closer detail.
Week 2
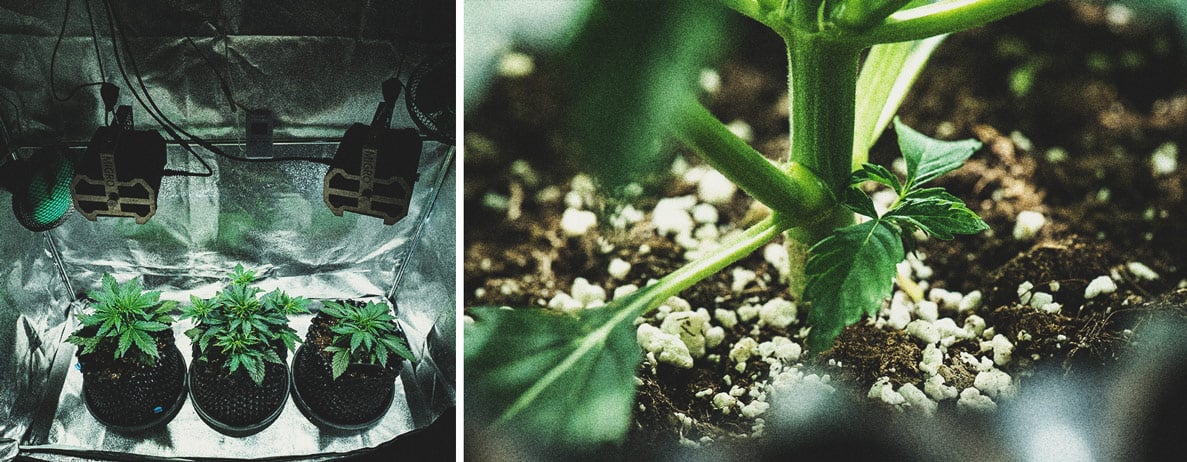
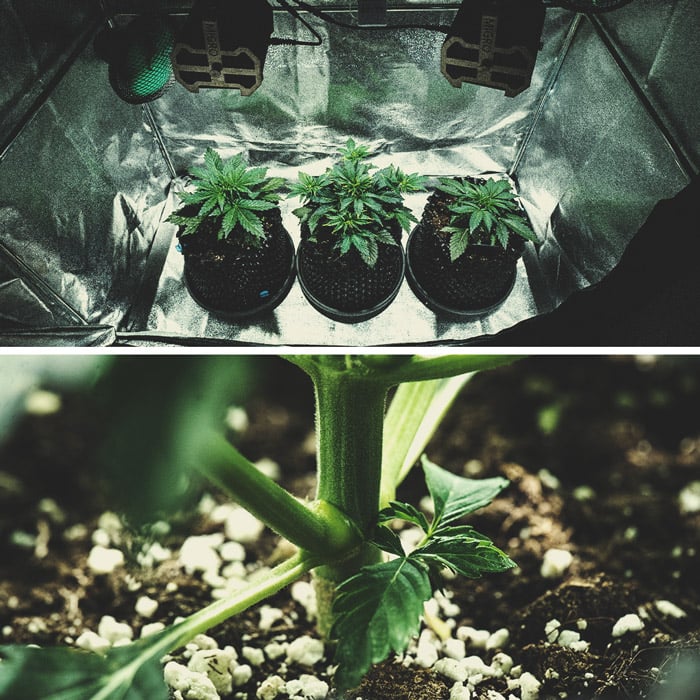
By the end of their first week of veg, my Purple Punch Auto plants looked healthy and strong. Purple Punch #1 (the first plant to germinate) grew to a total height of 11cm, while Purple Punch #2 (the backup seed) grew to 7cm. Here's how I went about my grow during the week:
- Lighting: Same as week 1 (24hr light cycle, with lamp 35cm from the top of the pots).
- Environment: The temperature in my tent measured 23°C, and I used a humidifier to keep RH between 50–60%.
- Nutrients: I applied Biobizz Root-Juice on day 3. Each plant received 1ml of Root-Juice dissolved in 1l of water.
- Water: I watered both Purple Punch Auto plants once on day 7. Each plant received 1.5l of water (pH 6.3).
Week 3
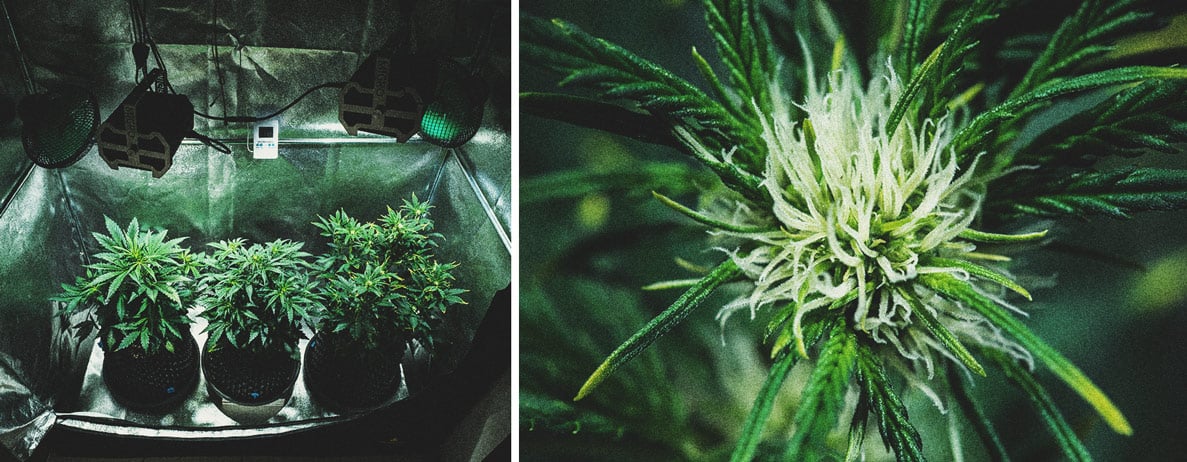
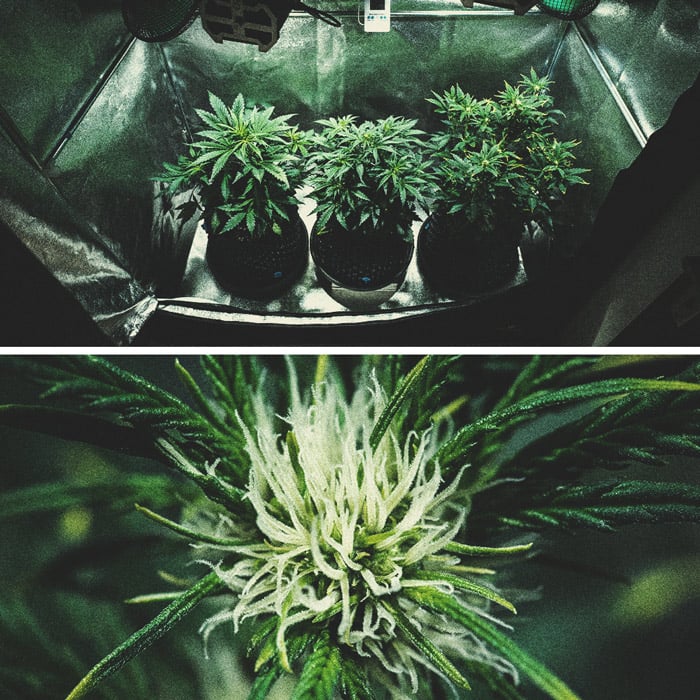
The second week of veg was pretty straightforward; I saw some solid growth from both Purple Punch Auto plants, and even some small flowers started to form by the end of the week. Both of my plants doubled in size, with Purple Punch #1 reaching 23cm and Purple Punch #2 reaching 15cm. Purple Punch #1 developed some bright yellow tinges on the tips and edges of its leaves (see pictures), the cause of which I am not yet sure of.
- Lighting: Same as week 1.
- Environment: The temperature in my tent during the week was 23.5–25°C and RH was 40–49%.
- Nutrients: None.
- Water: I watered both Purple Punch Auto plants on day 14.
Week 4
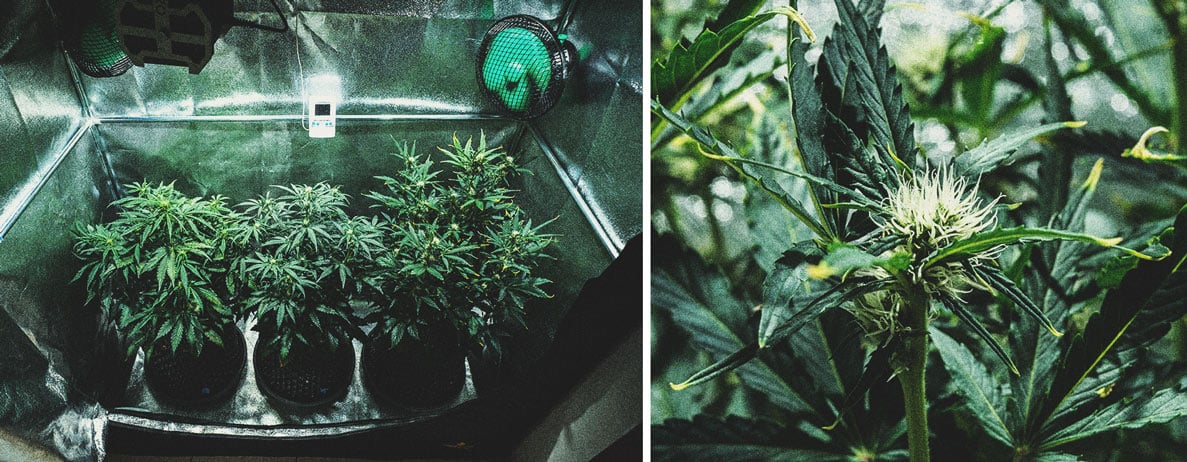
My Purple Punch Auto plants continued to grow vigorously during their last week of veg. By the end of the week, Purple Punch #1 measured 50cm tall, while Purple Punch #2 measured 30cm (acceptable, given that this seed got a delayed start). Both plants had also developed their first buds by the end of the week. Purple Punch #1 continued with its yellow-tinged leaves, which I think may be genetic since the other two plants in the tent showed no similar signs.
- Lighting: Same as week 1, but dimmed to 80%.
- Environment: The temperature in my tent was roughly 24°C. RH dropped from 40% to 35% during the week, so I brought a humidifier back in.
- Water/Nutrients: During the week, I fed/watered my plants on three separate occasions:
On day 15, I dissolved 1x RQS Easy Grow nutrient tablet in 6l of water and watered each plant with 2l. On day 18, I watered my plants without any added nutrients, and on day 21, I fed my plants again, this time using General Hydroponics CalMg+ (1.5ml/l), Biobizz Bio Heaven (2ml/l), Bio Grow (2ml/l), Acti Vera (2ml/l), and Alg-A-Mix (2ml/l).
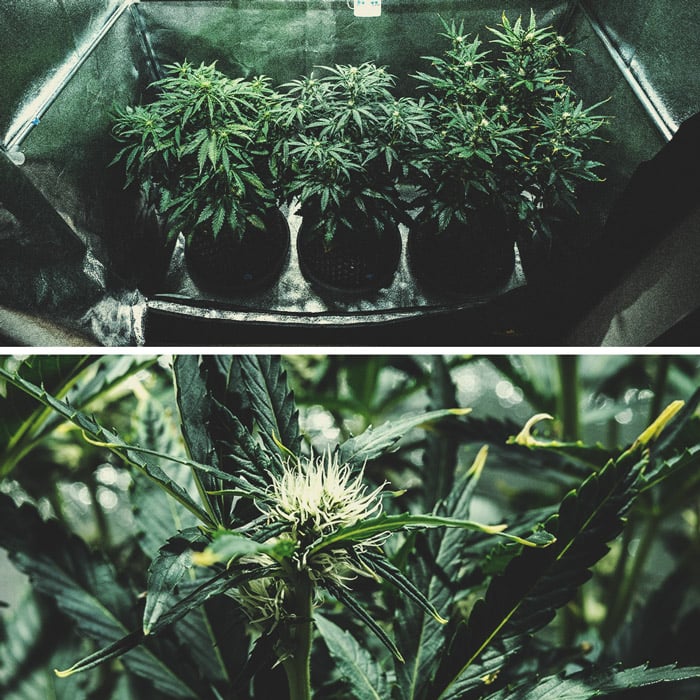
Purple Punch Automatic Strain Grow Diary: Flowering Stage (Weeks 5–11)
Both of my Purple Punch Automatic plants began flowering toward the end of their 4th week after germination. Their entire flowering stage lasted 7 weeks. Here's a closer look at Purple Punch Auto's bloom phase.
Week 5
By the end of week 5, my Purple Punch Auto plants had stretched considerably, with Purple Punch #1 reaching 66cm tall and Purple Punch #2 reaching 54cm. Both plants also developed plenty of healthy leaves, and while I know some growers like to defoliate their autos, I chose not to do so just yet.
Both of my Purple Punch plants also seemed to respond well to the nutrients I'd fed them in week 4, especially when compared to their Watermelon companion, which seemed a little stressed after the last feeding. Purple Punch #1 continued to have yellow-tinged leaf tips, which I continue to think is a genetic trait.
- Lighting: I reduced my light cycle to 20/4. My lamp continued to sit 35cm above the canopy of my plants.
- Environment: The temperatures in my tent reached 25°C during lights-on and 20°C during lights-off. Relative humidity stayed between 40–43%.
- Water/Nutrients: I watered my plants on three separate occasions, giving them 2l of water each time. On day 21, I fed them with 1.5 ml/l of General Hydroponics CalMg+. On day 25, I watered again, this time adding 1ml/l of CalMg+ and 1ml/l of Biobizz Bloom. On day 27, I watered my plants without nutrients.
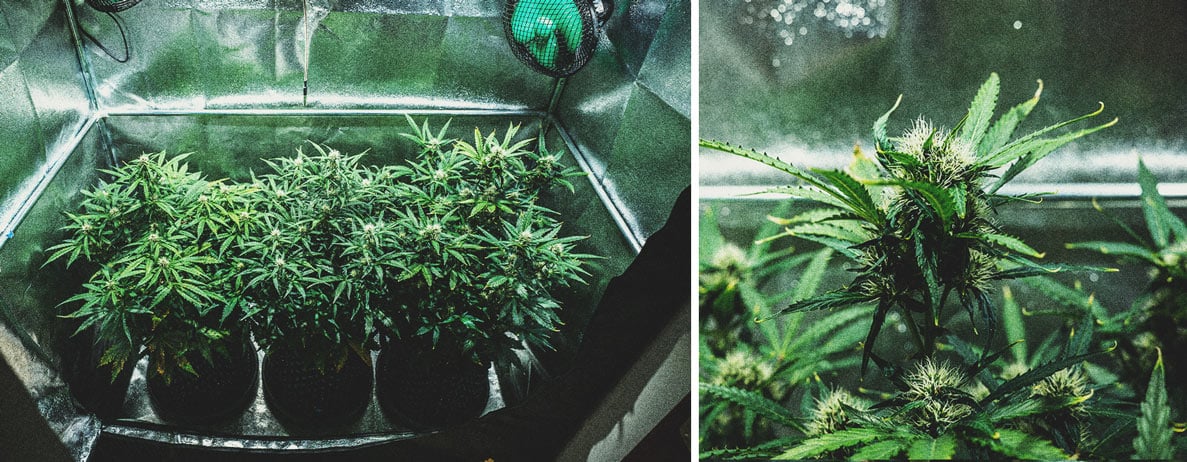
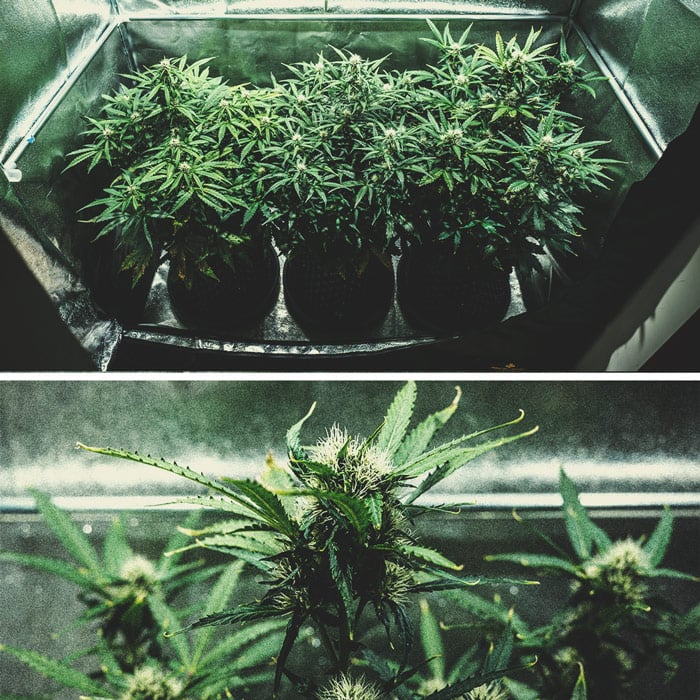
Week 6
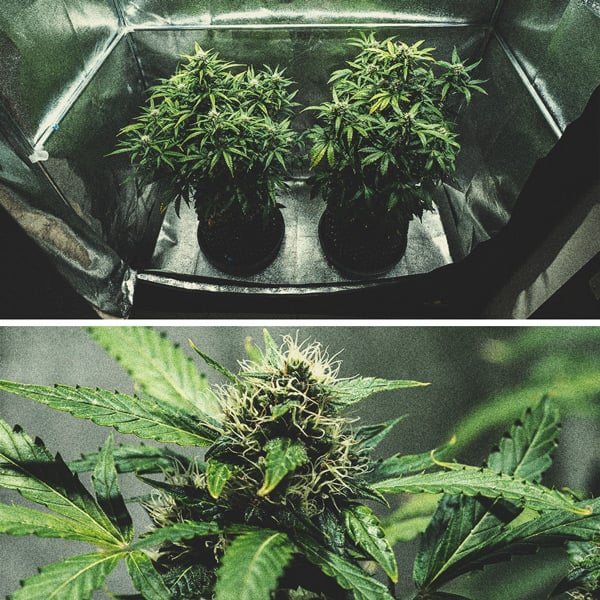
This week, my plants continued to flower nicely, and Purple Punch #2 finally caught up with Purple Punch #1 in terms of size, meaning I finally had a nice, even canopy in my tent. The fact that Purple Punch #1 hadn't grown any taller during the week is a solid indication that she is well into her bloom phase and focusing all of her energy on flower development. Both plants had a nice, thick canopy (which I am considering thinning out slightly) and started developing nice round flowers. ¨
- Lighting: Same as week 5.
- Environment: Temperatures stayed at 25°C during lights-on and 20°C during lights-off. RH, on the other hand, dropped considerably from 42% on day 29 to 35% on day 32, and then back up to 39% on day 35.
- Water/Nutrients: I watered my Purple Punch Auto plants three times in week 6. On day 29, I dissolved 1 RQS Easy Bloom tablet in 7l of water, which I distributed evenly between all three on the farm. On day 32, I gave both Purple Punch Auto plants roughly 2l of water containing 1ml/l of Biobizz Bio Bloom. Finally, on day 35, I gave all my plants plain, pH-regulated water.
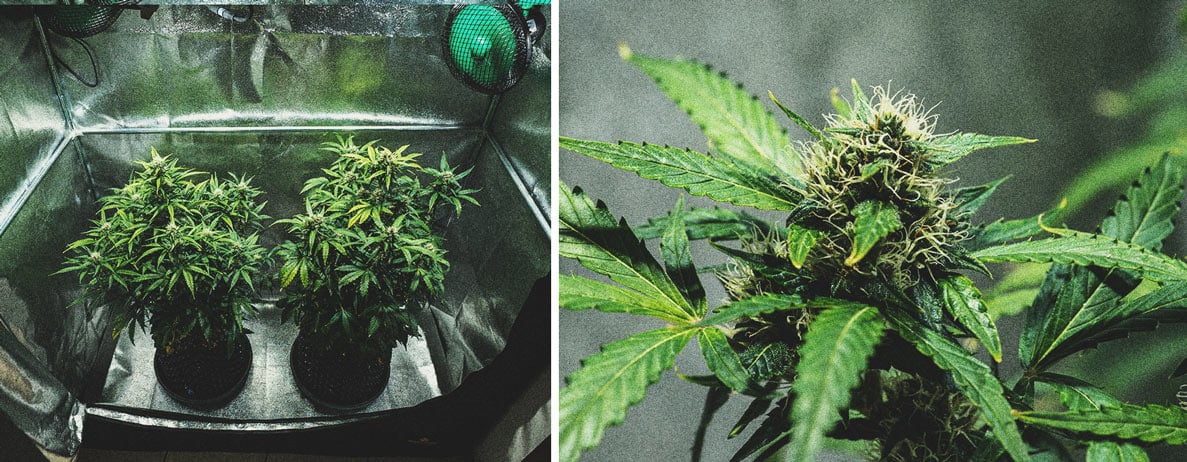
Week 7
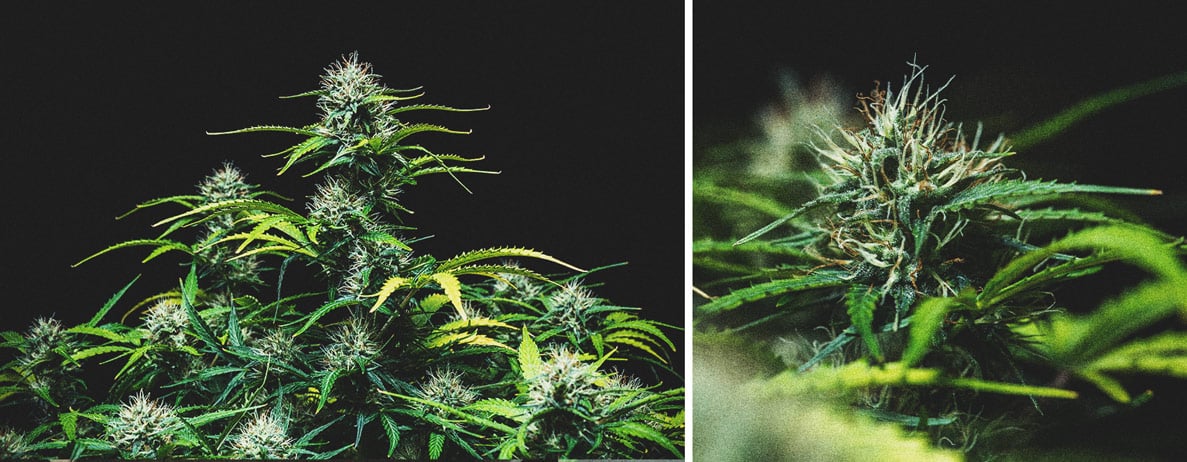
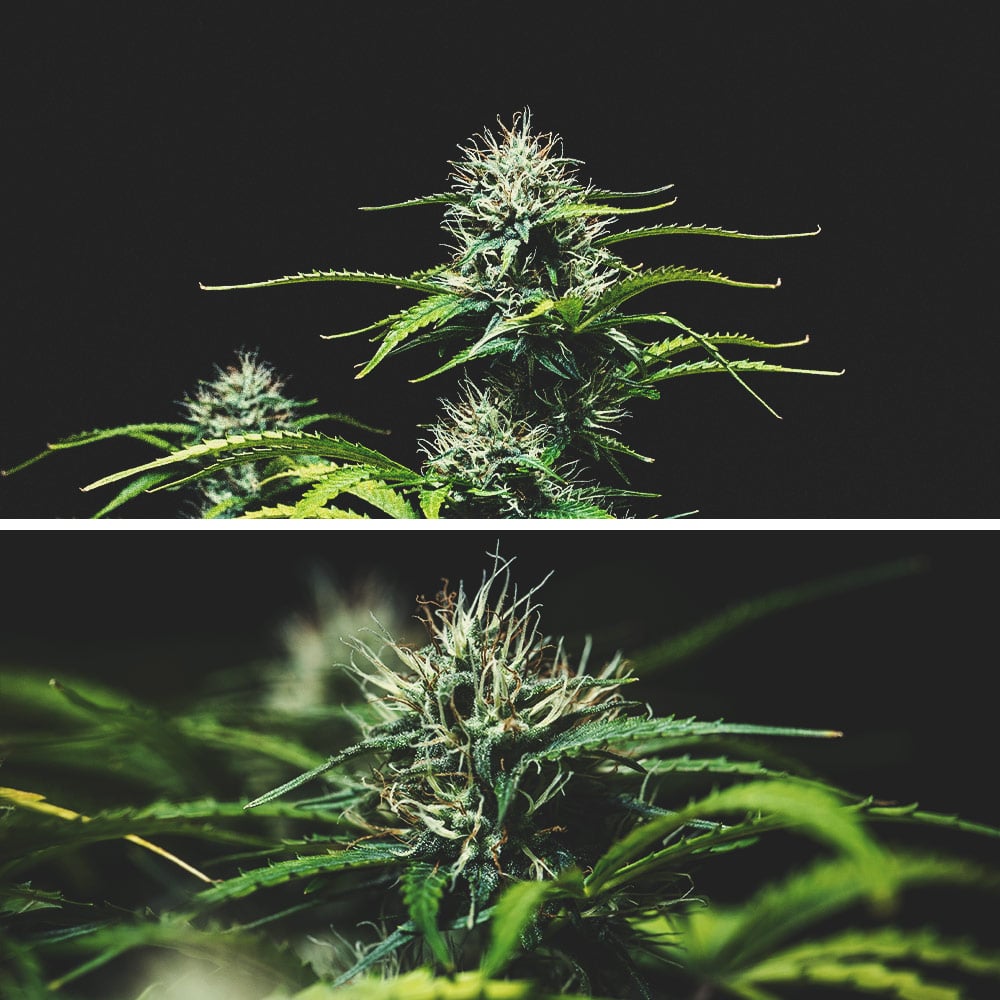
By the end of week 7, both Purple Punch Auto plants clocked in at 67cm tall (slightly taller than the week before). They looked nice and healthy, with dark, vibrant foliage. They also showed nice rounded flowers with some red pistils and a sugary coating of clear, but already aromatic, trichomes.
- Lighting: Same as week 6.
- Environment: The temperature in my tent during week 7 was roughly 25°C during the day and 21°C during lights-off. RH sat at 41% at the beginning of the week and dropped to 39% by the end.
- Water/Nutrients: On day 37, I diluted 1 RQS Easy Bloom Booster tablet in 7l of water, which I divided evenly between the three plants in the tent. On day 41, I watered each plant with 2l of water enriched with 1ml/l of CalMg+ and 2ml/l of Biobizz Bio Bloom.
- Training: I defoliated all three plants in my tent on day 42. I removed old, large foliage from the lower branches of both Purple Punch Auto plants, and removed sick foliage from Watermelon (which had developed yellow leaves with brown spots).
Week 8
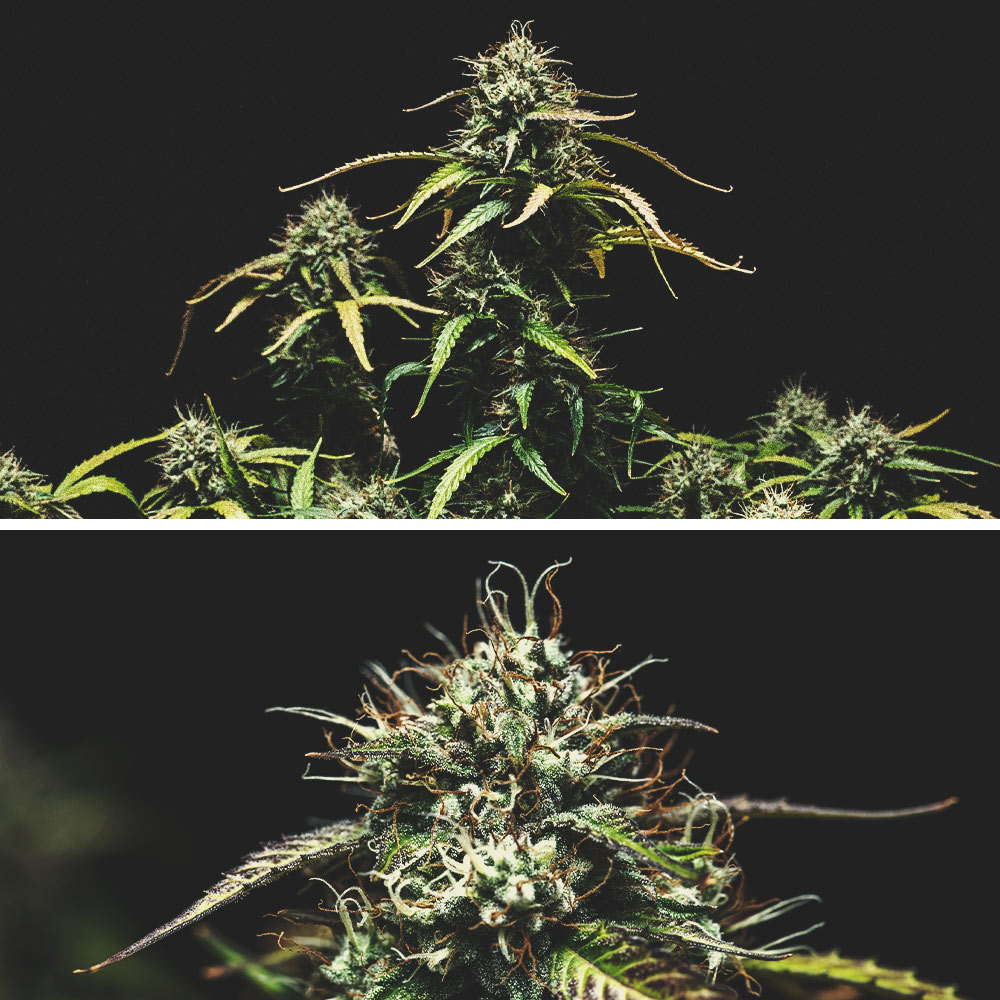
Another week of bloom down, and I must say that I am very impressed by the look and smell of Purple Punch Auto strain. Both plants have developed some yellow foliage, suggesting that they're approaching the final weeks of their life. Their flowers continue to ripen nicely, developing large, swollen calyxes with a frosty coating of trichomes and more red pistils.
- Lighting: Same as week 7.
- Environment: Temperatures sat at 25°C during lights-on and 23°C during lights-off. RH stayed at roughly 40% all week with only minor fluctuations.
- Water/Nutrients: On day 44, I gave both plants 2l of pH-regulated water. On day 46, I gave them their last fertilisation with Biobizz Bio Bloom (2ml/l). From here on out, the plants received only water up until harvest.
Week 9
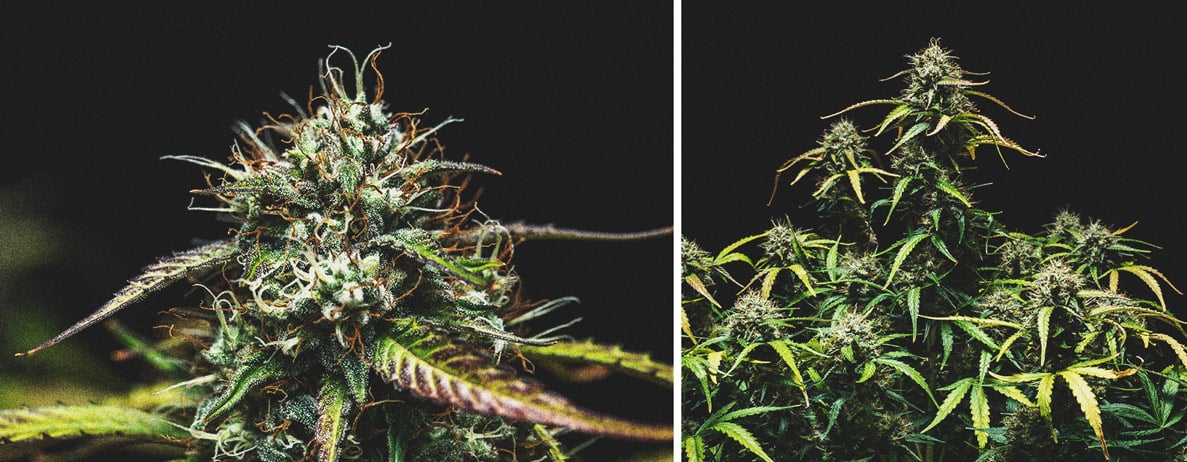
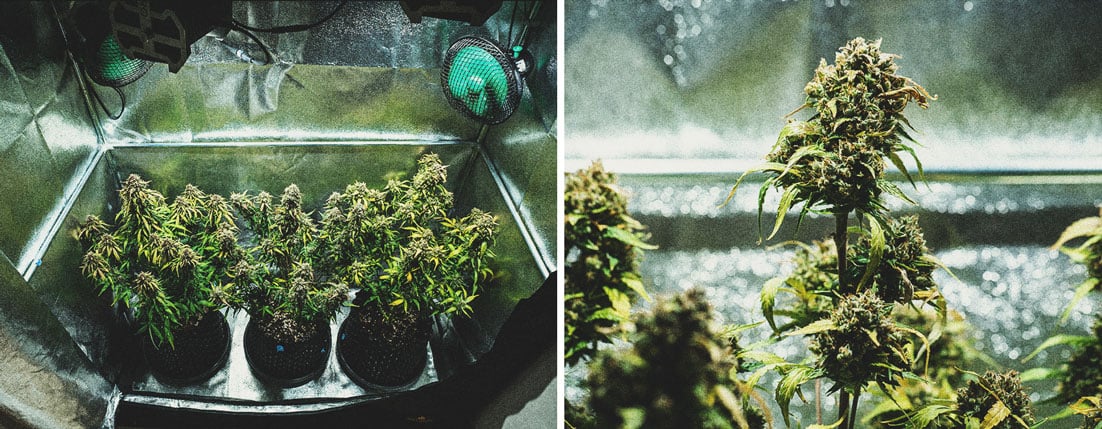
From the look of Purple Punch Automatic strain this week, I am guessing that we're roughly 2 weeks out from harvest. Both of my Purple Punch Auto plants are looking very healthy, with more yellow leaves as they continue to use up their nutrient stores to fuel the growth of their flowers. The buds of both plants are nice and dense, with swollen calyxes and a growing number of red pistils. The buds feel nice and hard to the touch and are producing a delicious aroma. I am using a microscope to carefully keep an eye on the development of trichomes, which are still mostly clear at this stage.
- Lighting: Same as week 8.
- Environment: 25°C during lights-on and 22°C during lights-off. RH started off at 38% and dropped to 34% by the end of the week.
- Water: I watered my plants three times this week, giving each plant 2.3l every time.
Week 10
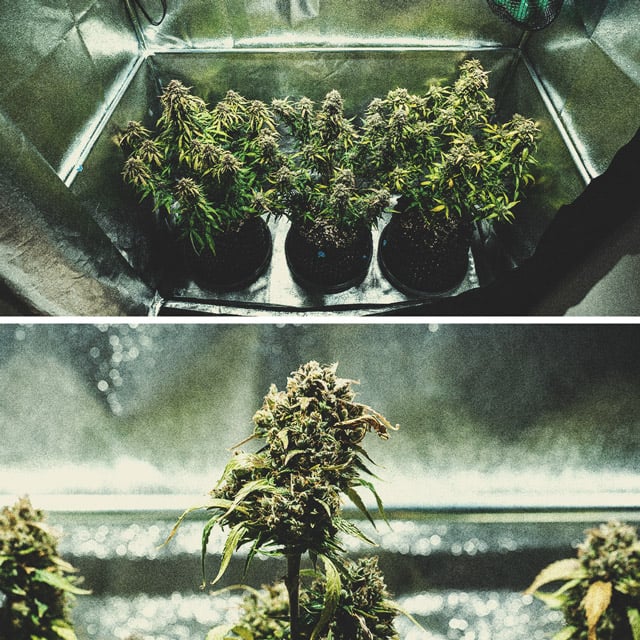
Harvest day is fast approaching, and I continue to be impressed by the look and smell of my Purple Punch Auto plants. As you can see from this week's photos, the buds on these strains are fattening up very nicely and even taking on those beautiful purple hues that so many growers love. Both Purple Punch #1 and #2 are producing a lot of resin, and their yellowing foliage is a good sign that they're using up their last nutrient stores and will make for a smooth, clean smoke.
- Lighting: Same as week 9.
- Environment: 25°C during lights-on and 22°C during lights-off. RH clocked in at 32% at the beginning of the week, and 36% toward the end.
- Water/Nutrients: I watered my plants two times this week. Each plant received 2.3l of water both times.
Week 11
A total of 80 days after germination, my Purple Punch Automatic plants are finally harvest-ready. While I ran into some trouble germinating one seed, I must say that this strain exceeded my expectations. While autos often get criticised for their small size and lack of potency, Purple Punch Auto from RQS seems to deliver on both of these fronts. While I admit that I can't attest to the potency of this strain, seeing as I still need to dry and cure my buds, the sheer amount of resin on the flowers and their delicious aroma leaves me confident that they'll make for an excellent smoke.
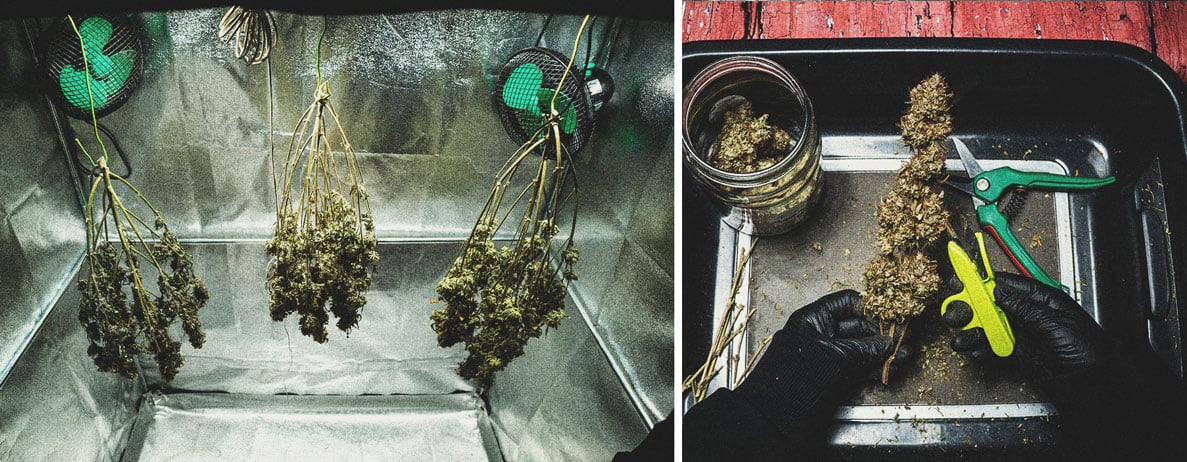
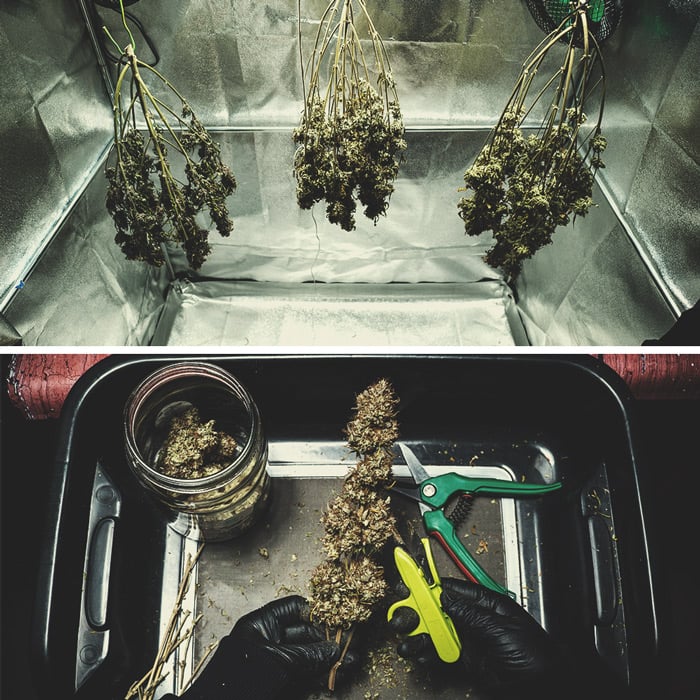
After taking my last pics of the plants, I cut them at the bottom of their stalks and hung them upside down inside my tent to dry at 25°C and just below 40% RH.
Purple Punch Automatic Strain Post-Harvest Review
After roughly two weeks of drying, I am now packing my Purple Punch Auto flowers into their curing jars. Until now, I must say that this has been my favourite strain to grow on Butterfly Farm. Growing to around 70cm tall, these plants worked perfectly in my small tent, and I'd recommend them to anyone with a similar-sized setup.
The physical traits of both Purple Punch Automatic plants seemed fairly similar, but their buds turned out quite different, with one plant producing smaller, denser flowers, and the other producing slightly more elongated ones. Either way, the buds all boasted a solid structure and plenty of aromatic resin. After a quick taste test, I can definitely say that my assumptions about the potency and flavour of Purple Punch Auto were spot-on; this compact auto produces a strong physical stone that's perfect for relaxing. Purple Punch Auto boasts a sweet berry aroma, and very respectable yields of roughly 70g of dried bud per plant.
All in all, I'd recommend this strain to almost any grower/smoker. Purple Punch Auto's grow traits are ideal for small indoor grow-ops, and her aromas, flavours, and potency are top-shelf.
Purple Punch Auto
|
|
Purple Punch x Old Skunk Auto |
|
|
350 - 400 gr/m2 |
|
|
60 - 100 cm |
|
|
7 - 8 weeks |
|
|
THC: 19% |
|
|
Sativa 20%, Indica 75%, Ruderalis 5% |
|
|
80 - 130 gr/plant |
|
|
80 - 120 cm |
|
|
9 - 10 weeks after sprouting |
|
|
Physically Relaxing |
 Grow Guide Topic Finder
- Growing cannabis step by step
- Cannabis growing basics
- Choosing your seeds
- How to germinate seeds
- The cannabis vegetative stage
- The cannabis flowering stage
- Harvesting cannabis
- Trimming, drying, and curing
- Choosing pots and soil
-
Growing indoors
- A Complete Overview Of Growing Cannabis Indoors
- Cannabis Cultivation Tips: How To Set Up Indoor Grow Lights
- How Many Cannabis Plants Can You Grow Per Square Metre?
- Indoor Cannabis Growing: Relative Humidity and Temperatures
- Hydroponics Cannabis Growing Guide (with diagrams)
- Cannabis Micro Growing: Growing Great Weed in Tiny Spaces
- Growing outdoors
- How to grow autoflowering cannabis
- Cannabis nutrients and pH
- Cannabis troubleshooting: Nutrients
-
Cannabis troubleshooting: Growing
- Cannabis Seed Germination — Troubleshooting Guide
- How to Deal With Pythium (Root Rot) in Cannabis Plants
- Slow Cannabis Plant Growth And What You Can Do About It
- How to Deal With Leggy Cannabis Seedlings
- Watering Your Cannabis: How to Fix Overwatering and Underwatering
- Understanding Male, Female, And Hermaphrodite Cannabis
- Identifying and Treating Common Cannabis Ailments
- How To Revive a Sick Cannabis Plant
- How to Avoid Mouldy Weed During Drying and Curing
- How to Prevent and Treat Dry and Crispy Cannabis Leaves
- What Cannabis Leaves Can Tell You
- Causes and Solutions for Yellow Cannabis Leaves
-
Cannabis Strains Grow Report
- HulkBerry Automatic Grow Report
- Blue Cheese Auto Grow Report
- Purple Punch Automatic Strain Grow Report
- Triple G Automatic Grow Report
- Do-Si-Dos Automatic Grow Report
- Green Gelato Automatic Grow Report
- Haze Berry Automatic Grow Report
- Purple Queen Automatic Grow Report
- Cookies Gelato Automatic Grow Report
- Sherbet Queen Automatic Grow Report
- Sweet Skunk Automatic Grow Report
- Medusa F1 Grow Report
- Cannabis plant training
-
Weed growing tips
- The Cannabis Plant Anatomy
- How to preserve seeds
- How Much Sunlight Do Outdoor Cannabis Plants Need To Grow?
- How to Control and Prevent Stretching in Cannabis Plants
- My Cannabis Plants Are Growing Too Tall: What Should I Do?
- Should You Worry About Purple Or Red Cannabis Stems?
- What To Do When Your Indoor Cannabis Won’t Flower
- How To Protect Your Cannabis Plants From Heat Stress
- How To Tell If Your Female Cannabis Plant Has Been Pollinated
- Growing Medical Marijuana
- Bud Washing: How to Clean Your Weed
- Understanding Cannabis Yield per Plant


