Amount exceeded

4.7 out of 5 based on 58566 reviews


4.7 out of 5 based on 58566 reviews
.

Cannabis e-liquids are the stealthiest and fastest way to get stoned. Plus, they taste amazing. Use these instructions to make your own at home! It's not as difficult as you might think.
Contents:
Vaping is the new smoking. Okay, some cannabis lovers will always smoke the herb. But some users are ditching tar, carbon monoxide, and carcinogens for a cleaner hit of cannabinoids. Instead of combustion, vaporizers use convection heating, conduction heating, or a combination of both to release cannabinoids and terpenes into an inhalable vapor.
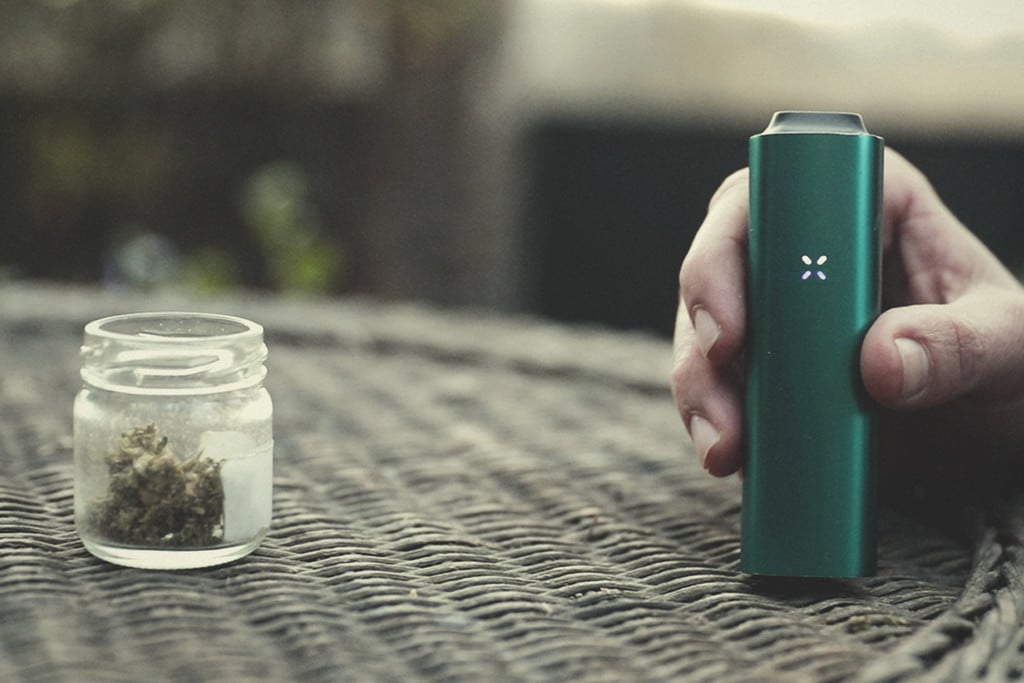
This is easier on the lungs, far more tasty, and a lot more discreet than walking around with a joint. CBD users also appreciate this form of ingestion. Because vaporizing a CBD liquid is much more enjoyable than swallowing a capsule.Vaporizers are available in both desktop and portable models. Vape pens are the stealthiest option and the easiest to carry around. These sleek and futuristic devices can vaporize both herb and extracts, depending on the model. In this article, you’ll learn how to make your own stash of cannabis e-liquid to use with your vape pen.
E-liquid, otherwise known as vape juice, is traditionally a nicotine-containing product. However, cannabis users have put their own spin on things. Both THC and CBD e-liquids (with accompanying terpenes) are available, and feature a base of either propylene glycol (PG) or vegetable glycerin (VG).
PG is a colourless and odourless organic compound. It’s not very viscous, which makes things easier when it comes to refilling cartridges and cleaning your device. VG is a completely natural liquid derived from plant oils. It’s also odourless, yet has a slightly sweet taste. It’s much more viscous than PG. It’s not ideal for cleaning, but it produces thick, satisfying clouds of vapor.
Natural and artificial food-grade flavourings are also typically added to create an array of flavours—anything from candy and mint to fruits. E-liquid is then loaded into the tank of an e-cigarette or vaporizer and heated to anywhere between 90–200°C. Devices will need to be set to around 157°C to effectively evaporate THC, whereas CBD requires slightly higher temperatures of between 160–180°C.
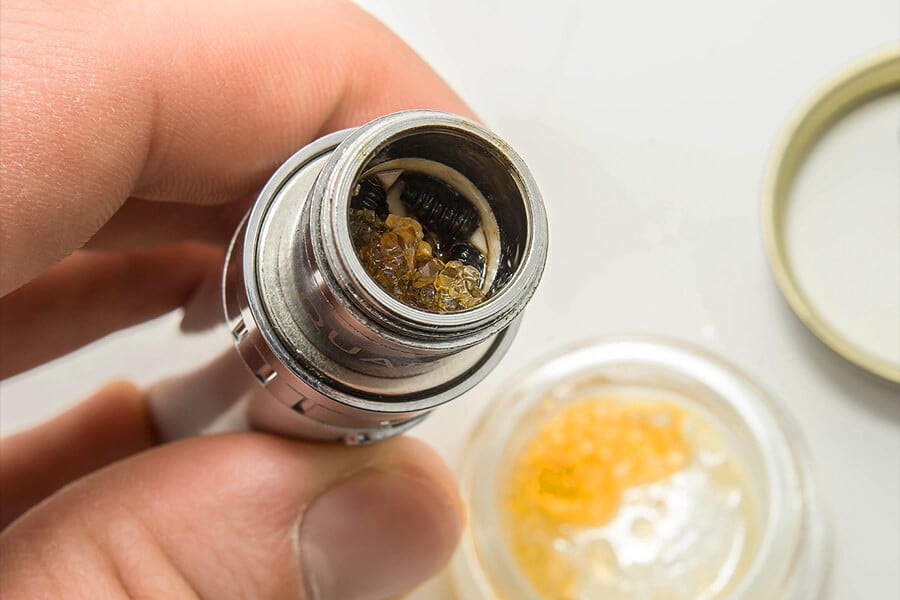
Vape pens represent the pinnacle of portability. These sleek devices feature similar technology to desktop vapes, just condensed into a pocket-friendly design. They share an appearance with standard pens and are therefore easy to store and conceal. Vape pens are composed of two main parts: the cartridge, and the battery. Cheaper, disposable vape pens come with pre-filled cartridges. However, more expensive models allow users to refill cartridges with their own product.
Vape pens are ideal for vaporizing high-potency extracts such as THC-enriched e-liquid or distillate. A single hit can provide just as much THC as an entire joint, with much less effort. There’s no need to carry around a container of buds, rolling papers, and a lighter. Just hit the pen and enjoy the ride.
Learning to make your own e-liquid is a worthwhile endeavour. It offers the same level of satisfaction as cooking your own edibles or crafting your own extracts and tinctures. Making e-liquid at home also contributes to peace of mind. You’ll know exactly what you’re inhaling with every hit.
Shop-bought e-liquid from unreliable companies can become contaminated in the same way that cannabis flowers can be laden with pesticides. There’s no way to tell exactly what’s inside a formula unless you get it tested at a lab—or simply make it yourself. You’ll also save money if you buy what you need in bulk or grow your own buds.

Take your time to grow and gather the best supplies you can find. By starting out with the best materials possible, you’ll achieve the best outcome. There’s little point in going through the whole process to produce something substandard. Spend some time identifying the ideal source of VG and the best cannabis flowers you can get your hands on. Even better, you can grow your own. Check out these ten amazing strains with high THC levels and unmatched flavours to start you off on the right foot.
Now that you know the benefits of making your own vape juice, let’s get into the nitty-gritty. It’s time to make your own! As with almost anything to do with cannabis, there’s more than one way to skin this cat. Below, we’ll talk you through three of the easiest methods.
Using rosin to make your own vape juice is the cleanest and quickest method. Rosin, by nature, is a low-risk extract. There are no solvents or harsh chemicals used in the process. It’s simply a matter of applying a bit of heat and pressure to extract the resin. You can use buds to make rosin if you have enough resinous flowers to hand. If not, you can press rosin from concentrates such as BHO wax.
To begin, select a few plump and resinous buds from your stash and sandwich them in parchment paper. Turn on your hair straighteners and set them to a temperature of around 121°C. If your hair straighteners don’t have this low of a setting, heat them up and unplug them until they become slightly cooler.
Place the wrapped buds between the hair straightener irons and apply significant pressure. Keep applying force as the resin oozes out of the flowers. Release the irons when the goo stops flowing. Unwrap the pressed buds to reveal a fresh patch of rosin. Repeat this process until you’ve made around 0.5g of rosin. You’ll need around 3g of high-quality herb to achieve this amount.
Place the rosin-covered parchment paper into the fridge for around 20 minutes. Remove your cooled bounty and scrape off the rosin using a sturdy toothpick; place it in the glass vial. Add a few drops of your preferred terpenes or flavouring into the jar.
Next, you’ll need to mix your rosin and flavouring into an oil. To do this, you’ll need to flash heat the vial. Hold a flame underneath the container for around five seconds, or until the solution begins to bubble. Any less and the two substances won’t mix. Any more, and you’ll degrade the volatile terpenes. As soon as the mixture starts to bubble, remove the flame and give it a good mix using a toothpick. Then, draw the solution into a syringe and inject it into your vape pen cartridge.

This is another fast method for cannabis users looking for an instant supply of vape juice. It’s a relatively easy method that requires breaking up buds, mixing them with VG, and applying heat.
It’s time to get sticky. Tear apart your flowers with your bare hands and place the small pieces into a small Pyrex dish. Pour a small amount of VG into the dish and stir. Keep adding small amounts until the pieces are saturated, without the mixture becoming too thin.
Pour the vegetable oil into the large Pyrex dish—enough to submerge the bottom inch of the small Pyrex dish. Place the oil on the stove or a hot plate and place the thermometer sensor inside. Heat the mixture up to a temperature of 104°C.
Place the small Pyrex dish into the hot oil bath and insert the second thermometer into the mix of VG and broken-down buds. The aim is to heat the solution to around 82°C to allow the cannabinoids to diffuse into the VG. Maintain this temperature for 45 minutes and stir the mixture frequently.
Remove the small Pyrex dish from the oil bath and let it cool for several minutes. Next, place a sieve over a glass jar to strain the mixture. Use a spatula to press the bud against the sieve to extract as much liquid as possible. Repeat steps two and three a total of two times to extract as much THC as possible, using fresh VG each time.
Now that you’ve collected three runs in the glass jar, it’s time to purify your vape juice. Clean and dry your sieve; place it over a clean glass jar and add around four layers of cheesecloth. Pour your vape juice onto the cheesecloth and watch it filter through into the jar. Use the spatula to squeeze out any residue.
Add your purified vape juice back into the small Pyrex dish. Heat up the oil bath and place the small Pyrex dish inside. Insert your thermometer and heat up the vape juice to exactly 104°C for 30 minutes. This will convert precursor cannabinoid THCA into psychoactive THC via decarboxylation.
You’re all done! Use a dropper bottle or syringe to load up your vape pen cartridge with clean and potent vape juice!
Patient weed lovers are rare animals, indeed. If you happen to be one, this simple method is for you. It doesn’t use high temperatures. Instead, a long period of time allows the cannabinoids to diffuse into the mixture.
Break up your flowers into small chunks using your hands or a pair of scissors. Avoid grinding them. If the pieces are too fine, they’ll make it through the filtration process.
Line a baking tray with aluminium foil and spread your plant material evenly over the surface. Preheat the oven to 121°C. Place your buds inside to decarboxylate for 30 minutes. Remove them and allow to cool.
Place your buds into a mason jar. Add a small amount of VG and stir. Keep adding VG until the mixture is clumpy and thick. Stop before the mixture becomes too liquidy and thin. Screw the lid on, label with the date, and store for one month (we told you it’d take a while).
After one month, remove the lid and stir the mixture well. Add a tablespoon of VG, stir again, and return to storage for another month. Repeat this process again one month later.
At the end of the third month, stir the mixture and strain through a sieve into another mason jar. Use the spatula to assist the process. Clean the sieve and original jar. Line the sieve with four layers of cheesecloth and strain the vape juice back into the original jar. Press out any residue with the spatula.
Use a syringe to add your vape juice into a cartridge—enjoy!

Vaping e-liquids isn’t limited to getting stoned. Medicinal and recreational users can also vape them to enjoy the clear-headed and relaxing effects of CBD. CBD e-liquid is non-psychotropic, elevates the mood, and calms the nerves. It’s great before public speaking, meetings, social gatherings, or sleep. You can also purchase pre-made CBD e-liquid if you don’t fancy making your own.
Making e-liquids at home is easy, but it isn’t without risk. Working with hot oil can be extremely dangerous, so handle with care. Also, you must ensure that all of the ingredients you use are food-grade and certified. There’s a lot of dodgy products out there, so do your research and store with care. If you use common sense and take the right safety precautions, you’ll have your own stash of vape juice in no time.
DisclaimerExtracts, concentrates, and oils used for dabbing are among the strongest cannabis products available. Proceed with caution when using substances high in THC. Start with low doses and slowly increase over time to build up a tolerance to the compound.
Remember: Set and Setting will help you deal with various situations.
Stay Cultivated.