 Weed Grow Guide by Royal Queen Seeds
- Growing weed step by step
- Cannabis growing basics
- Choosing your seeds
- How to germinate seeds
- The cannabis vegetative stage
- The cannabis flowering stage
- Harvesting cannabis
- Trimming, drying, and curing
- Choosing pots and soil
-
Growing indoors
- A Complete Overview Of Growing Cannabis Indoors
- Cannabis Cultivation Tips: How To Set Up Indoor Grow Lights
- How Many Cannabis Plants Can You Grow Per Square Metre?
- Indoor Cannabis Growing: Relative Humidity and Temperatures
- Hydroponics Cannabis Growing Guide (with diagrams)
- Cannabis Micro Growing: Growing Great Weed in Tiny Spaces
- Growing outdoors
- How to grow autoflowering cannabis
- Cannabis nutrients and pH
- Cannabis troubleshooting: Nutrients
-
Cannabis troubleshooting: Growing
- Cannabis Seed Germination — Troubleshooting Guide
- How to Deal With Pythium (Root Rot) in Cannabis Plants
- Slow Cannabis Plant Growth And What You Can Do About It
- How to Deal With Leggy Cannabis Seedlings
- Watering Your Cannabis: How to Fix Overwatering and Underwatering
- Understanding Male, Female, And Hermaphrodite Cannabis
- Identifying and Treating Common Cannabis Ailments
- How To Revive a Sick Cannabis Plant
- How to Avoid Mouldy Weed During Drying and Curing
- How to Prevent and Treat Dry and Crispy Cannabis Leaves
- What Cannabis Leaves Can Tell You
- Causes and Solutions for Yellow Cannabis Leaves
-
Cannabis Strains Grow Report
- HulkBerry Automatic Grow Report
- Blue Cheese Auto Grow Report
- Purple Punch Automatic Strain Grow Report
- Triple G Automatic Grow Report
- Do-Si-Dos Automatic Grow Report
- Green Gelato Automatic Grow Report
- Haze Berry Automatic Grow Report
- Purple Queen Automatic Grow Report
- Cookies Gelato Automatic Grow Report
- Sherbet Queen Automatic Grow Report
- Sweet Skunk Automatic Grow Report
- Medusa F1 Grow Report
- Cannabis plant training
-
Weed growing tips
- The Cannabis Plant Anatomy
- How to preserve seeds - UK
- How Much Sunlight Do Outdoor Cannabis Plants Need To Grow?
- How to Control and Prevent Stretching in Cannabis Plants
- My Cannabis Plants Are Growing Too Tall: What Should I Do?
- Should You Worry About Purple Or Red Cannabis Stems?
- What To Do When Your Indoor Cannabis Won’t Flower
- How To Protect Your Cannabis Plants From Heat Stress
- How To Tell If Your Female Cannabis Plant Has Been Pollinated
- Growing Medical Marijuana
- Bud Washing: How to Clean Your Weed
- Understanding Cannabis Yield per Plant
Sweet Skunk Automatic Grow Report
Contents:
- Sweet skunk automatic grow report: equipment list
- Sweet skunk automatic grow report: seedling stage (week 1)
- Sweet skunk automatic grow report: vegetative stage (week 2–4)
- Sweet skunk automatic grow report: flowering stage (week 5–10)
- Sweet skunk automatic grow report: harvest (week 11)
- Genetic attributes of sweet skunk automatic
- Growing characteristics of sweet skunk automatic
- Effects and flavour of sweet skunk automatic
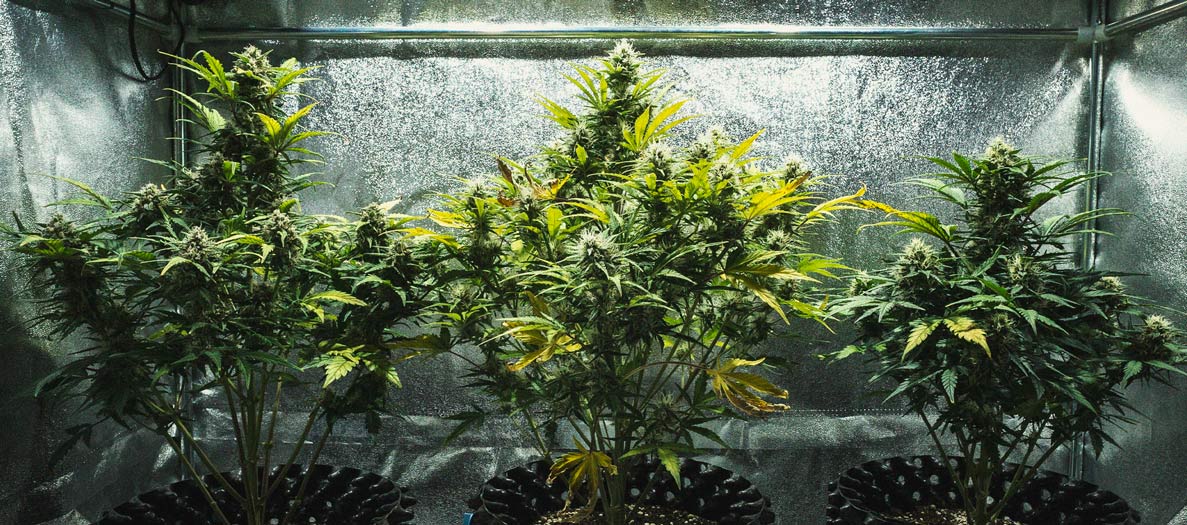
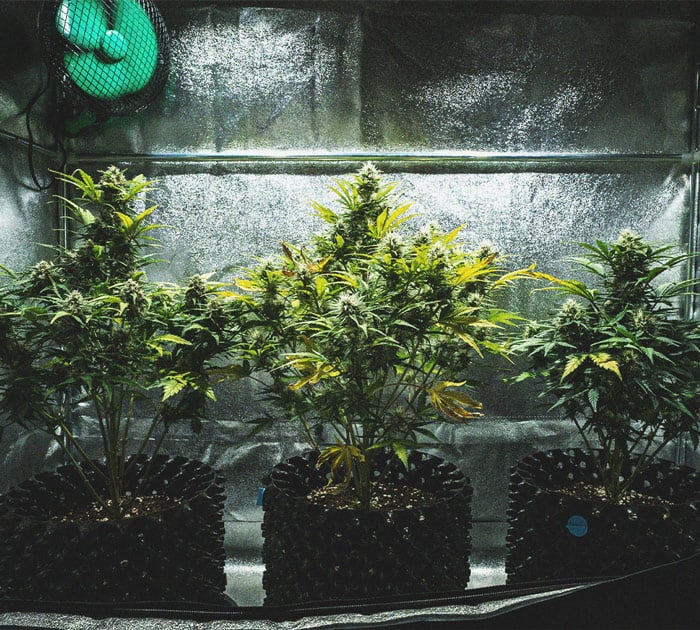
Has Sweet Skunk Automatic caught your eye? Below, you’ll find out exactly how I achieved a great harvest with this variety. I’ll walk you through each week of the growing cycle, sharing everything I did to ensure a healthy and productive plant.
Sweet Skunk Automatic Grow Report: Equipment List
- Box: Secret Jardin DS120W 120 × 60 × 178
- Lights: MIGRO 200+
- Ventilation: TT Silent-M100
- Filter: Prima Klima filter PK 100/125
- Fan: Oscillating Koala Fan
- Humidifier: Beurer LB 45
- Soil: Biobizz Light Mix
- Pot: 11l Air-Pot
- Seed: Royal Queen Seeds
- Nutrition: RQS Organic Nutrition
Sweet Skunk Automatic Grow Report: Seedling Stage (Week 1)
Welcome to the beginning of the seedling stage! Of course, a successful grow always starts with successful germination. During this all-important period, I put together a high-quality growing medium, germinated my seed, and dialled in my lighting and growing environment.
- Germination: Instead of sowing directly in the substrate, I decided to germinate my seed in an RQS Soil Plug. The micronutrients and active biologicals within the plug increase the chances of successful germination and a healthy seedling. I moistened the Soil Plug with a mister, placed my seed into the hole, and kept it moist (but not soaking wet) until the shoot emerged.
- Growing medium: While I waited for my seed to germinate, I created a growing medium containing biologicals and organic nutrients. To start, I added 5l of Biobizz Light Mix into my 11l pot. Then, I thoroughly mixed in the following ingredients:
- RQS Easy Boost Organic Nutrition: 50g
- RQS Bat Guano: 70g
- RQS Rhizobacter: 10g
- RQS Mycorrhiza Mix: 5g
Once adequately mixed, I added in another 5l of Biobizz Light Mix and used my hands to mix everything together once more. I transplanted my Soil Plug into the 11l Air-Pot after the first roots emerged from the plug.
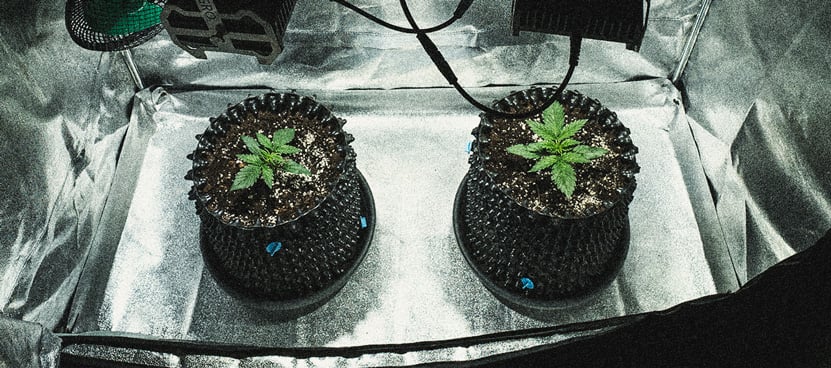
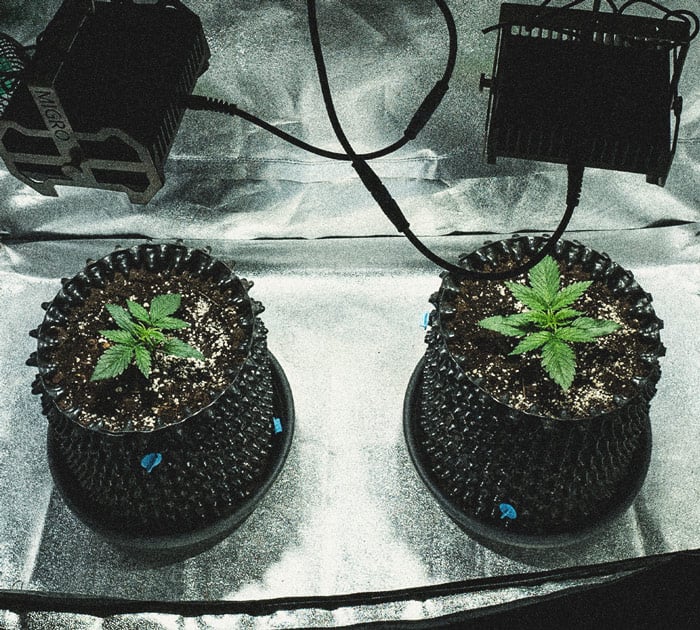
- Lighting: I suspended my two MIGRO 200+ lamps from the top of my grow box using the ratchet straps provided. I positioned each of the lights 35cm horizontally from the midline to ensure an even spread throughout the grow box, and 35cm vertically from the rim of the pot to ensure optimal growth. I started to run them for 24 hours each day as soon as shoots emerged from the Soil Plug.
- Plant status: By the end of the seedling phase, my plant had reached a height of around 4cm and had developed its first set of true leaves.
Sweet Skunk Automatic Grow Report: Vegetative Stage (Week 2–4)
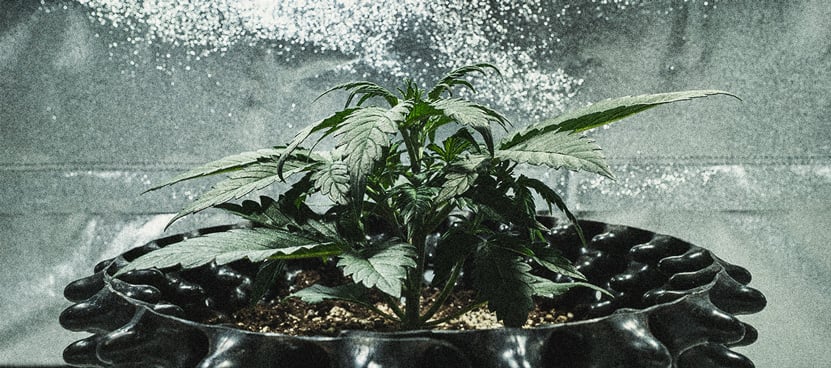
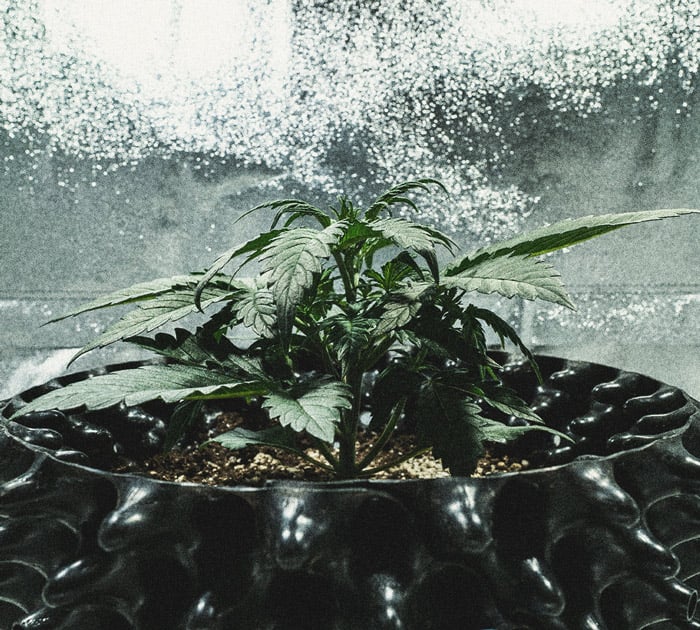
Goodbye seedling stage, hello vegetative phase! My plant packed on a lot of size during this period, developing plenty of organic solar panels—aka fan leaves. Check out what I did during the first few weeks to keep my plant healthy and thriving.
Week 2
My plant surged in size during the first week of the vegetative stage. Because my growing medium already contained plenty of organic nutrients, I decided not to feed—with the exception of some root system support.
- Lighting: I kept my lights running for 24 hours each day and repositioned my lamps to hang 35cm above the top of my plant.
- Nutrients: I applied 1.5l of water regulated to a pH of 6.2 on day 1 of the week. On day 6, I fed my plant with 6ml of humic acid and a seaweed blend mixed into 1.5l of pH-regulated water.
- Environment: I recorded an average temperature of 24°C and relative humidity of 50%.
- Plant status: By the end of week 2, my plant appeared turgid, dark green, and very healthy overall.
Weeks 3 & 4
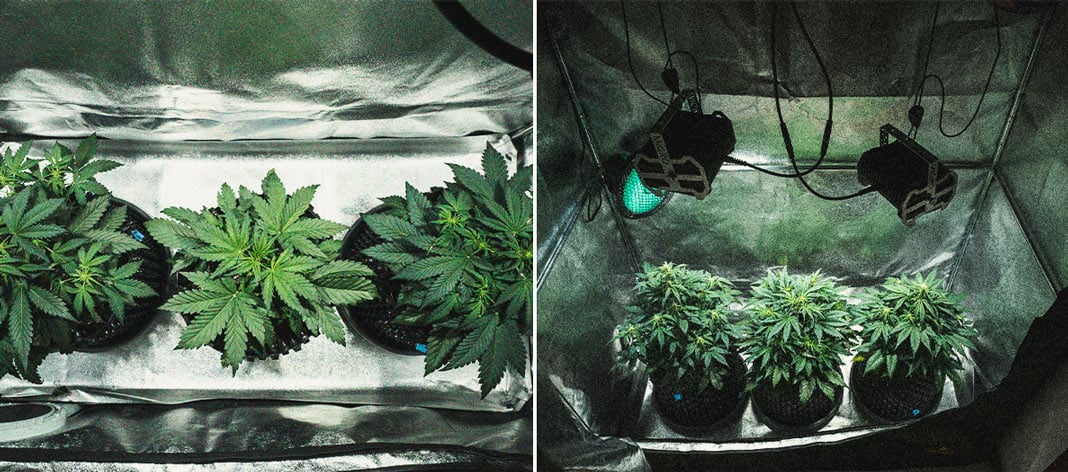
If week 2 pulled back the bowstring, week 3 certainly released it; growth seriously sped up at this point! During the remaining two weeks of veg, I started to feed my plant with RQS veg nutrients to supplement the growing medium with plant-available nitrogen and other key minerals.
- Lighting: I continued to keep my lamps running for 24 hours each day, maintaining a distance of 35cm between the lamps and the tip of the plant.
- Nutrients: I added half of an RQS Easy Grow Booster Tablet to 1.5l of pH-adjusted water and applied it on day 3 of weeks 3 and 4. I also applied 1.5l of pH-adjusted water on day 6 of both weeks.
- Environment: I recorded an average temperature of 24°C and a relative humidity of 50%.
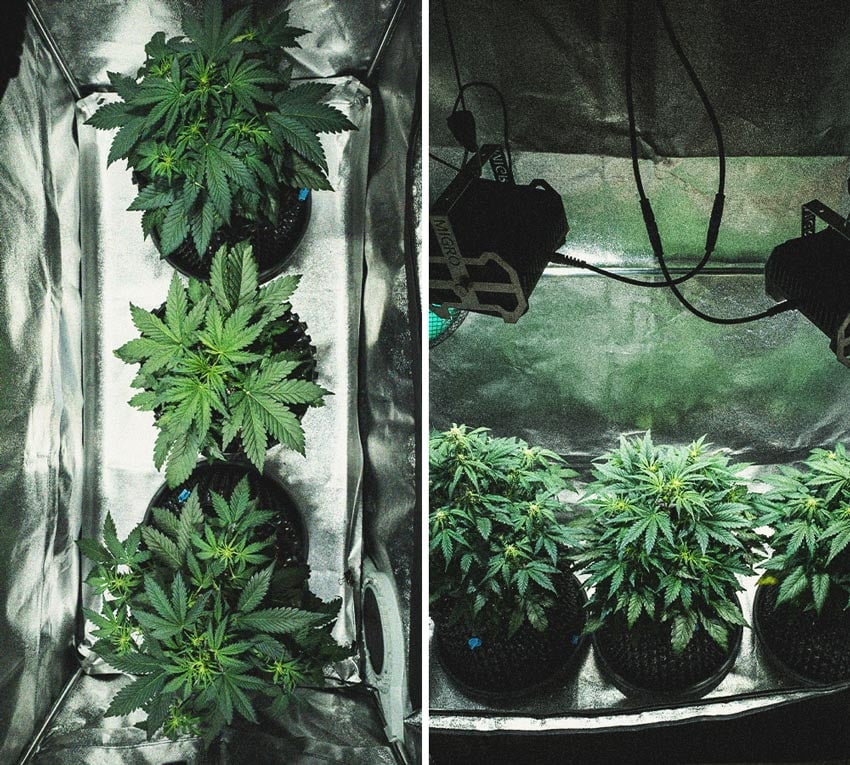
- Plant status: By the end of the vegetative phase, my plant stood at a height of 30cm and had developed a large and dense canopy. I noticed preflowers starting to develop at the nodes.
Sweet Skunk Automatic Grow Report: Flowering Stage (Week 5–10)
During the flowering stage, I implemented several important changes, including a different nutrient regimen to facilitate flowering and some defoliation to improve plant health. I noticed signs of deficiency/disease during this time; however, my plant overcame this brief bout and ended up providing an excellent harvest.
Week 5
To kick-start the flowering phase, I switched up my feeding strategy. I decreased nitrogen input and added higher levels of potassium and phosphorus to aid flower development.
- Lighting: I continued to run my lamps for 24 hours each day at a distance of 35cm from the top of the canopy.
- Nutrients: I didn’t just want good flowers; I wanted buds dripping with resin and packed with cannabinoids. To achieve this, I added RQS Easy Bloom Booster Tablets to my feeding regimen to provide higher levels of phosphorus and potassium. With macronutrients in place, I also included RQS Easy Plus Micronutrients to cover any gaps. This product contains boron, iron, manganese, zinc, molybdenum, calcium, magnesium, and B vitamins to facilitate key physiological functions.
On day 1 of the week, I added one-third of an Easy Bloom Booster Tablet into 1.5l of pH-adjusted water and fed my plant. On day 5 of the week, I added one-third of an Easy Plus Micronutrients tablet into 1.5l of pH-adjusted water and fed my plant again.
- Environment: I recorded an average temperature of 24°C and a relative humidity of 42%.
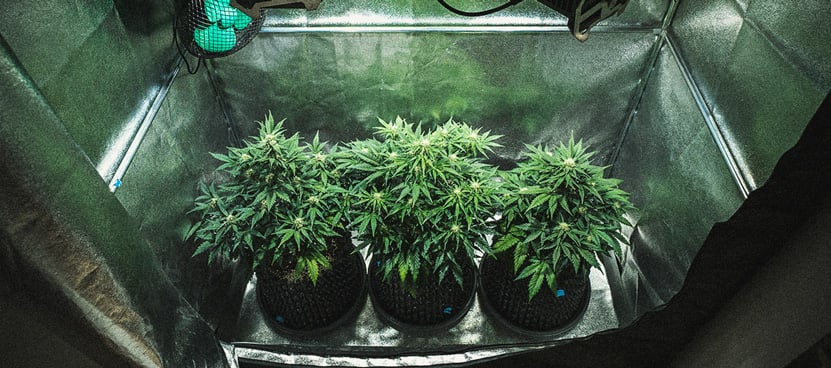
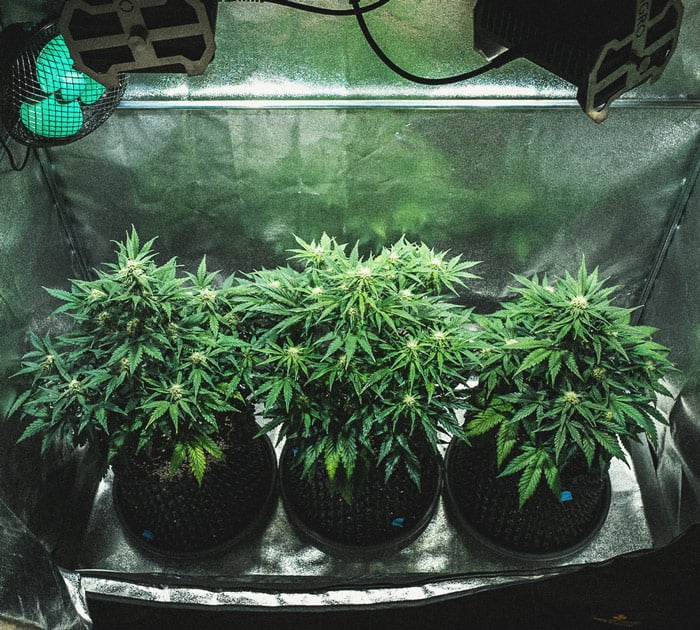
- Plant status: During the week, I defoliated the canopy, removing most of the lower fan leaves and any that were blocking light from developing bud sites. Not only did this improve light penetration, but it would help to enhance aeration and reduce the chances of mould later on in the flowering phase. At the end of week 5, my plant had reached a height of 47cm.
Weeks 6 & 7
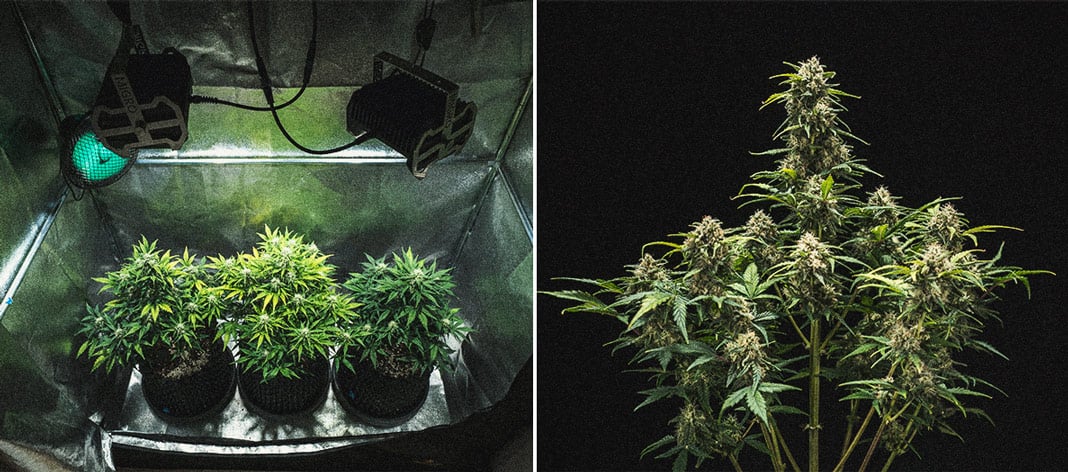
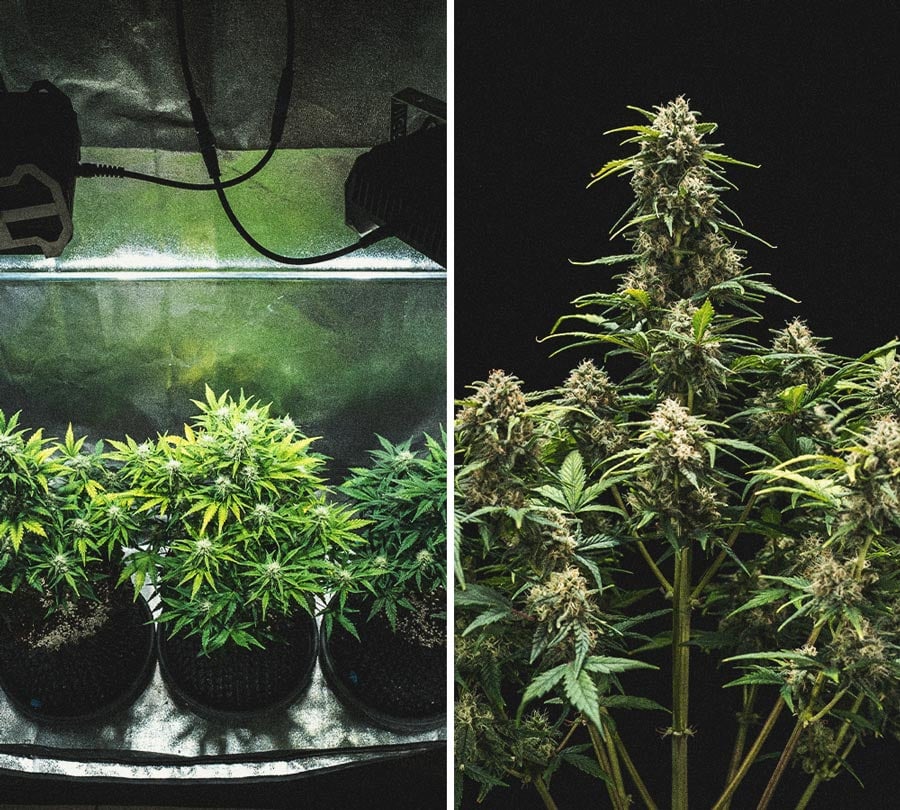
The next two weeks came with both highs and lows. The flowers started to develop fast and became covered in trichomes and pistils. However, I did notice a sign of deficiency, disease, or tissue damage that was worrying at first. Thankfully, I managed to remove the affected tissue, and it didn’t return.
- Lighting: I reduced the light cycle to 20 hours on and 4 hours off, but kept my lamps at a distance of 35cm above the plant.
- Nutrients: On day 2 of both weeks, I fed my plant with one-third of an Easy Plus Micronutrients tablet mixed into 1.5l of pH-adjusted water. On day 6 of both weeks, I fed my plant again by adding ⅓ of an Easy Bloom Booster Tablet into 1.5l of pH-adjusted water.
- Environment: I recorded an average temperature of 24°C and a relative humidity of 40%.
- Plant status: At the end of week 7, my plant stood at a final height of 49cm. Partway through the week, I noticed some yellowing on the tips of several leaves, along with black spots. Considering that I had fed my plant generously, I put this down to some kind of pathogen. I defoliated all of the affected vegetation and the problem didn’t return.
Week 8
Week 8 marked the final week of feeding. My canopy really started to thicken out during this time. The buds began to seriously swell, and a strong smell of terpenes permeated the air.
- Lighting: I continued to run my lamps for 20 hours each day at a distance of 35cm above the canopy.
- Nutrients: Because my plant seemed mostly healthy and well-developed, I held back on the micronutrients and applied one last dose of flowering nutrients. I added one-third of an Easy Bloom Booster Tablet into 1.5l of pH-adjusted water and administered it on day 2 of the week. On day 6, I withheld all nutrients and instead applied 1.5l of pH-adjusted water.
- Environment: I recorded an average temperature of 24°C and a relative humidity of 40%.
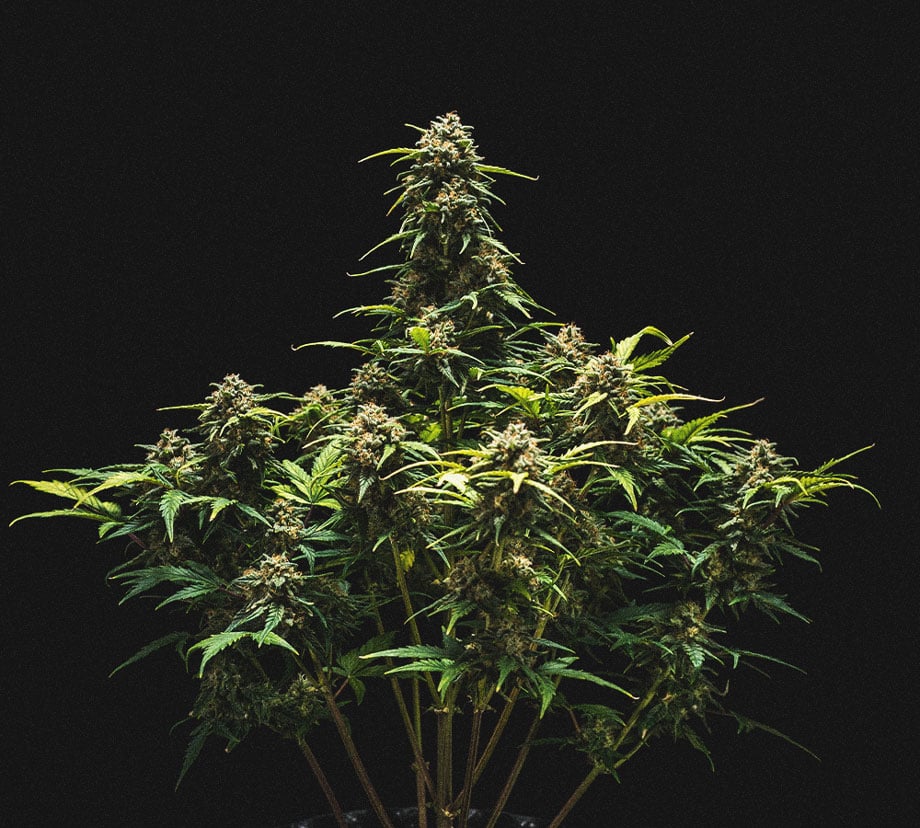
- Plant status: Everything looked great! The buds smelled incredible and some of the stigmas started to turn orange—a sign of increasing maturity.

Weeks 9 & 10 (Flush)
I withheld all nutrients going forward and flushed my plants to improve their smoothness and flavour.
- Lighting: Lights remained on for 20 hours per day at a distance of 35cm from the canopy.
- Nutrients: I applied 1.5l of pH-adjusted water on day 2 of each week.
- Environment: I recorded an average temperature of 24°C and a relative humidity of 38%.
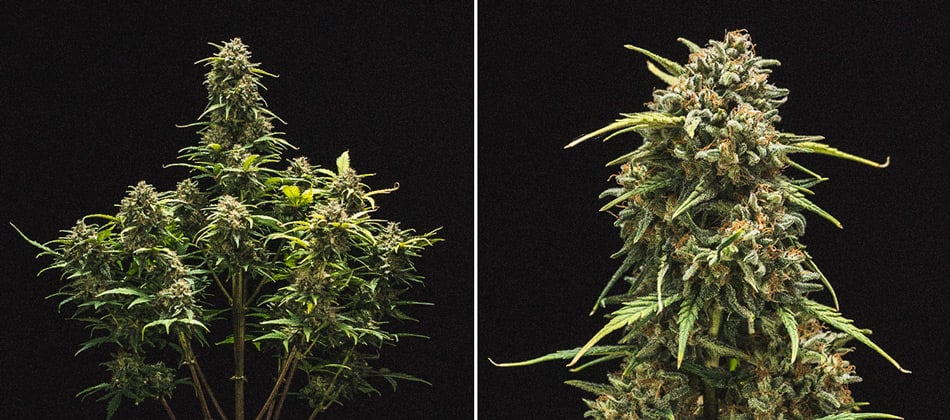
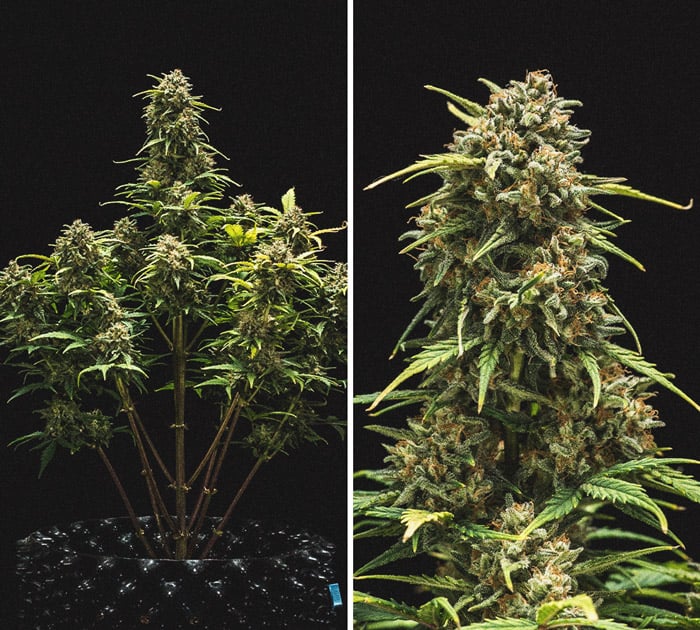
- Plant status: The smell of the buds became increasingly strong, the trichomes became milkier in appearance, and the stigmas turned orange. All of these signs indicated that it was time to harvest my plant.
Sweet Skunk Automatic Grow Report: Harvest (Week 11)
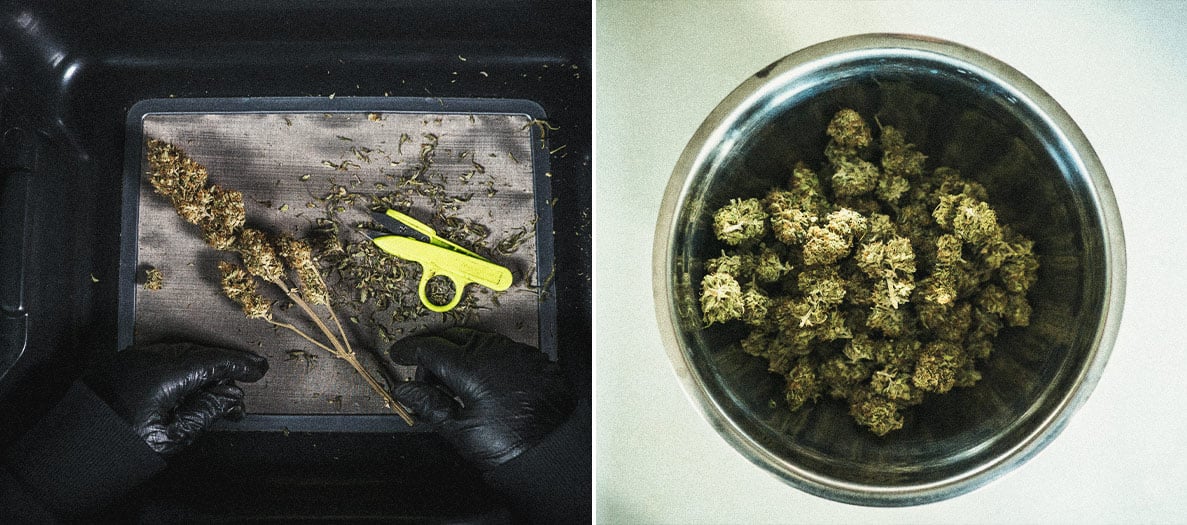
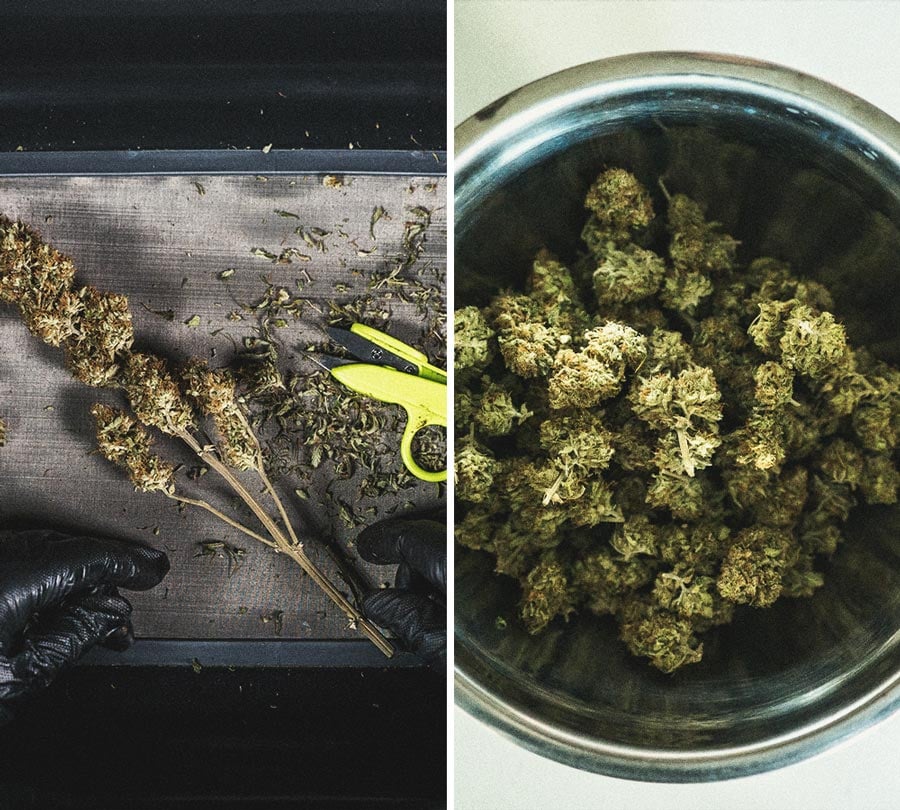
Harvest time—the pinnacle of every grow—had arrived! I cut my plant at the base and hung it upside down from the top of the grow tent. I switched off the lights, left the fan running, and let it dry for 10 days. At this point, I used curved trimming scissors to dry-trim my buds, and then placed them into jars with Moisture Fighters and let them cure for 6 weeks. Overall, I obtained a dry yield of 80g.
Genetic Attributes of Sweet Skunk Automatic
Sweet Skunk Automatic is a flavourful and uplifting cultivar that hits the sweet spot for most smokers. The talented breeding team at Royal Queen Seeds created this polyhybrid by crossing Early Skunk, Critical, and a high-performing ruderalis specimen. As a direct descendant of Skunk #1, Early Skunk passed down an indica-dominant genetic profile and pungent skunky aromas. Likewise, Critical brought gassy and floral aromas to the table, along with a comforting and stoning high. The addition of ruderalis added the cherry on top—autoflowering genetics. Overall, Sweet Skunk Automatic features 60% indica genetics, 30% ruderalis, and 10% sativa.
Sweet Skunk Auto
|
|
Early Skunk x Critical x Ruderalis |
|
|
400 - 450 gr/m2 |
|
|
40 - 80 cm |
|
|
55 - 60 days |
|
|
THC: Up to 15% |
|
|
Sativa 10% Indica 60% Ruderalis 30% |
|
|
60 - 110 gr/plant |
|
|
60 - 100 cm |
|
|
Clear, Uplifting |
|
|
75 - 85 days after sprouting |
Growing Characteristics of Sweet Skunk Automatic
Speedy. Short. Stealthy. These three adjectives sum up Sweet Skunk Automatic perfectly, and make her ideal for growers dealing with limited space or strict laws. Indoors, this variety grows to a short height of 40–80cm. You can keep her at the lower end of the spectrum by using small containers and training techniques. Despite her short stature, her quality genetics are able to produce up to 450g/m² under adequate lights. Outdoors, plants grow to a taller height of 60–100cm and pump out 60–110g/plant. Regardless of where you grow her, she’ll race from seed to harvest in as little as 11 weeks.
Effects and Flavour of Sweet Skunk Automatic
The clue is in the name. The dense and frosty flowers of this strain produce a delightful terpene profile dominated by contrasting notes of sweetness, earth, and Skunk. In terms of effects, Sweet Skunk Automatic possesses a THC content of 15%, resulting in an extremely pleasant, but not overwhelming, stone. You can blaze this strain at any time of day and have a good time, from early in the morning with a coffee to late at night with a chilled beer.
 Grow Guide Topic Finder
- Growing weed step by step
- Cannabis growing basics
- Choosing your seeds
- How to germinate seeds
- The cannabis vegetative stage
- The cannabis flowering stage
- Harvesting cannabis
- Trimming, drying, and curing
- Choosing pots and soil
-
Growing indoors
- A Complete Overview Of Growing Cannabis Indoors
- Cannabis Cultivation Tips: How To Set Up Indoor Grow Lights
- How Many Cannabis Plants Can You Grow Per Square Metre?
- Indoor Cannabis Growing: Relative Humidity and Temperatures
- Hydroponics Cannabis Growing Guide (with diagrams)
- Cannabis Micro Growing: Growing Great Weed in Tiny Spaces
- Growing outdoors
- How to grow autoflowering cannabis
- Cannabis nutrients and pH
- Cannabis troubleshooting: Nutrients
-
Cannabis troubleshooting: Growing
- Cannabis Seed Germination — Troubleshooting Guide
- How to Deal With Pythium (Root Rot) in Cannabis Plants
- Slow Cannabis Plant Growth And What You Can Do About It
- How to Deal With Leggy Cannabis Seedlings
- Watering Your Cannabis: How to Fix Overwatering and Underwatering
- Understanding Male, Female, And Hermaphrodite Cannabis
- Identifying and Treating Common Cannabis Ailments
- How To Revive a Sick Cannabis Plant
- How to Avoid Mouldy Weed During Drying and Curing
- How to Prevent and Treat Dry and Crispy Cannabis Leaves
- What Cannabis Leaves Can Tell You
- Causes and Solutions for Yellow Cannabis Leaves
-
Cannabis Strains Grow Report
- HulkBerry Automatic Grow Report
- Blue Cheese Auto Grow Report
- Purple Punch Automatic Strain Grow Report
- Triple G Automatic Grow Report
- Do-Si-Dos Automatic Grow Report
- Green Gelato Automatic Grow Report
- Haze Berry Automatic Grow Report
- Purple Queen Automatic Grow Report
- Cookies Gelato Automatic Grow Report
- Sherbet Queen Automatic Grow Report
- Sweet Skunk Automatic Grow Report
- Medusa F1 Grow Report
- Cannabis plant training
-
Weed growing tips
- The Cannabis Plant Anatomy
- How to preserve seeds - UK
- How Much Sunlight Do Outdoor Cannabis Plants Need To Grow?
- How to Control and Prevent Stretching in Cannabis Plants
- My Cannabis Plants Are Growing Too Tall: What Should I Do?
- Should You Worry About Purple Or Red Cannabis Stems?
- What To Do When Your Indoor Cannabis Won’t Flower
- How To Protect Your Cannabis Plants From Heat Stress
- How To Tell If Your Female Cannabis Plant Has Been Pollinated
- Growing Medical Marijuana
- Bud Washing: How to Clean Your Weed
- Understanding Cannabis Yield per Plant


