 Weed Grow Guide by Royal Queen Seeds
- Growing weed step by step
- Cannabis growing basics
- Choosing your seeds
- How to germinate seeds
- The cannabis vegetative stage
- The cannabis flowering stage
- Harvesting cannabis
- Trimming, drying, and curing
- Choosing pots and soil
-
Growing indoors
- A Complete Overview Of Growing Cannabis Indoors
- Cannabis Cultivation Tips: How To Set Up Indoor Grow Lights
- How Many Cannabis Plants Can You Grow Per Square Metre?
- Indoor Cannabis Growing: Relative Humidity and Temperatures
- Hydroponics Cannabis Growing Guide (with diagrams)
- Cannabis Micro Growing: Growing Great Weed in Tiny Spaces
- Growing outdoors
- How to grow autoflowering cannabis
- Cannabis nutrients and pH
- Cannabis troubleshooting: Nutrients
-
Cannabis troubleshooting: Growing
- Cannabis Seed Germination — Troubleshooting Guide
- How to Deal With Pythium (Root Rot) in Cannabis Plants
- Slow Cannabis Plant Growth And What You Can Do About It
- How to Deal With Leggy Cannabis Seedlings
- Watering Your Cannabis: How to Fix Overwatering and Underwatering
- Understanding Male, Female, And Hermaphrodite Cannabis
- Identifying and Treating Common Cannabis Ailments
- How To Revive a Sick Cannabis Plant
- How to Avoid Mouldy Weed During Drying and Curing
- How to Prevent and Treat Dry and Crispy Cannabis Leaves
- What Cannabis Leaves Can Tell You
- Causes and Solutions for Yellow Cannabis Leaves
-
Cannabis Strains Grow Report
- HulkBerry Automatic Grow Report
- Blue Cheese Auto Grow Report
- Purple Punch Automatic Strain Grow Report
- Triple G Automatic Grow Report
- Do-Si-Dos Automatic Grow Report
- Green Gelato Automatic Grow Report
- Haze Berry Automatic Grow Report
- Purple Queen Automatic Grow Report
- Cookies Gelato Automatic Grow Report
- Sherbet Queen Automatic Grow Report
- Sweet Skunk Automatic Grow Report
- Medusa F1 Grow Report
- Cannabis plant training
-
Weed growing tips
- The Cannabis Plant Anatomy
- How to preserve seeds - UK
- How Much Sunlight Do Outdoor Cannabis Plants Need To Grow?
- How to Control and Prevent Stretching in Cannabis Plants
- My Cannabis Plants Are Growing Too Tall: What Should I Do?
- Should You Worry About Purple Or Red Cannabis Stems?
- What To Do When Your Indoor Cannabis Won’t Flower
- How To Protect Your Cannabis Plants From Heat Stress
- How To Tell If Your Female Cannabis Plant Has Been Pollinated
- Growing Medical Marijuana
- Bud Washing: How to Clean Your Weed
- Understanding Cannabis Yield per Plant
Identifying and Treating Common Cannabis Ailments
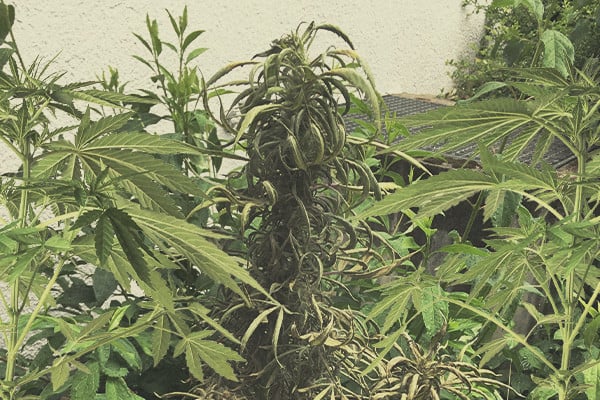
Like any other crop, cannabis can be subject to pests, fungal infections, viruses, and a variety of other problems that can be detrimental to the quality and size of your harvest. Knowing how to tell nutrient deficiencies from root rot and mould, for example, is key to treating a cannabis ailment early and minimising its effect on the health of your plants.
Contents:
- Nutrient-related cannabis problems
- Ph-related cannabis plant problems
- Root-related cannabis problems
- Environmental cannabis plant problems
- Cannabis moulds: bud rot and powdery mildew
- Identifying common cannabis fungi
- Viral cannabis flowers
- Spotting common cannabis pests
- Other common cannabis problems
Nutrient-related Cannabis Problems
Both overfeeding and underfeeding create stress for a plant that may cause it to develop symptoms like discoloured or malformed foliage and stunted growth. Some of the most common nutrient-related cannabis problems include:
Nutrient Deficiencies
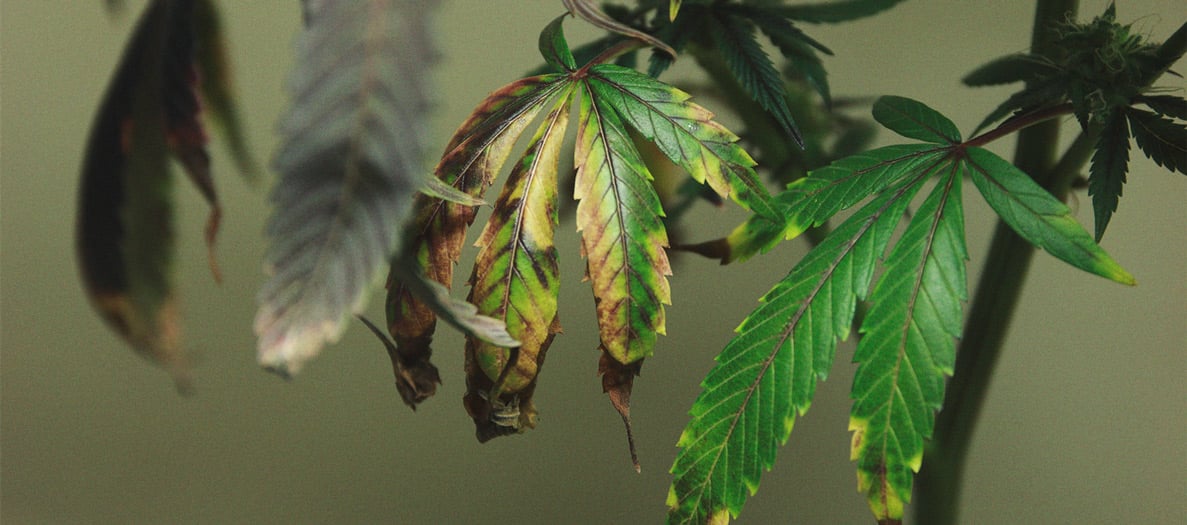
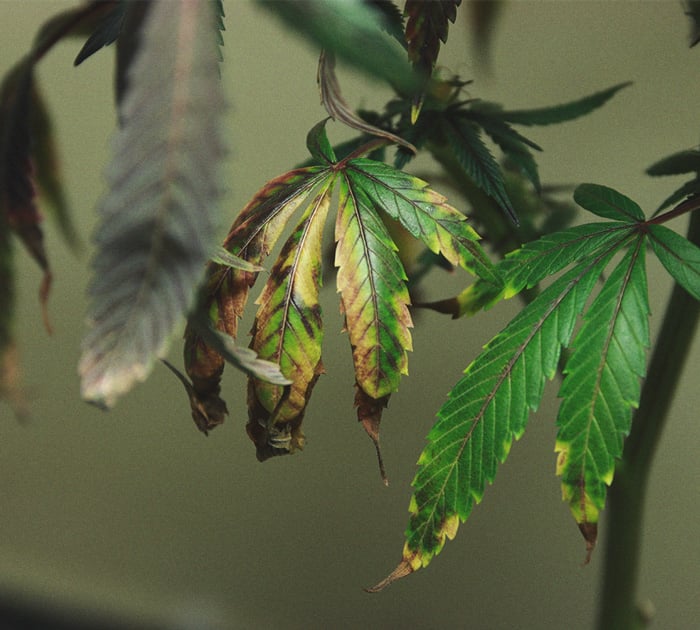
Inexperienced growers often think that cannabis just needs three nutrients: nitrogen (N), phosphorus (P), and potassium (K). And while these macronutrients are indeed vital to healthy growth, cannabis plants need a complex mix of macro, secondary, and micronutrients to fuel both vegetative growth and flowering. When your plants don’t get the right amount of nutrients, they develop deficiencies that cause the death of old and young leaves, and leaf discolouration.
Nutrient deficiencies are typically caused by underfeeding, pH imbalance, and nutrient lockout. Left untreated, a nutrient deficiency can severely stunt a plant’s development and reduce both the quality and size of its yield.
The exact symptoms of nutrient deficiencies vary depending on what nutrient your plant is missing. Some common symptoms include:
- Dying old or young leaves
- Yellowing or brown leaves
- Red or purple stems
- Spotted or dry leaves
- Curled leaf tips and edges
- Stretching
- Warped leaves and stems
Some nutrient deficiencies can be remedied by simply upping the amount you feed your plants. In cases where it's a result of pH imbalance and/or nutrient lockout, however, plants will require different treatment methods.
Nutrient Burn
The opposite of a deficiency—nutrient burn—occurs when plants get more nutrients than they need. Overfeeding is an obvious cause of nutrient burn, but, here too, pH imbalances or nutrient lockout are also common causes. Characteristic signs of nutrient burn are dry, brown, and sometimes curled leaf tips and edges.
You must follow a strict feeding calendar and check your pH and EC levels before and after each feed to ensure your plants are not just getting their nutrients, but are also able to absorb them properly.
It’s worth noting that nutrient burn is typically only associated with the use of chemical fertilisers. Organic nutrients, which have a slow-release formula, typically don’t cause nutrient burn, as they take longer to be broken down and absorbed by your plants.
Nutrient Lockout
Nutrient lockout is caused by a chemical reaction between your plant, its medium, and your fertiliser. This reaction essentially inhibits your plant’s ability to absorb nutrients from its medium, which eventually leads to a nutrient deficiency.
Nutrient lockout typically occurs when you use concentrated chemical fertilisers over extended periods of time. Trace amounts of nutrients and salts from your fertiliser can build up in your medium, changing its pH and interfering with your plant’s ability to absorb nutrients in the future.
Typically, nutrient lockout is treated by flushing the substrate with pH balanced water and starting your feeding regime over again. Many growers also opt to start feeding slightly less to avoid running into the same issue again.
PH-Related Cannabis Plant Problems
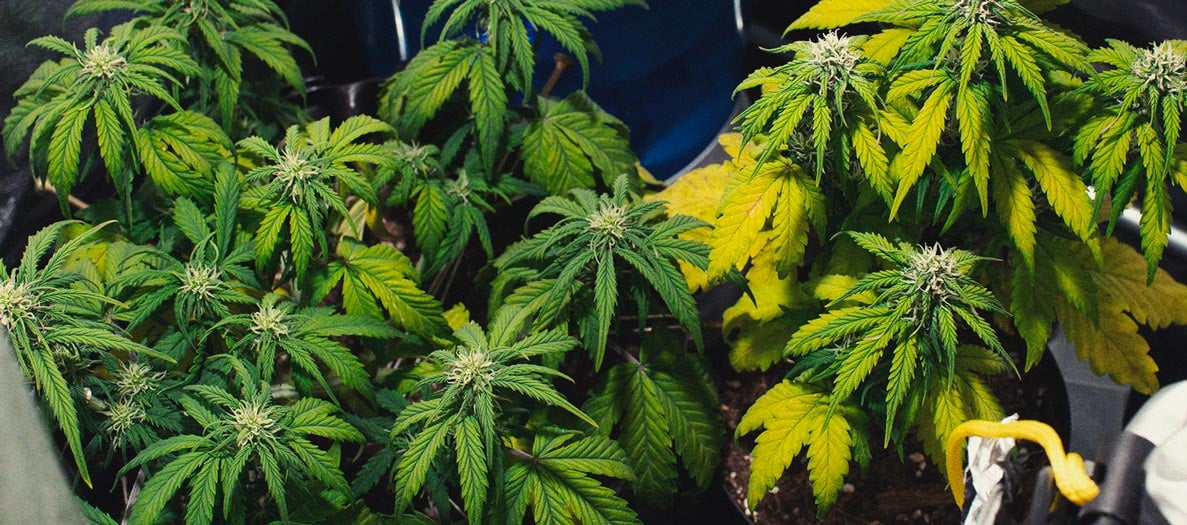
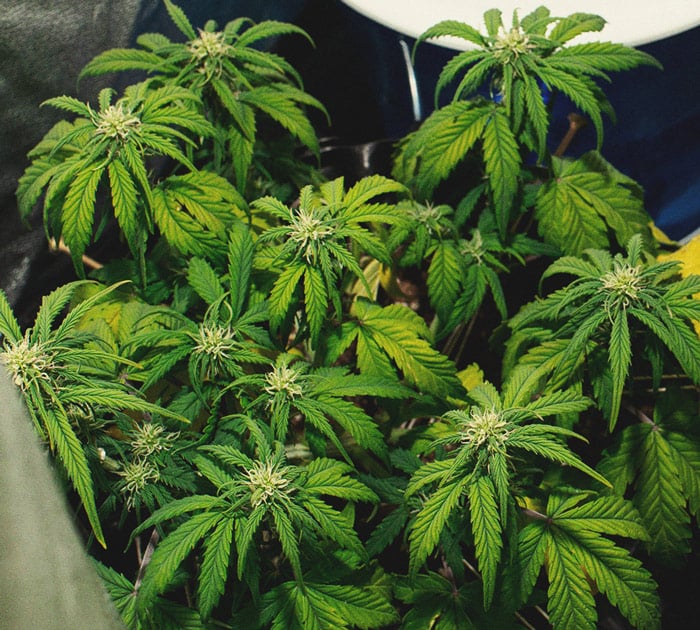
Unlike other plants, cannabis is only able to absorb nutrients within a small pH window; if your soil, water, or fertiliser is outside that window, your plant won’t be able to feed properly. Not only will you be wasting expensive nutrients, but you might also have to deal with nutrient deficiencies and/or lockout further down the road.
Cannabis plants like growing in slightly acidic soil, with an optimal pH of around 6–7. However, we’ve found that some fluctuation between 6 and 7 pH optimises cannabis’ ability to take up a variety of macro, secondary, and micronutrients.
In hydroponic or soilless setups, cannabis grows best at a pH of 5.5–6.5. Again, some fluctuation can help your plants properly take up a variety of nutrients.
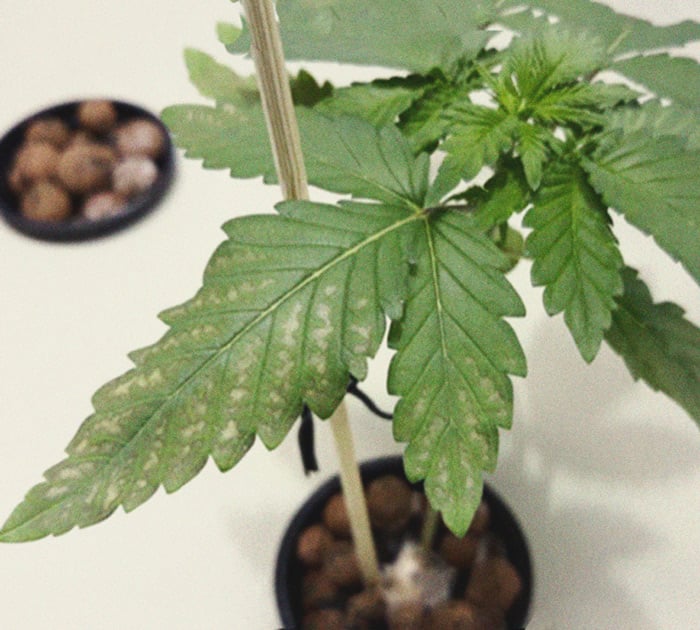
Signs Of Overwatering Or Underwatering Cannabis
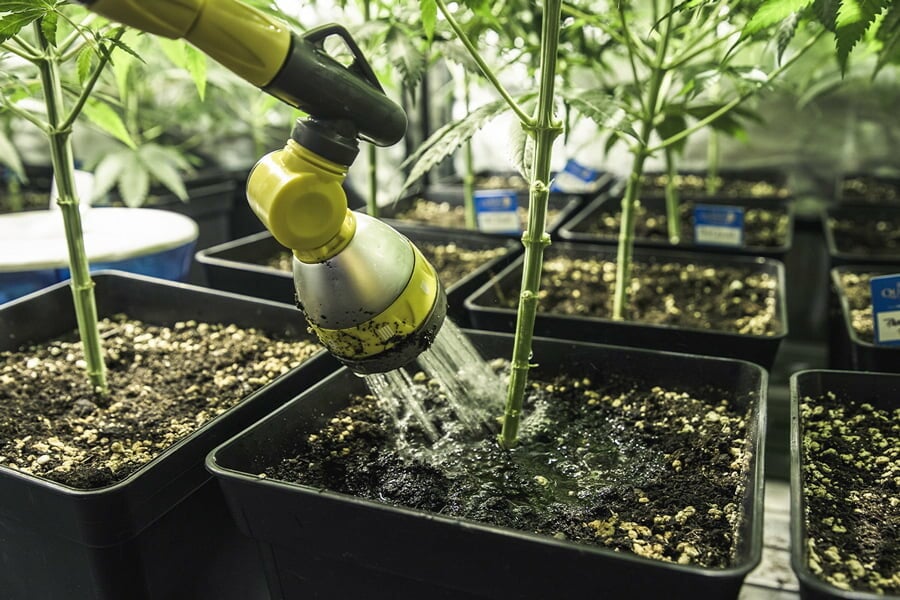
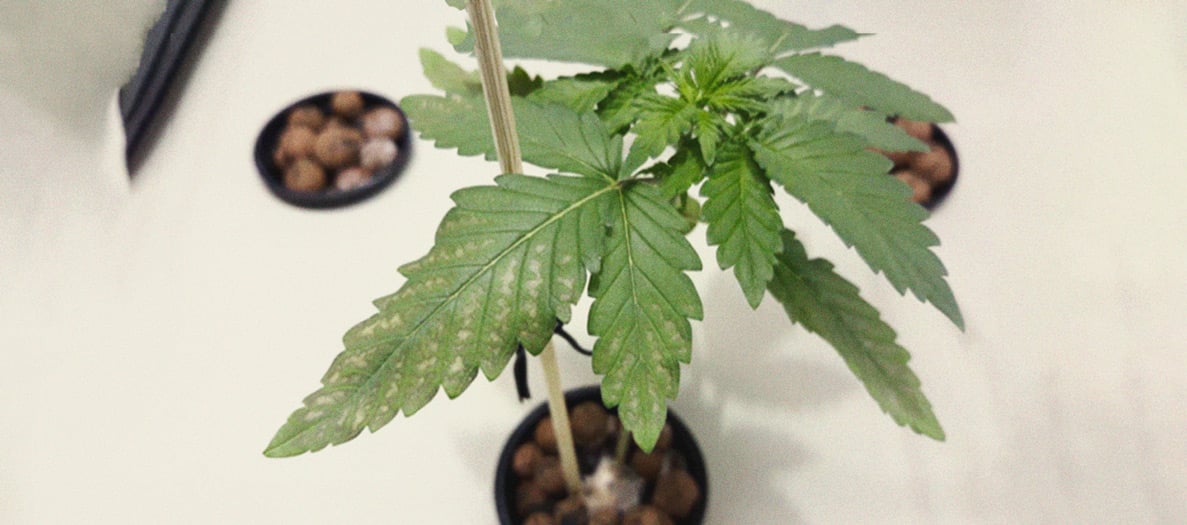
Either way, underwatering and overwatering cannabis interferes with many of the plant’s biological processes, causing stress and stunted growth. Overly humid or dry soil also attracts pests like fungus gnats, spider mites, and more, depending on conditions.
Unfortunately, overwatered and underwatered plants develop the same symptoms; their leaves droop, and over time they’ll start to wither and die. Your soil, however, will often tell you where you’re going wrong; if it’s bone dry, you're watering too little, and if it’s wet and sludgy, you’re likely overdoing it.
To avoid overwatering or underwatering, remember to:
- Stick your finger in your soil roughly one knuckle deep and only water when it’s completely dry.
- Ensure you’re growing in light, well-aerated soil in pots with enough drainage holes.
- Defoliate or lollipop your plants to improve airflow around the soil so it dries faster.
- Read our comprehensive guide on how to properly water cannabis plants.
Want to set your plants up for healthy growth? Download our Grow Guide for expert tips on optimal growing conditions.
Free RQS
Grow Guide!

Root-related Cannabis Problems
Not only do roots anchor a plant in place, but they also take up oxygen, water, and nutrients from the medium and transport them up to the stem, leaves, and flowers. A plant's roots also store and release energy produced during photosynthesis to fuel growth and deal with injury as needed.
Some of the most common root-related problems affecting cannabis growers include:
Root-Bound Plants
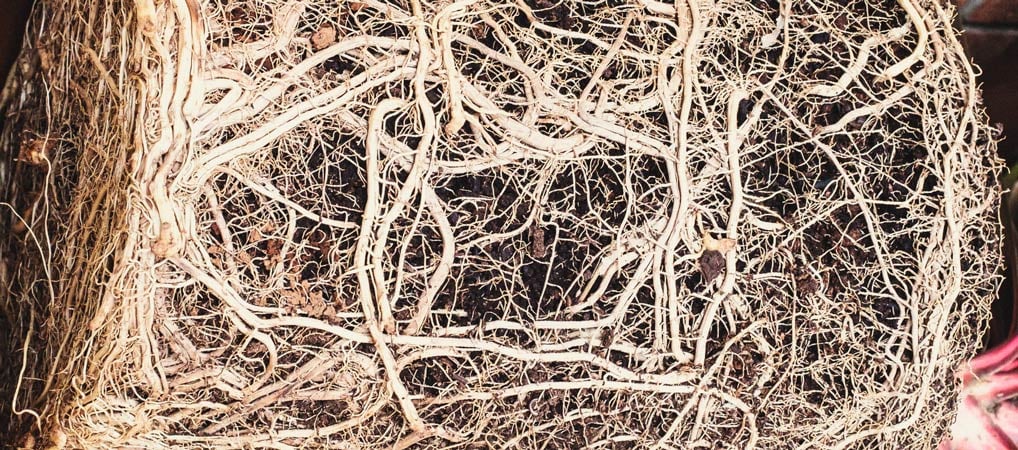
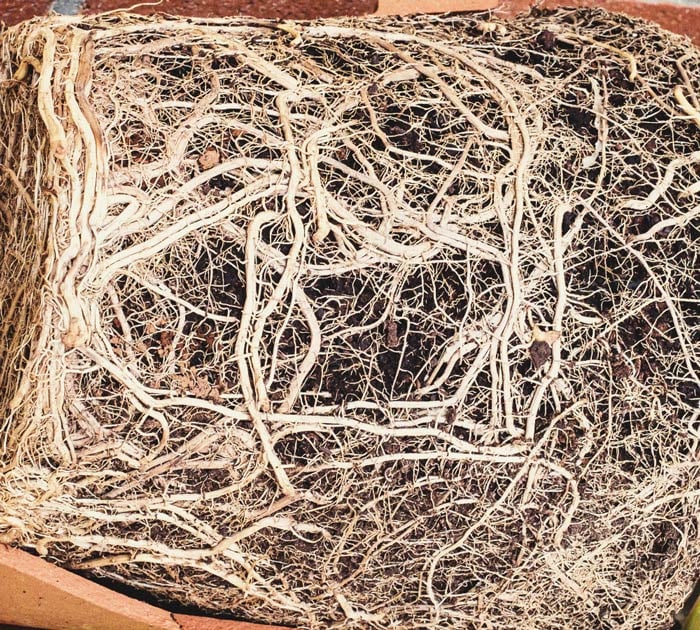
Plants become root-bound when they completely outgrow their containers. The roots will have grown around the circumference of their pot, forming a tight knot. Not only does this stress the plant, but it also affects its ability to take up water and nutrients, which can lead to deficiencies, pH imbalances, and nutrient lockout.
If your plants are root-bound, you’ll need to transplant them to bigger containers. When doing so, do your best to untangle the roots (where possible). In severe cases, you might have to prune the roots using a sharp pair of scissors or a knife. After transplanting, give your plants at least one week to recover from the stress of transplanting.
To stop your cannabis from becoming root-bound in the future, up-pot plants regularly and at the right time; that is, just before their roots reach the circumference of their containers. Seedlings, for example, can be transplanted once they’ve gained some height and developed true leaves that cover the circumference of their starter pots.
Root Rot
As the name suggests, root rot is characterised by rotting, sick roots. In soil or coco setups, it’s usually caused by drainage issues or overwatering, both of which cause stagnant water to build up around the roots, creating a breeding ground for bacteria or fungi.
In hydro setups, root rot is typically caused by heat, light leaks, lack of water oxygen levels, or decomposing matter in the reservoir. All of these causes invite root-rotting bacteria and fungi (like Fusarium) into your reservoir.
Rotting roots look brown and slimy and sometimes smell bad. Above ground, plants with root rot will droop and wilt, developing yellow or white foliage. Root rot can also cause deficiencies as the plant struggles to take up nutrients from its medium.
To treat root rot, you’ll need to administer beneficial bacteria to the plant's roots to fight any pathogens. If you’re growing in soil, you’ll want to transplant your plants into fresh soil and new containers, ensuring your soil is well-aerated and your pots have enough drainage holes. If you’re growing hydroponically, you’ll want to clean and disinfect your entire setup, create a new reservoir with plenty of oxygen, and address any light leaks or heat issues.
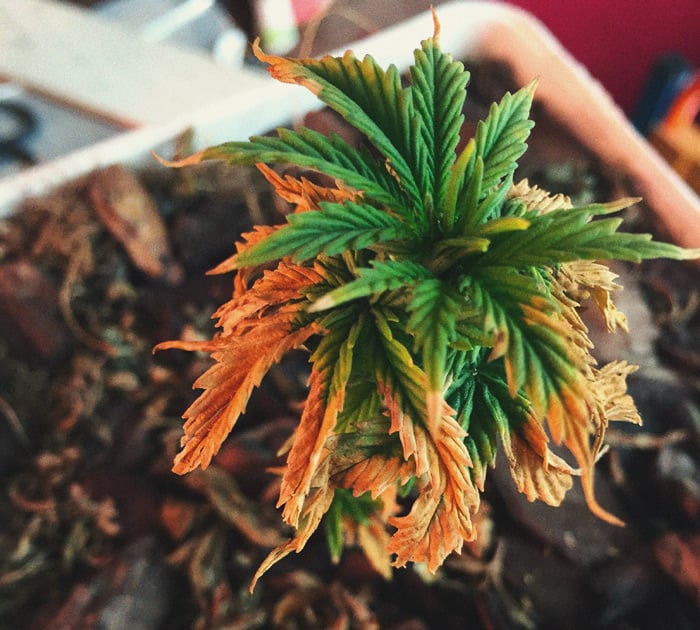
Environmental Cannabis Plant Problems
Whether you’re growing indoors or outdoors, environmental factors like temperature, humidity, light, and airflow can stress your plants when not regulated properly.
Heat Stress Or Cold
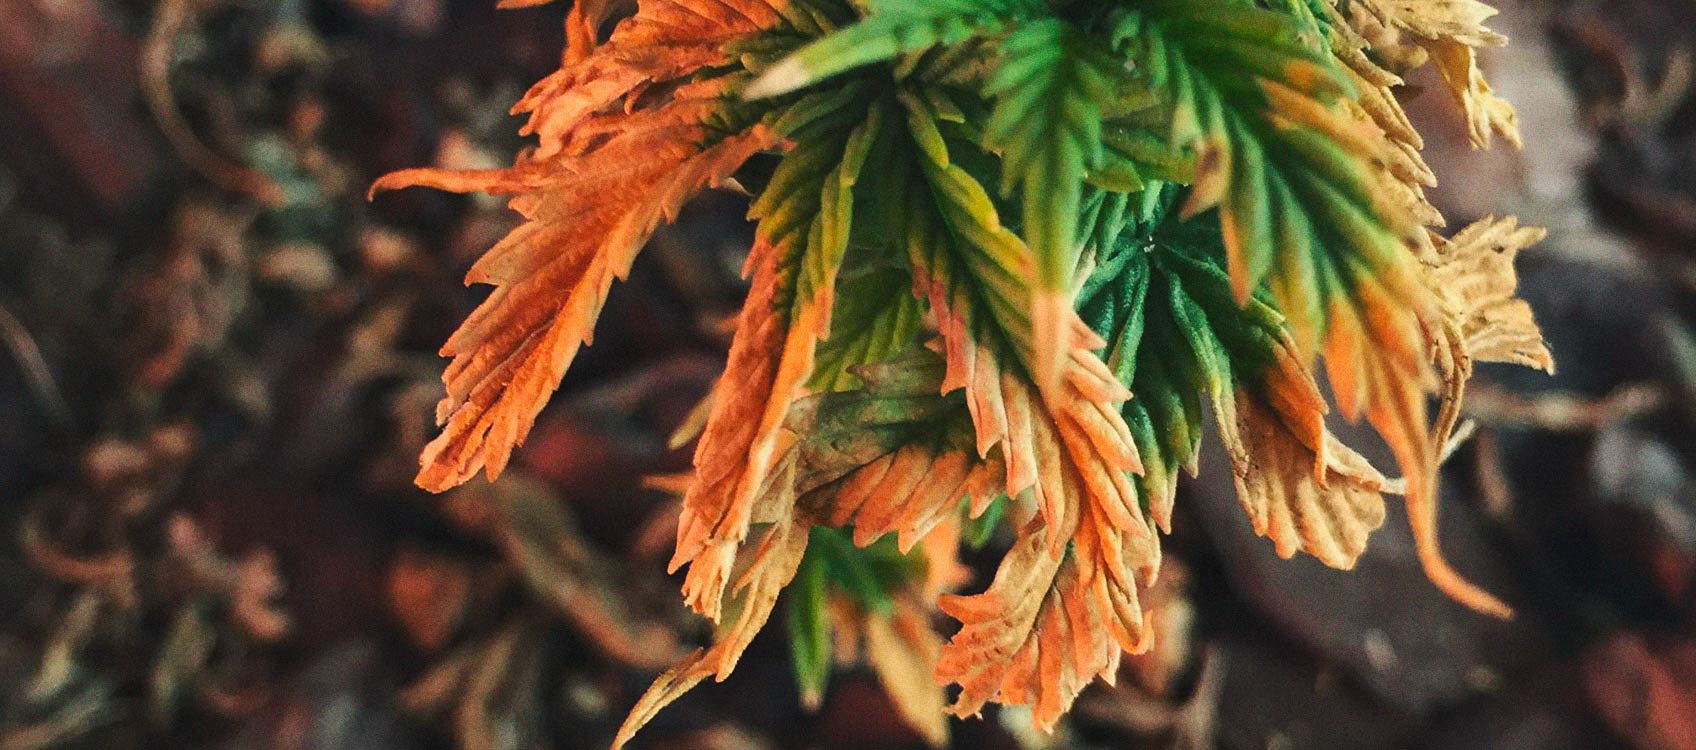
Cannabis plants prefer different temperatures during different stages of their life cycle. When temperatures get too hot, plants will develop upward-curling leaves that look and feel dry. Over time, heat-stressed plants may also develop brown spots or white blotches along the edges of their fan leaves.
The first step to dealing with heat stress indoors is using fans to move air around your plants and a ventilation system to remove old air and replace it with fresher, cooler air from outside. If that’s not enough, you might need to use air conditioning to gain more control over the temperatures in your grow space. Finally, if your lights are giving off too much heat, you may need to invest in a different lighting solution (like LEDs, for example).
Just like extreme heat can damage your plants, so can the cold. If your plants are exposed to temperatures below 15°C, their growth will slow down (due to reduced photosynthesis) and they’ll also be at a higher risk of dealing with pathogens like mould. Even if they don’t show signs of stress, plants growing in low temperatures typically don’t yield as well as those grown in optimal temperatures.
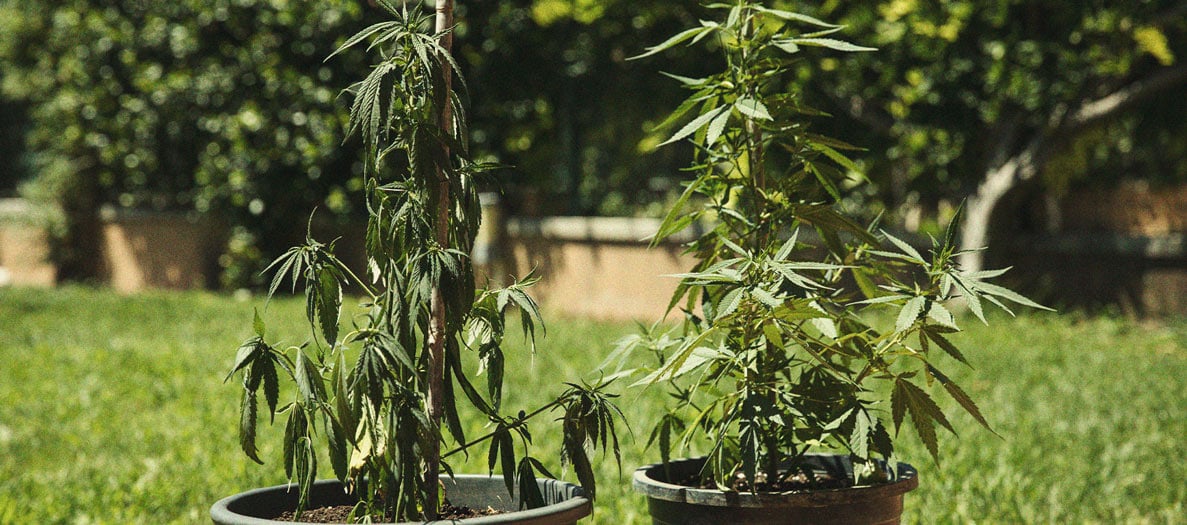
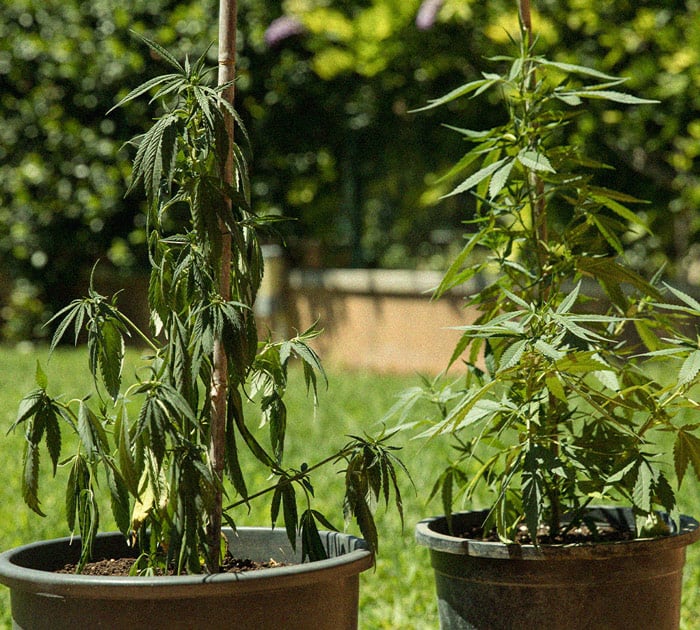
To avoid running into these problems, follow our temperature and humidity guidelines, and remember to:
- Use a thermometer and hygrometer to measure the temperature and humidity in your grow room.
- Use fans to move air around your plants.
- Use a ventilation system to circulate air in and out of your grow room.
- Use low-heat LED grow lights.
If you’re an outdoor grower dealing with extreme heat or cold, pay attention to the weather report and bring your plants inside when temperatures are expected to reach peak highs/lows. Also, consider using a greenhouse or polytunnel for more control over temperature and/or humidity.
Light Burn
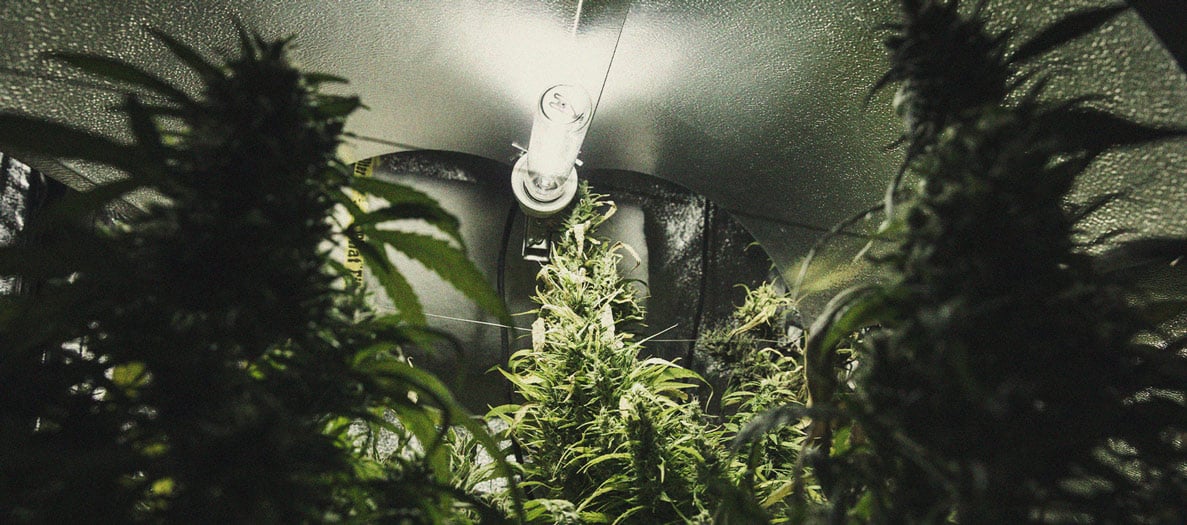
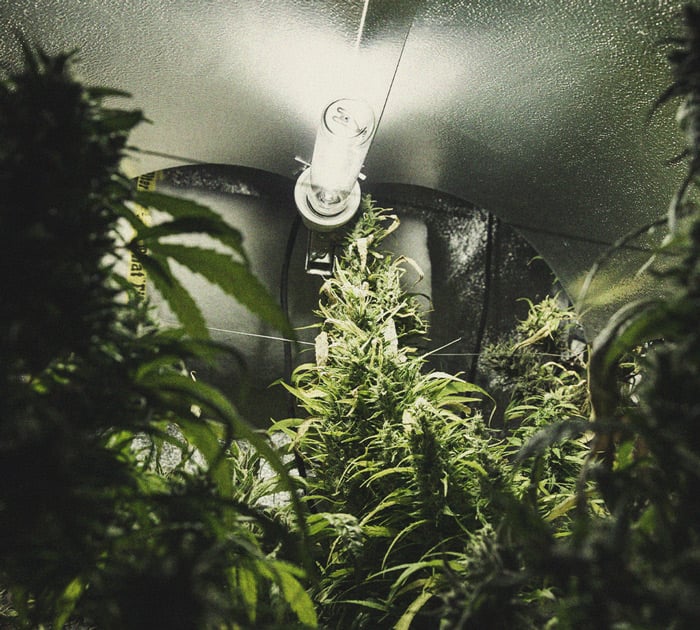
Light burn is a common problem for inexperienced growers dealing with spatial restrictions. It occurs when cannabis plants get too close to their grow lights, resulting in bleached buds (during flowering) and yellow foliage.
Luckily, dealing with light burn is usually pretty simple; just move your lights further away from your plants. If that’s not an option, we recommend using LST to encourage your plants to grow low and wide rather than thin and high.
If you’re an outdoor grower, you generally won’t have to worry about light burn; the sun is too far away to do your plants any major harm. If you tend to grow your seedlings indoors, however, just remember to gradually acclimate young plants to the sunlight to avoid any problems.
Wind Damage
Cannabis loves growing in a breeze. Unfortunately, harsh winds can cause some irreparable damage to your plants, shredding through healthy foliage, breaking budding branches, or uprooting them altogether.
Luckily, indoor growers generally don’t have to worry about wind damage. Meanwhile, there’s a couple of things you can do to protect your plants from the wind outdoors:
• Plant them close to other plants, fences, garden beds, or walls that can help serve as wind breakers.
• Top and train your plants. Short, bushy plants are less likely to tumble over in the wind.
• Grow clover and alfalfa around the roots of your plants to prevent uprooting.
• Avoid over-staking cannabis; your plants need the flexibility to move with the wind to avoid snapping.

Cannabis Moulds: Bud Rot And Powdery Mildew
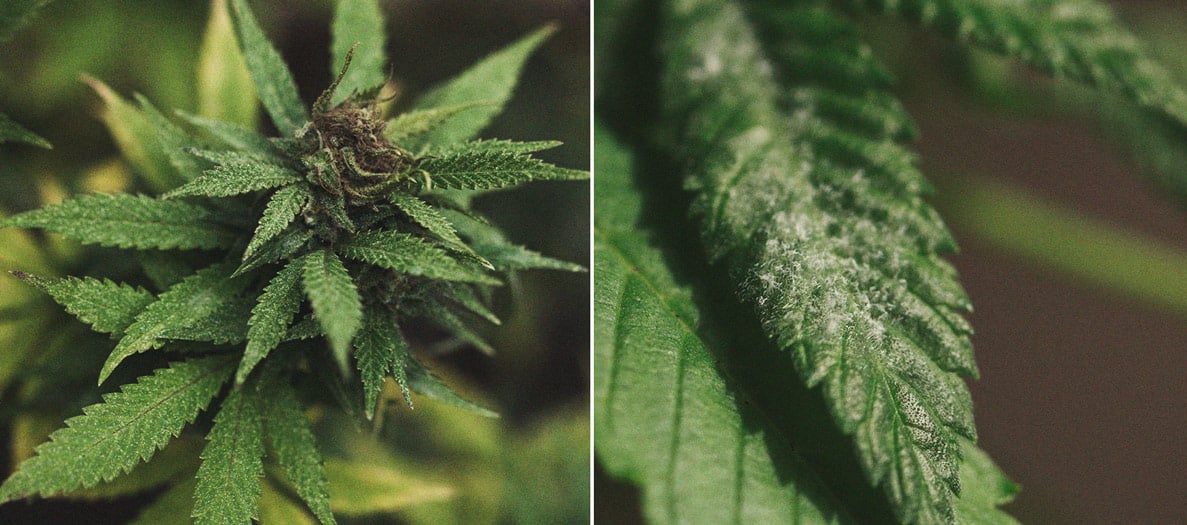
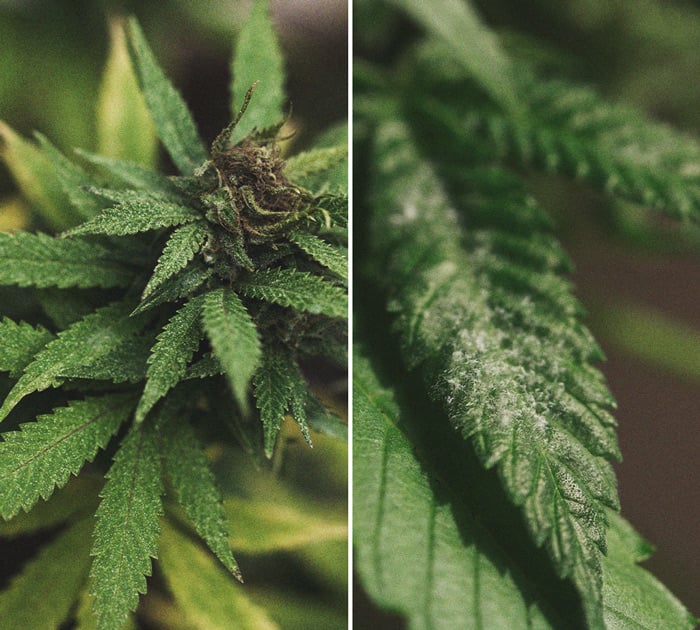
Mould is a big problem for cannabis growers. Not only does it suck the life from your plants, but some moulds also directly target the buds, destroying them before you even get a chance to harvest. The two most common moulds affecting cannabis are white powdery mildew (WPM) and Botrytis (bud rot).
As the name suggests, white powdery mildew leaves a fine, white, flour-like powder on the surface of a plant’s leaves. Eventually, the mould spreads to the rest of the plant, interrupting photosynthesis and slowly turning leaves yellow before killing them off completely. In advanced stages, WPM may leave small black spores on your plants that can become airborne and spread. There is no way to completely cure an infected plant; instead, you’ll have to fight the mould with an organic fungicide and try to minimise its spread while letting the healthy sections of your plant grow.
Botrytis, also known as bud rot, generally nestles in at the base of a plant’s stem and slowly works its way up to individual branches, taking out any buds it comes into contact with. Some of the first signs of a Botrytis infection are dry, withering, and discoloured leaves on single buds or entire colas. Take a close look at the affected buds and you’ll find grey or blueish mould growing on them. As it matures, Botrytis will also produce small black spores that can spread to other plants via direct contact or through the air.
Fighting cannabis moulds is tough. The first thing you’ll have to do is assess the specific infection your plant is dealing with. From there, you can decide whether it is worth trying to save or not.
Identifying Common Cannabis Fungi
A fungal infection can be detrimental to the size and quality of your harvest. Unfortunately, fungal problems are very common among both indoor and outdoor growers. Translation: prevention is key.
Damping-Off
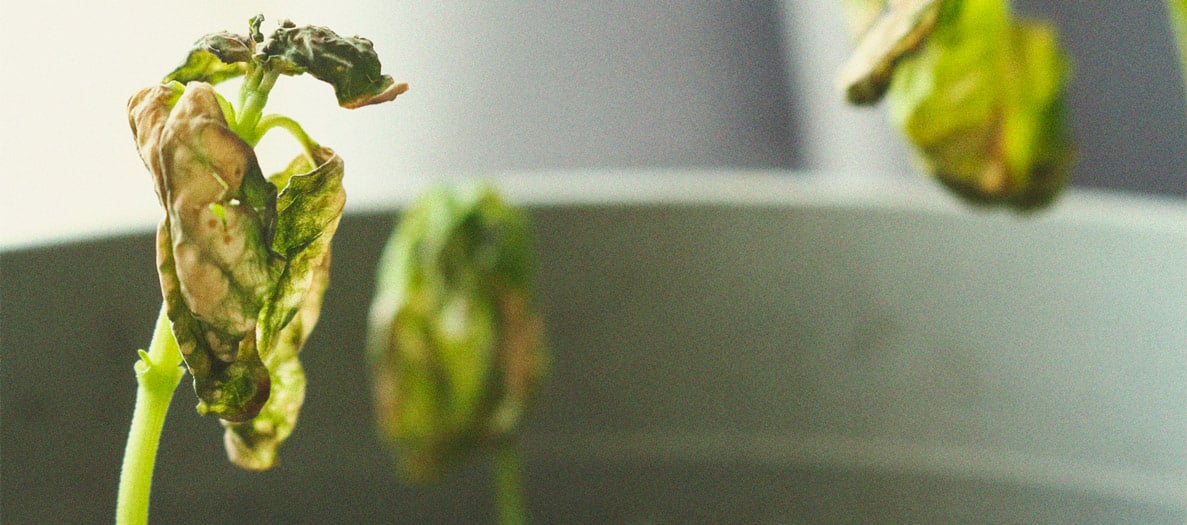
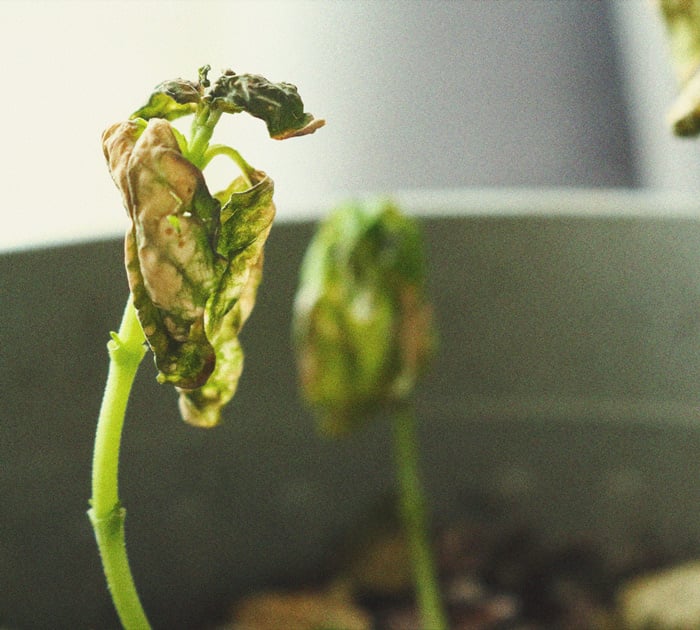
Damping-off is a common fungal problem that most commonly affects seedlings. It’s usually caused by Pythium, Botrytis, and Fusarium fungi (more info below). Whether they are present in your soil or brought into your grow room/garden by another plant, these fungi attack the stems of young seedlings, turning them limp and killing them off in less than 24 hours.
Septoria
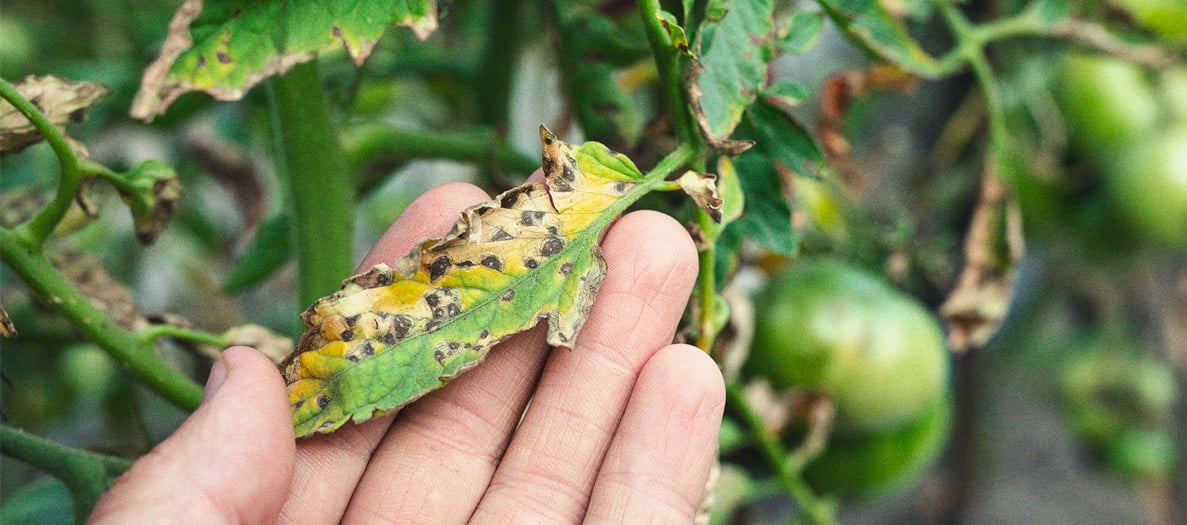
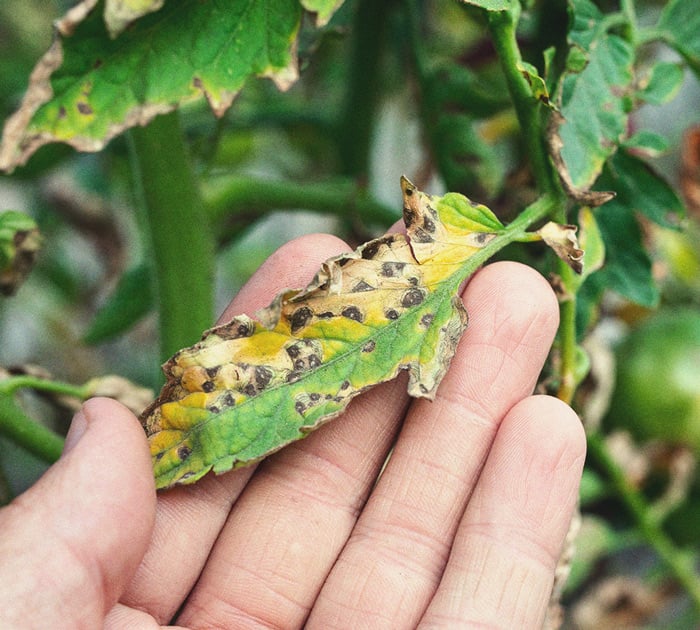
Also known as yellow leaf spot, septoria is a fungus that attacks the leaves of your plants, dotting them with yellow or brownish spots. It usually attacks plants right after they start flowering and appears on low foliage first. If left untreated, septoria works its way up the plant; while it usually doesn’t attack buds, it can destroy a lot of foliage. Not only does this stress plants, but it also affects their ability to photosynthesise, effectively stunting their growth and reducing their yield.
Fusarium
Fusarium is a deadly fungus capable of destroying an entire cannabis crop. Able to lay dormant in soil for years and strike without any telltale symptoms, Fusarium is notoriously hard to detect. When it does strike, it goes straight for the roots, causing them to rot while also interrupting the flow of nutrients and water through the plant. Affected plants will droop, wilt, and—sometimes within a matter of days—die. There’s no cure for Fusarium, and growers facing this fungus are usually told to cull their crops, throw out their soil and pots, disinfect their grow space, and start a new grow altogether.
Pythium
Pythium is a type of parasitic algae, formerly classified as fungi, that attacks the roots of cannabis plants. It is one of the principal causes of root rot. While Pythium can attack cannabis plants at any stage of life, seedlings are especially at risk due to their moist medium.
If you’re growing in a hydro setup, you’ll have an extra advantage when it comes to spotting a Pythium infestation; brown discolouration and a gunky, gooey, or slimy mass around a plant’s roots are telltale signs of root rot. Not to mention, Pythium is responsible for almost 90% of root rot cases.
Unfortunately, if you’re growing in soil or passive hydro systems (like coco or perlite), detecting Pythium is extremely difficult as it causes a variety of above-ground symptoms that can resemble everything from nutrient deficiencies to light burn.
Alternaria
It is estimated that Alternaria infestations are responsible for the spoilage of up to 20% of all agricultural crops.
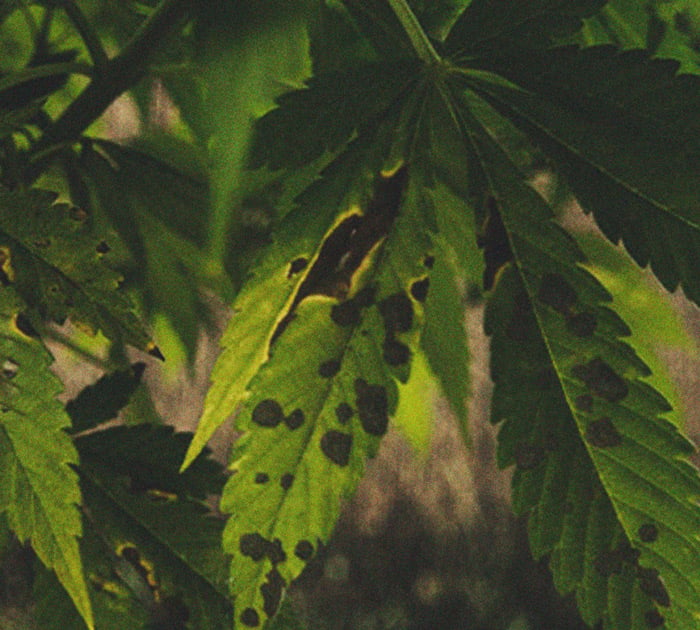
Alternaria loves warm, humid conditions. It also targets plants growing in poor soil, those that have had other fungal issues in the past, or those suffering from poor nutrient management. While it can strike at any stage of a plant’s life cycle, Alternaria tends to affect blooming plants the most. A telltale sign of an Alternaria infestation is purple-brown spotting with yellow borders on foliage. Sometimes, you might also detect small black spores of the fungus covering your leaves (known as conidia).
Unfortunately, there is no way to treat Alternaria. It is a seed-borne fungus that spreads quickly from one plant to another, leaving the fruits infected and inedible.

Verticillium
Verticillium is another devastating plant fungus. It can lay dormant in soil for years before germinating and attacking your plant’s roots. Eventually, the fungus proliferates into the xylem—vascular tissue that transports water and nutrients from the roots to the rest of the plant.
As it grows, the fungus blocks the xylem, affecting the flow of water and nutrients and causing parts of the plant to die back and wilt (including leaves, branches, and flowers). Verticillium can also cause brown discolouration around the stem close to the soil.
Like many other fungi, Verticillium spreads quickly and does some serious damage to the plants it affects. If you spot it in your garden, your best bet is to cull the infected plants and sterilise your grow equipment to avoid spreading the fungi. To avoid future infections, you must remove all topsoil.
Viral Cannabis Flowers
Unfortunately, viruses can be hard to detect, especially for inexperienced growers, and they can do some serious damage in a short period of time.
Tobacco Mosaic Virus
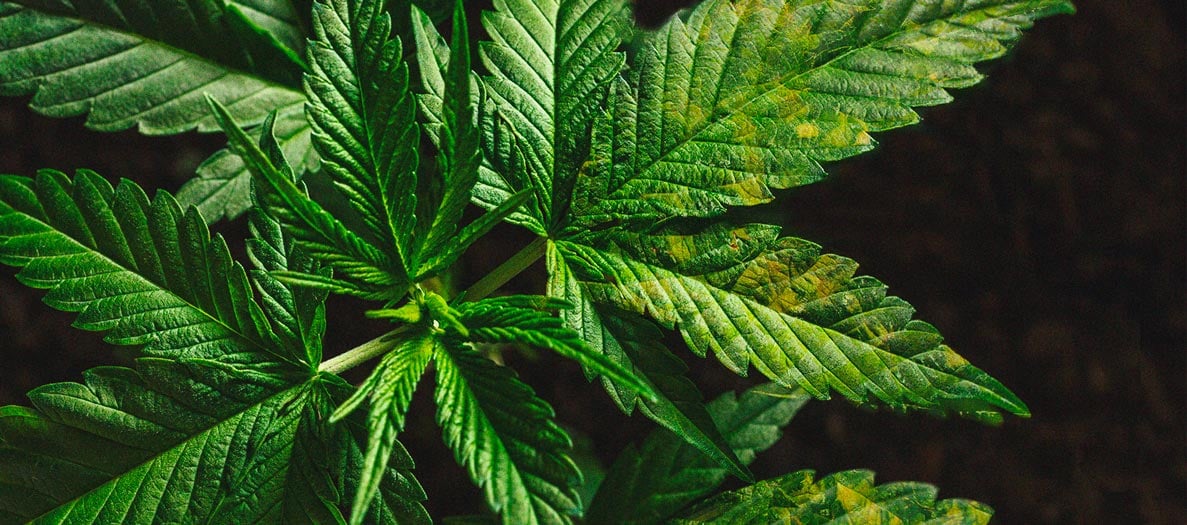
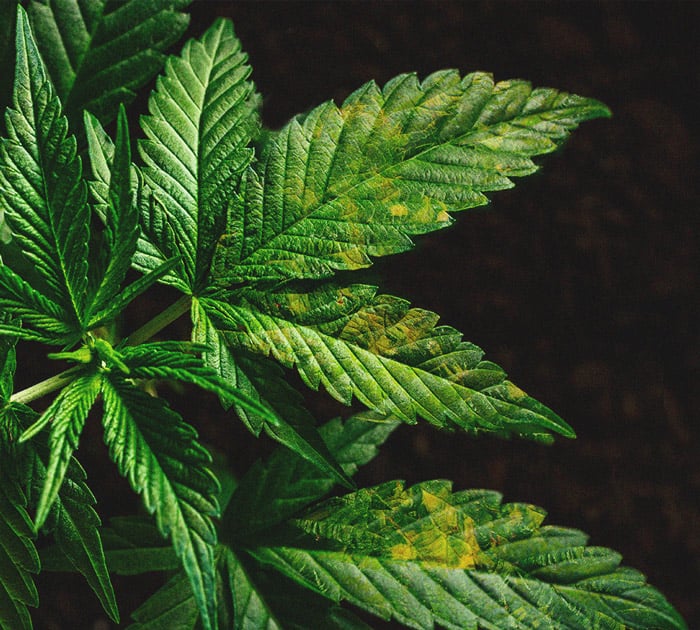
First identified in tobacco plantations, tobacco mosaic virus (TMV) causes malformed, curved leaves with distinct yellow, mosaic-like spots. Some plants may also develop weak, discoloured stems (usually red or purple), while others may carry the virus without developing any symptoms at all. While it is rare, tobacco mosaic virus has no cure. If you spot it in your garden, your best bet is to remove the infected plants to avoid spreading the virus.
Spotting Common Cannabis Pests
Pests are a common problem for cannabis growers, especially outdoors.
Fungus Gnats
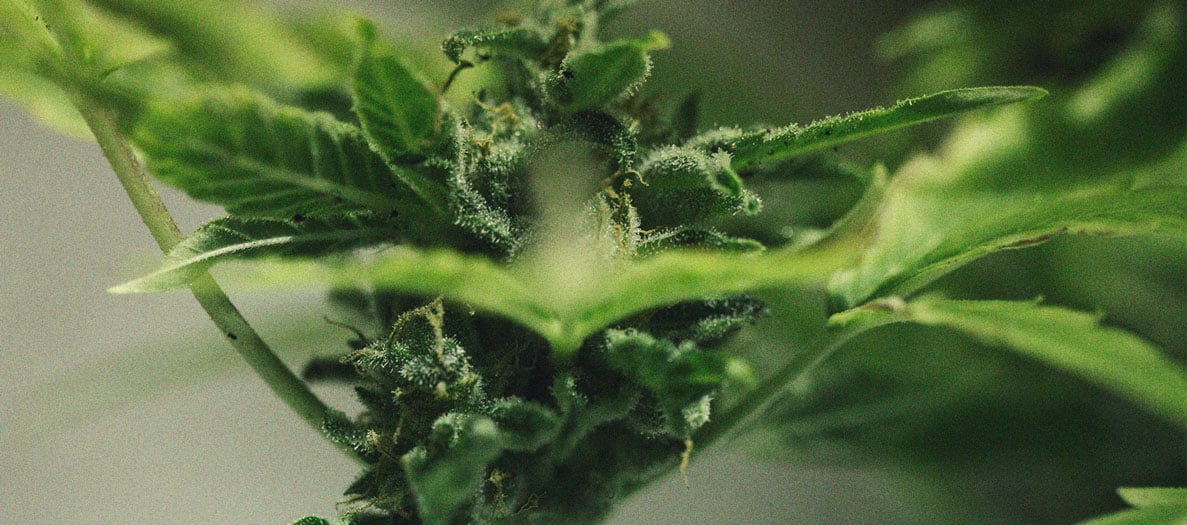
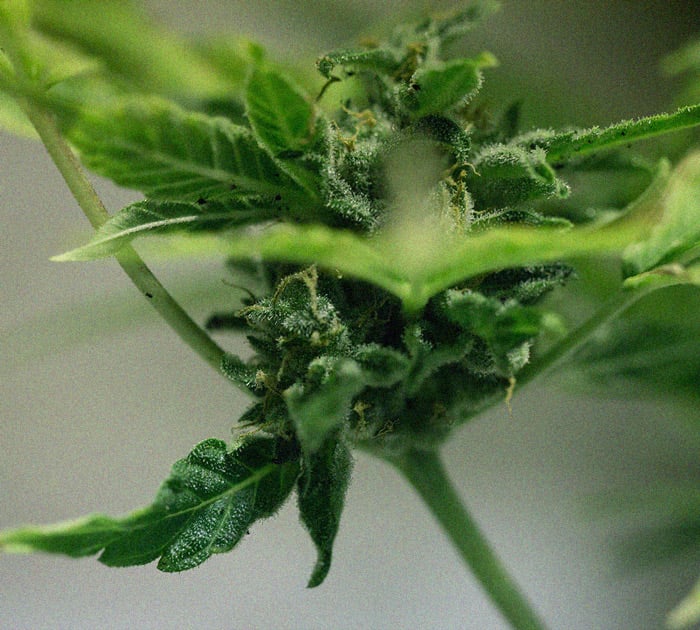
Fungus gnats are small, black bugs that look a lot like fruit flies. Unlike other pests, they don’t attack a plant’s foliage or flowers. Their larvae, however, live in the soil beneath your plants and slowly eat away at their roots. Over time, this can cause yellowing leaves, wilting, symptoms of nutrient deficiencies, and stunted growth.
Unfortunately, fungus gnats are a very common problem for the cannabis grower. Their larvae can be present in store-bought soil, but overwatering and high humidity levels also attract these small, annoying bugs into your garden or grow room.
Luckily, fungus gnats aren’t the worst pests out there. Neem oil, diatomaceous earth, and beneficial bacteria and insects (like Bacillus thuringiensis and ladybugs, for example) can help keep fungus gnats at bay, given you catch them early.
Spider Mites
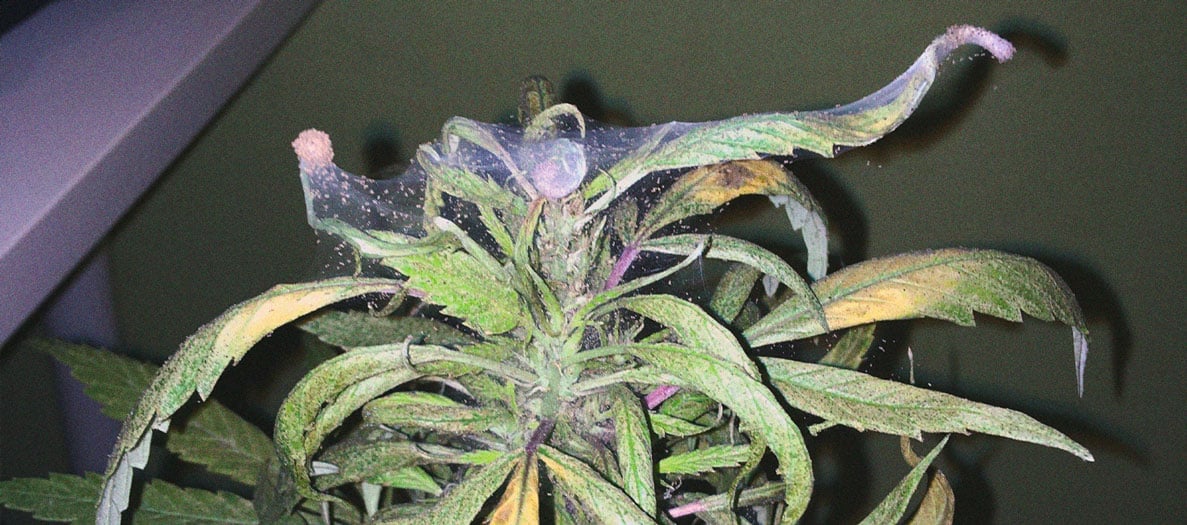
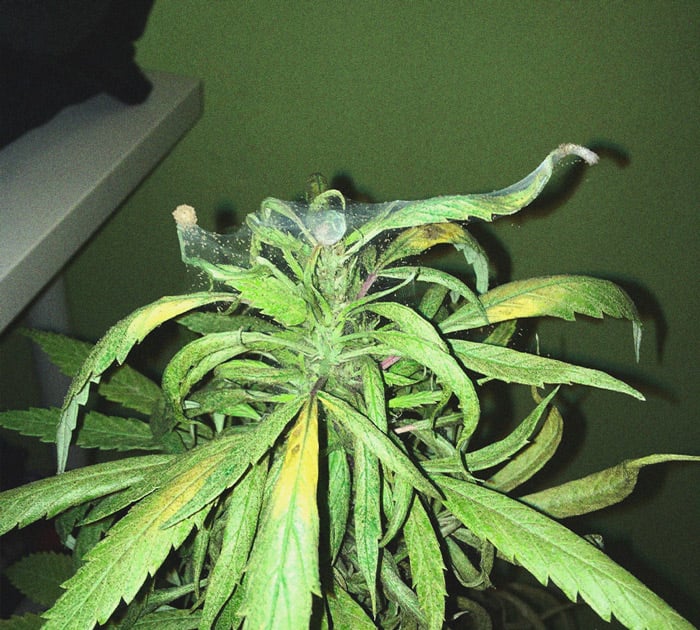
Spider mites are another common pest that can wreak havoc on your harvest. These small spiders can be either black or red and love hot, dry conditions. Worst of all, these tiny mites reproduce extremely rapidly (females lay up to 20 eggs per day over 2–4 weeks), meaning you need to catch an infestation quickly to minimise the damage.
Some initial signs of spider mites include tiny spots and stippling on leaves, as well as fine, white webs on the underside of the foliage (which can later spread to the entire plant). If left untreated, these mites can kill off leaves, stunting a plant’s growth and reducing its yield.
Spider mites are particularly resistant to a lot of commercial pesticides. To treat a spider mite infestation, we recommend pruning the affected leaves, hosing down your plants with a mix of neem oil and water, and using ladybugs to kill off mites and prevent a future infestation.
Aphids
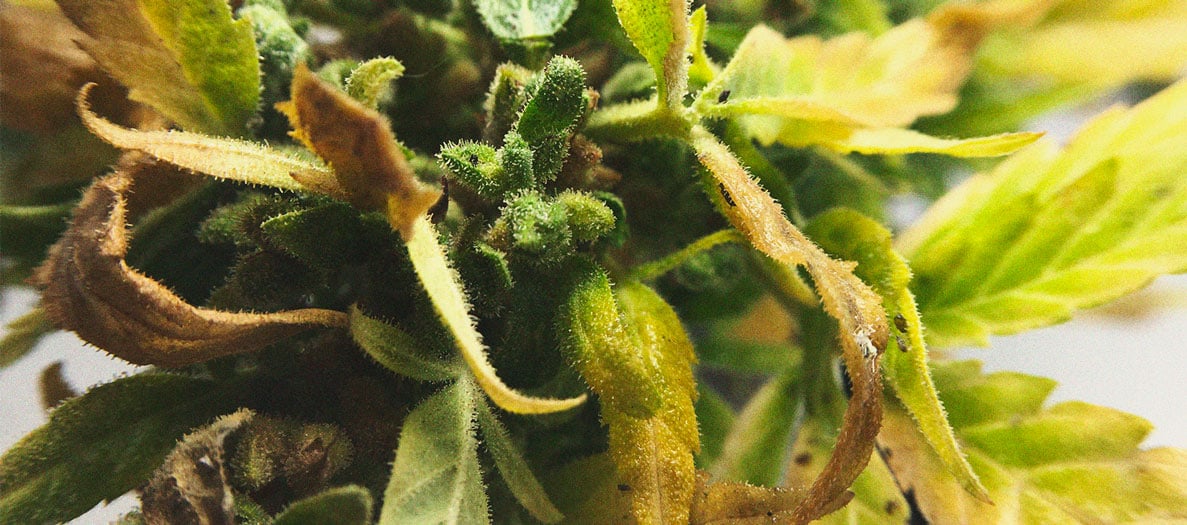
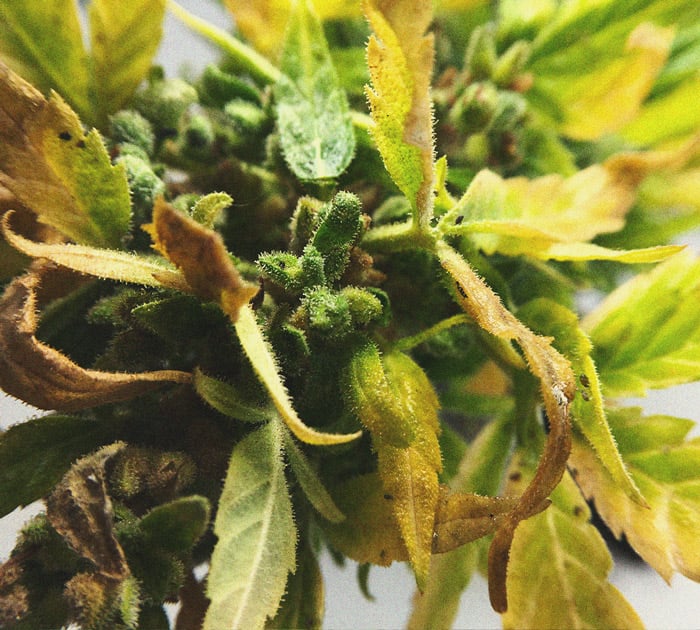
Aphids are one of the most destructive pests affecting cultivated plants, including cannabis. Under a microscope, these bugs look like tiny green, black, red, or white grasshoppers or crickets that vary in size from 1–10mm.
Female aphids usually hatch at the beginning of spring, and their numbers rapidly increase in just a few weeks. Once they’ve found their way into your grow room or garden, they’ll feed off your plants, leaving behind a sap-like substance on the leaves, stems, and flowers (known as honeydew). Honeydew attracts ants and mould, both of which can harm your plants and fight off predatory insects like ladybugs, only allowing the initial aphid infestation to get worse.
Not only do aphids kill healthy foliage, but they can also spread disease from one plant to another. Like with spider mites or fungus gnats, we recommend pruning affected foliage, hosing your plants with a mix of water and neem oil, and introducing beneficial predatory insects to fight off aphids and keep them from coming back.
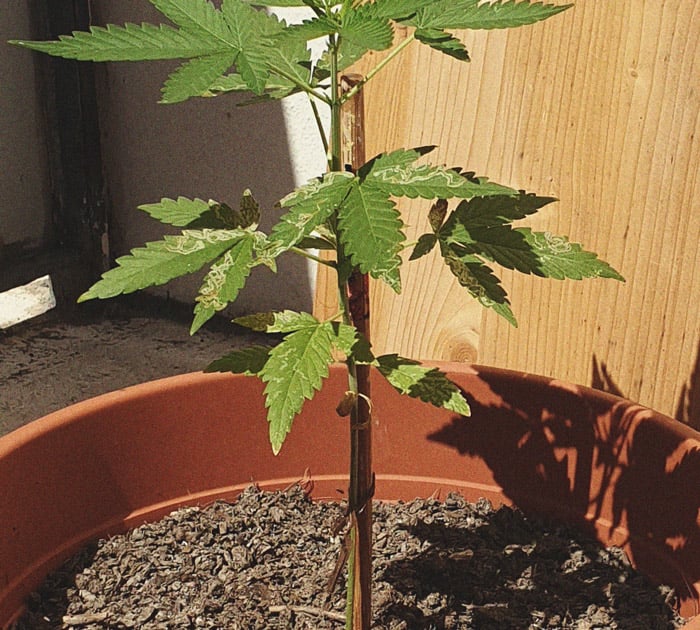
Leaf Miners
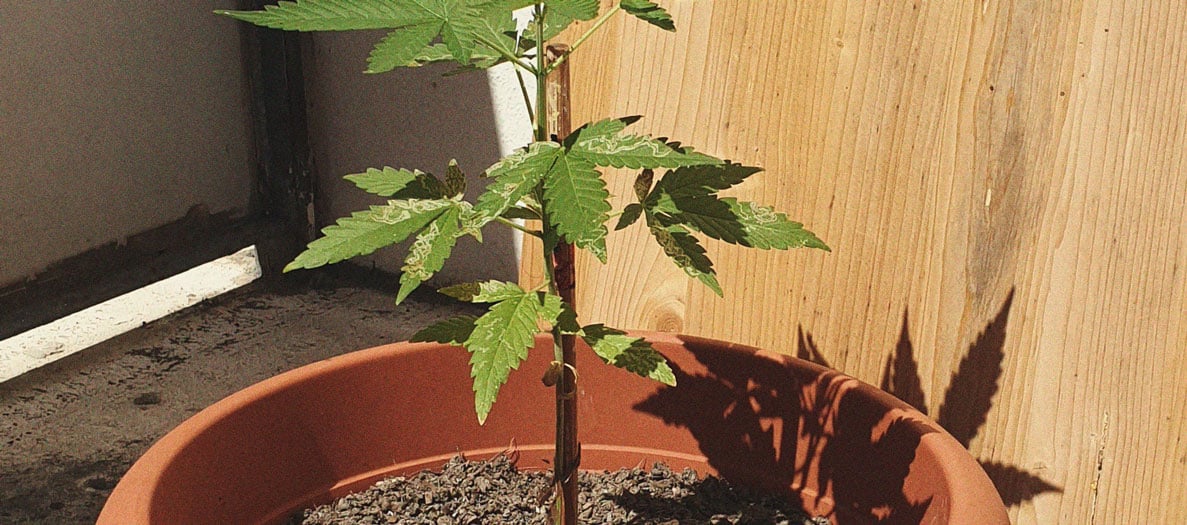
Leaf miners are the larvae of a variety of insects that—as their name suggests—burrow into leaves to feed and grow. They usually look like small worms or maggots, typically measuring 1mm in size with a pale yellow or green colour.
Young leaf miners usually hide out in soil during winter and emerge in spring. Once they’re mature, they’ll work their way up to the leaves to lay eggs. This new batch of offspring will then hatch and feed off the leaves until they drop to the ground to repeat the process.
Leaf miners leave characteristic white or yellow lines on the leaves they’ve been feeding from. Like with spider mites and aphids, you’ll want to remove any affected leaves, hose your plants with a water and neem oil mix, and use predatory insects to deal with leaf miners.
Caterpillars
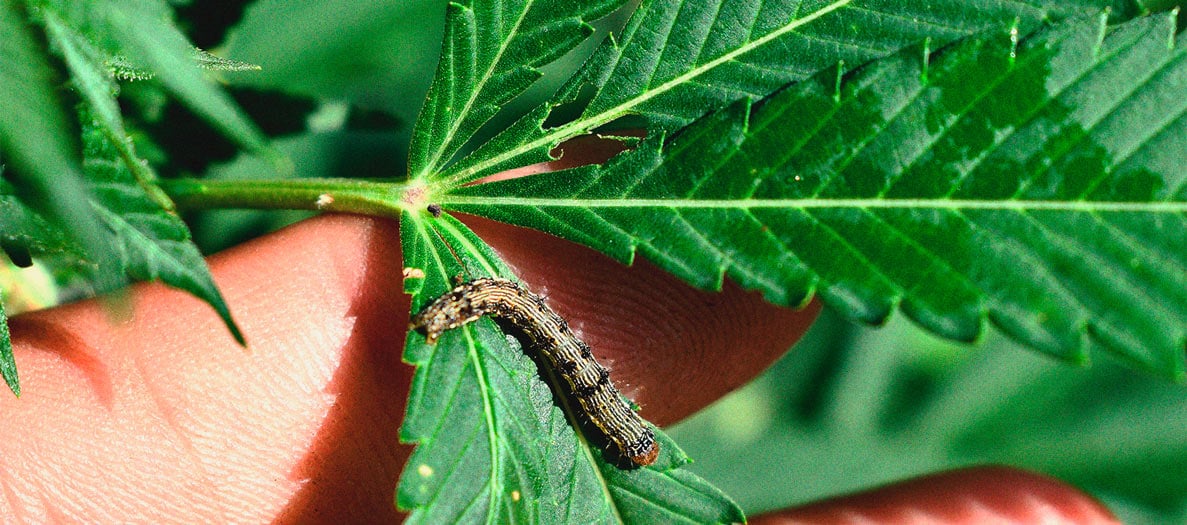
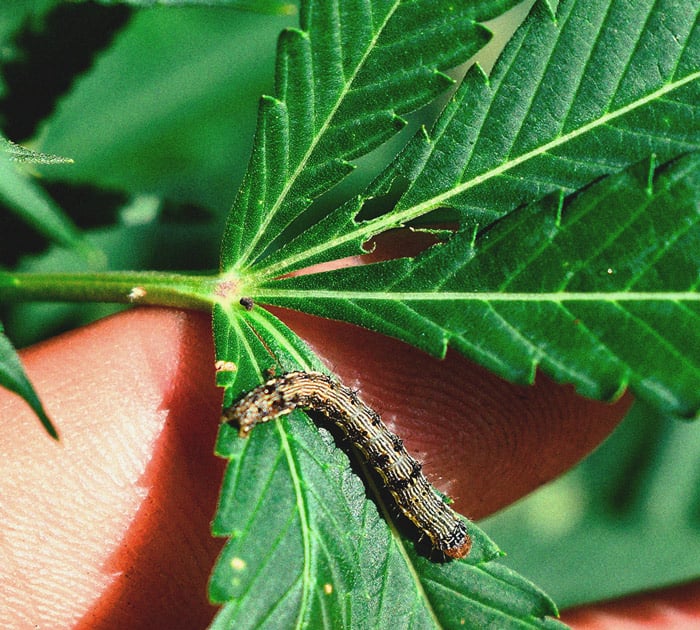
There are over 20,000 species of caterpillars out there, and they all have something in common: They can completely destroy your cannabis.
Whether they're the larvae of moths or butterflies, caterpillars will feed off your plants and, given time, even call them home (at least temporarily) as they cocoon. Most caterpillars will eat and lay their eggs on the leaves, but the notorious hemp and corn borer will bore through the stems.
The only way to protect your plants against caterpillars is to inspect them regularly with a jeweller’s loupe or microscope and cull any caterpillars and their eggs (which can be black, white, or red in colour) you can find. Also, look out for holes in your stems and brown trails, which are telltale signs of boring caterpillars.
Other Common Cannabis Problems
A variety of other issues can arise in the grow room, from revegetation to pollination. Here’s what you need to know to prevent these cannabis-specific issues.
Hermaphrodites And Bananas
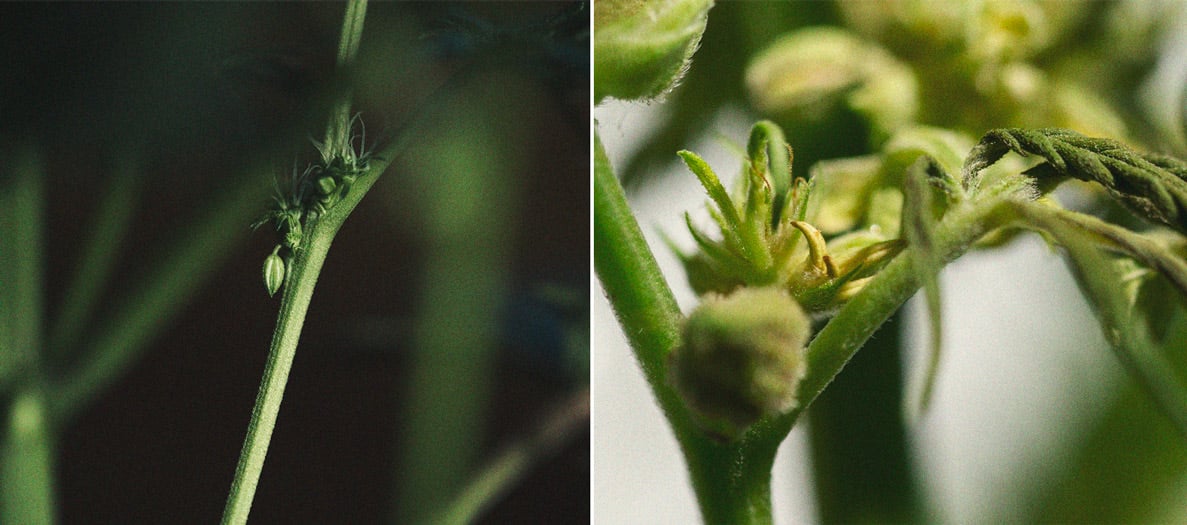
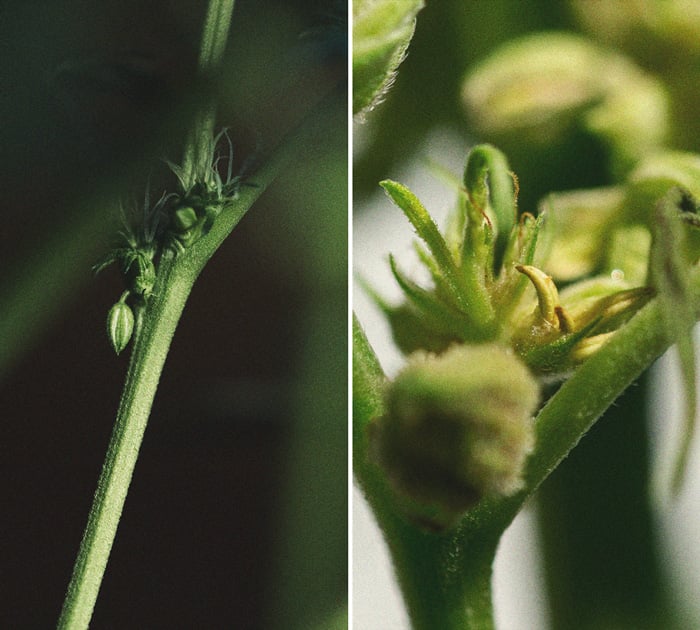
Cannabis is dioecious, meaning it produces plants with distinct male and female reproductive organs. Hermaphrodites, however, can produce both sexual organs on the same plant. This can be a result of genetics, seed manipulation, or stress.
Hermaphroditism is a survival instinct. The production of sinsemilla cannabis is far from natural—females are left unpollinated for extremely long periods of time in an attempt to push their resin production to the max, improving the flavour and potency of their fruit. Unfortunately, these long flowering times (as well as environmental stressors like incorrect humidity and temperature, poor lighting, improper feeding, and pH issues) can cause a female to develop male reproductive organs known as “bananas” in a final attempt to reproduce.
Spotting hermaphrodites isn’t hard if you know what to look for. You’ll just want to make sure you spot them quickly to avoid them pollinating your females and ruining your entire harvest.
Reverting And Revegetating
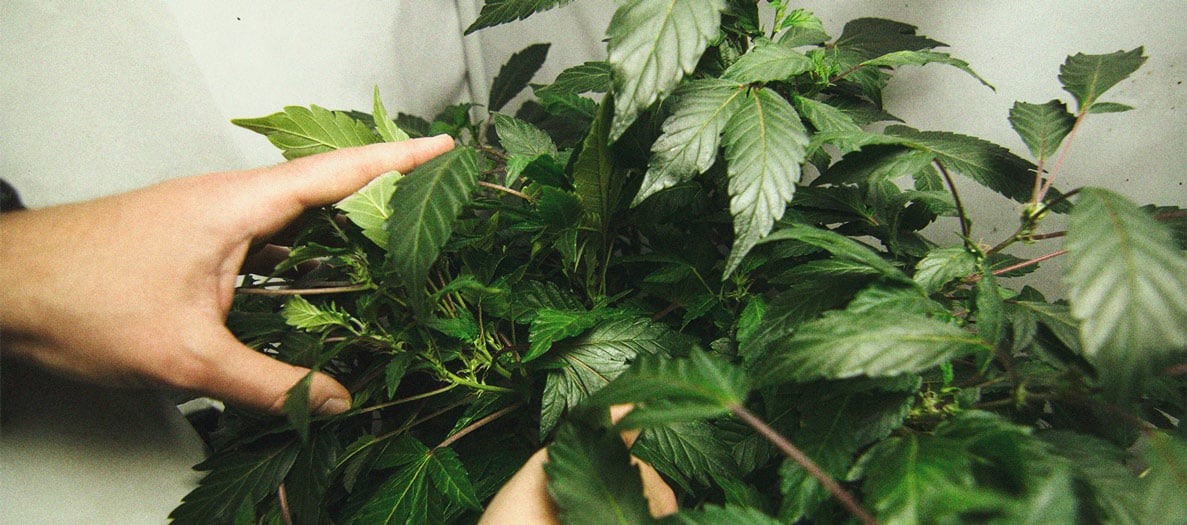
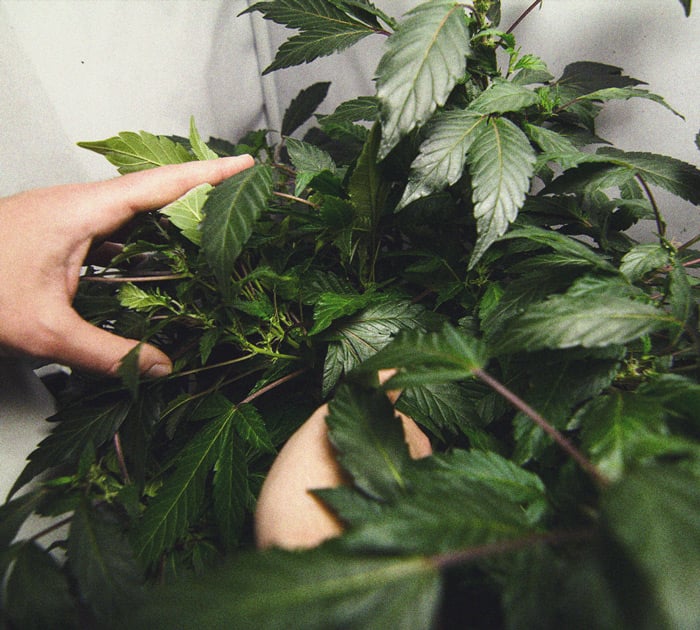
A flowering cannabis plant can revert back to its vegetative phase if you interrupt its light cycle. While inexperienced growers might accidentally revert their plants back, experienced growers sometimes re-veg on purpose to get multiple harvests from the same plant. While it sounds great, re-vegging does come with risks; re-vegged plants tend to yield less and can show signs of hermaphroditism.
Pollinated Plants
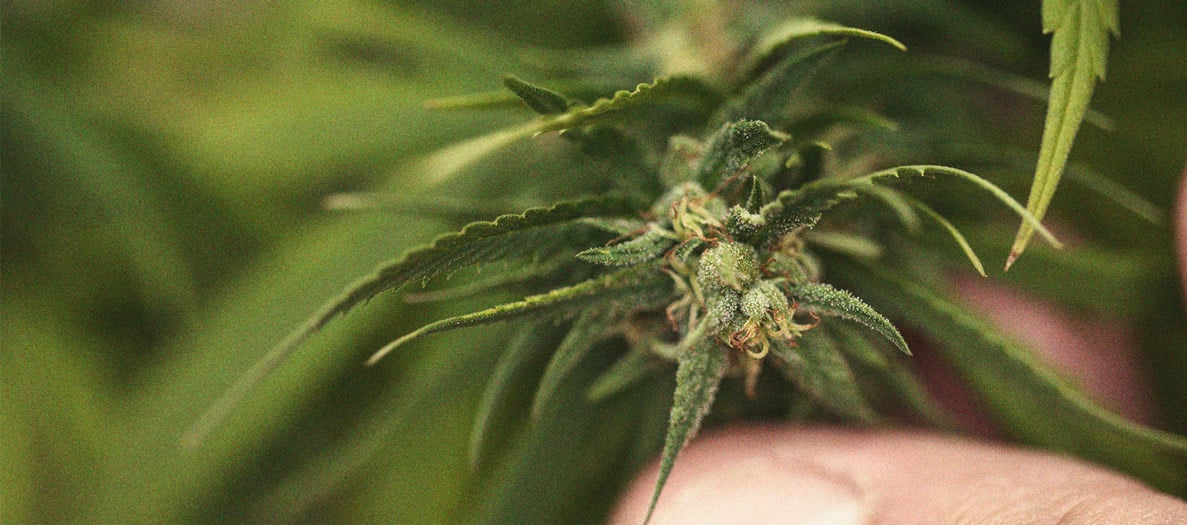
Pollination is the cardinal sin of sinsemilla cannabis growing. Once your females get pollinated, they’ll stop producing resin and invest all their energy into developing seeds. A telltale sign of a pollinated female are swollen bracts. Take a pair of tweezers and open up a bract; if there’s a seed inside—you’ve got yourself a pollinated plant.
Unfortunately, there’s nothing you can do to reverse pollination. Your best bet is to cull any males, analise how pollinated your other females are, and decide whether to keep them alive or cull them and start a new grow from scratch.
 Grow Guide Topic Finder
- Growing weed step by step
- Cannabis growing basics
- Choosing your seeds
- How to germinate seeds
- The cannabis vegetative stage
- The cannabis flowering stage
- Harvesting cannabis
- Trimming, drying, and curing
- Choosing pots and soil
-
Growing indoors
- A Complete Overview Of Growing Cannabis Indoors
- Cannabis Cultivation Tips: How To Set Up Indoor Grow Lights
- How Many Cannabis Plants Can You Grow Per Square Metre?
- Indoor Cannabis Growing: Relative Humidity and Temperatures
- Hydroponics Cannabis Growing Guide (with diagrams)
- Cannabis Micro Growing: Growing Great Weed in Tiny Spaces
- Growing outdoors
- How to grow autoflowering cannabis
- Cannabis nutrients and pH
- Cannabis troubleshooting: Nutrients
-
Cannabis troubleshooting: Growing
- Cannabis Seed Germination — Troubleshooting Guide
- How to Deal With Pythium (Root Rot) in Cannabis Plants
- Slow Cannabis Plant Growth And What You Can Do About It
- How to Deal With Leggy Cannabis Seedlings
- Watering Your Cannabis: How to Fix Overwatering and Underwatering
- Understanding Male, Female, And Hermaphrodite Cannabis
- Identifying and Treating Common Cannabis Ailments
- How To Revive a Sick Cannabis Plant
- How to Avoid Mouldy Weed During Drying and Curing
- How to Prevent and Treat Dry and Crispy Cannabis Leaves
- What Cannabis Leaves Can Tell You
- Causes and Solutions for Yellow Cannabis Leaves
-
Cannabis Strains Grow Report
- HulkBerry Automatic Grow Report
- Blue Cheese Auto Grow Report
- Purple Punch Automatic Strain Grow Report
- Triple G Automatic Grow Report
- Do-Si-Dos Automatic Grow Report
- Green Gelato Automatic Grow Report
- Haze Berry Automatic Grow Report
- Purple Queen Automatic Grow Report
- Cookies Gelato Automatic Grow Report
- Sherbet Queen Automatic Grow Report
- Sweet Skunk Automatic Grow Report
- Medusa F1 Grow Report
- Cannabis plant training
-
Weed growing tips
- The Cannabis Plant Anatomy
- How to preserve seeds - UK
- How Much Sunlight Do Outdoor Cannabis Plants Need To Grow?
- How to Control and Prevent Stretching in Cannabis Plants
- My Cannabis Plants Are Growing Too Tall: What Should I Do?
- Should You Worry About Purple Or Red Cannabis Stems?
- What To Do When Your Indoor Cannabis Won’t Flower
- How To Protect Your Cannabis Plants From Heat Stress
- How To Tell If Your Female Cannabis Plant Has Been Pollinated
- Growing Medical Marijuana
- Bud Washing: How to Clean Your Weed
- Understanding Cannabis Yield per Plant


