 Weed Grow Guide by Royal Queen Seeds
- Growing weed step by step
- Cannabis growing basics
- Choosing your seeds
- How to germinate seeds
- The cannabis vegetative stage
- The cannabis flowering stage
- Harvesting cannabis
- Trimming, drying, and curing
- Choosing pots and soil
-
Growing indoors
- A Complete Overview Of Growing Cannabis Indoors
- Cannabis Cultivation Tips: How To Set Up Indoor Grow Lights
- How Many Cannabis Plants Can You Grow Per Square Metre?
- Indoor Cannabis Growing: Relative Humidity and Temperatures
- Hydroponics Cannabis Growing Guide (with diagrams)
- Cannabis Micro Growing: Growing Great Weed in Tiny Spaces
- Growing outdoors
- How to grow autoflowering cannabis
- Cannabis nutrients and pH
- Cannabis troubleshooting: Nutrients
-
Cannabis troubleshooting: Growing
- Cannabis Seed Germination — Troubleshooting Guide
- How to Deal With Pythium (Root Rot) in Cannabis Plants
- Slow Cannabis Plant Growth And What You Can Do About It
- How to Deal With Leggy Cannabis Seedlings
- Watering Your Cannabis: How to Fix Overwatering and Underwatering
- Understanding Male, Female, And Hermaphrodite Cannabis
- Identifying and Treating Common Cannabis Ailments
- How To Revive a Sick Cannabis Plant
- How to Avoid Mouldy Weed During Drying and Curing
- How to Prevent and Treat Dry and Crispy Cannabis Leaves
- What Cannabis Leaves Can Tell You
- Causes and Solutions for Yellow Cannabis Leaves
-
Cannabis Strains Grow Report
- HulkBerry Automatic Grow Report
- Blue Cheese Auto Grow Report
- Purple Punch Automatic Strain Grow Report
- Triple G Automatic Grow Report
- Do-Si-Dos Automatic Grow Report
- Green Gelato Automatic Grow Report
- Haze Berry Automatic Grow Report
- Purple Queen Automatic Grow Report
- Cookies Gelato Automatic Grow Report
- Sherbet Queen Automatic Grow Report
- Sweet Skunk Automatic Grow Report
- Medusa F1 Grow Report
- Cannabis plant training
-
Weed growing tips
- The Cannabis Plant Anatomy
- How to preserve seeds - UK
- How Much Sunlight Do Outdoor Cannabis Plants Need To Grow?
- How to Control and Prevent Stretching in Cannabis Plants
- My Cannabis Plants Are Growing Too Tall: What Should I Do?
- Should You Worry About Purple Or Red Cannabis Stems?
- What To Do When Your Indoor Cannabis Won’t Flower
- How To Protect Your Cannabis Plants From Heat Stress
- How To Tell If Your Female Cannabis Plant Has Been Pollinated
- Growing Medical Marijuana
- Bud Washing: How to Clean Your Weed
- Understanding Cannabis Yield per Plant
Tips For Growing Autoflowering Cannabis Indoors
Contents:
-
Benefits of growing autoflowers indoors
- Tip 1: choose the right strains
- Tip 2: don’t repot your autoflowers
- Tip 3: use a root stimulant
- Tip 4: grow in light and airy soil
- Tip 5: use the right type of light
- Tip 6: try the sea of green method
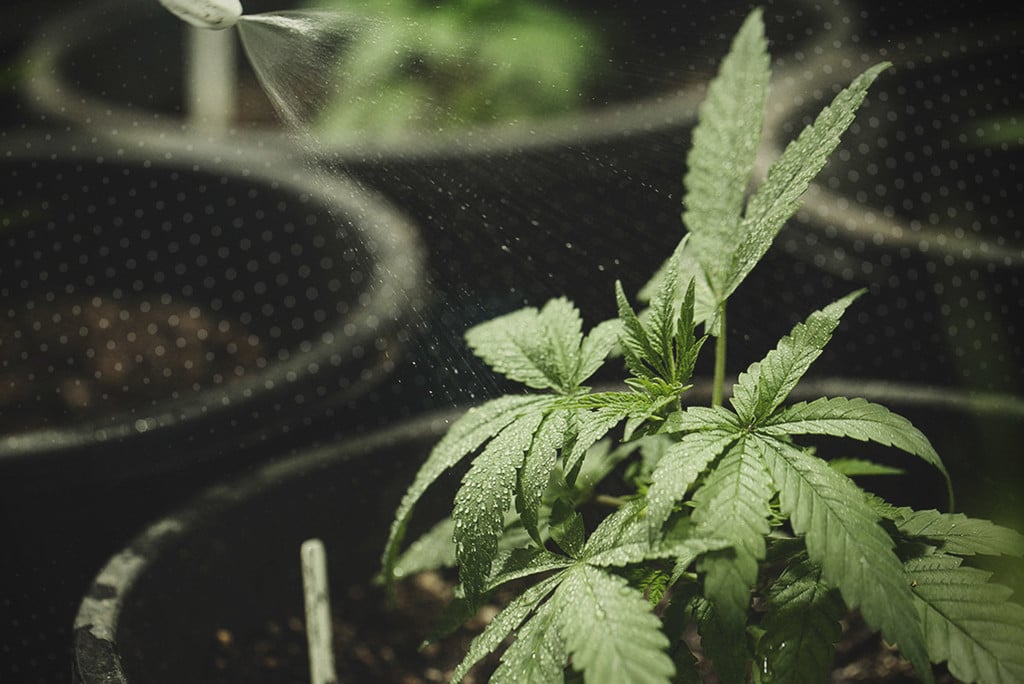
- Tip 7: watch your watering
- Tip 8: control the pH level of your water
- Tip 9: cut the nutrients
- Tip 10: don’t top your autoflowers
- Tip 11: ensure good airflow, humidity, and temperature
- Tip 12: flush
- Tip 13: harvest gradually
- Tip 14: harvest all year round
- Conclusion
Benefits of Growing Autoflowers Indoors
Autoflower cannabis strains are great. Unlike conventional (i.e. photoperiod) plants, it is age, not light cycle, that determines when autoflowers switch to flowering. This makes growing autoflowers straightforward, as growers can just leave their plants under a fixed light schedule (such as 18/6) from seed to harvest. Autoflowers also grow faster and don’t get as big as photoperiod strains. Your buds will be ready for you in a short ~60–65 days from planting your seeds. Since many autoflowers won’t get taller than 50–70cm, they are ideal for growing indoors, where space is often limited.
With all the benefits of growing autoflowers indoors, it’s not surprising that they are immensely popular, and not just among those new to cannabis growing. Here are some vital tips on how to best grow autoflowers indoors, so you can look forward to great harvests!
Tip 1: Choose the Right Strains
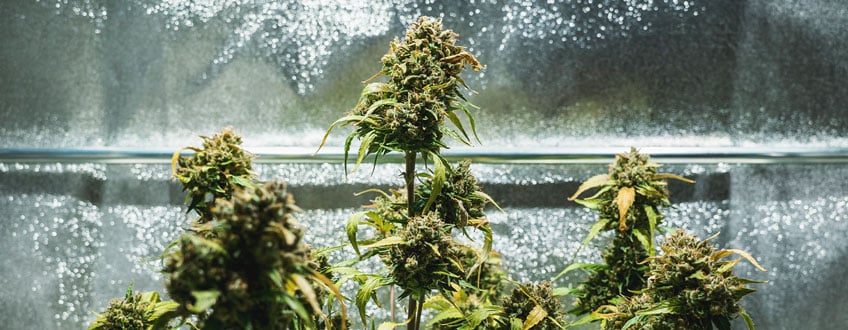
More than anything else, genetics will play the biggest role in determining the final outcome of your grow operation. But what makes the right strain? Well, let’s start with your personal preferences, for example, what type of effect you want from your cannabis. If you’re smoking to get blazed with the best and the latest, you can’t go wrong with THC monsters like the super dank and potent Royal Cookies Automatic or Royal Gorilla Automatic, our automatic variants of two popular strains!
Then again, if you happen to be a medicinal cannabis user, or for some other reason choose not to get high, a low-THC, high-CBD strain like the excellent Solomatic CBD can be a good choice.
The other thing you should consider when selecting a strain is its growing characteristics. Some strains may be easier than others to manage, or are known to grow and flower exceptionally fast. If you’re still new to growing, or simply want to grow great bud in a very short time, you may want to take a look at our Easy Bud or Quick One.
| Try our own Cannabis Seedfinder |
Tip 2: Don’t Repot Your Autoflowers
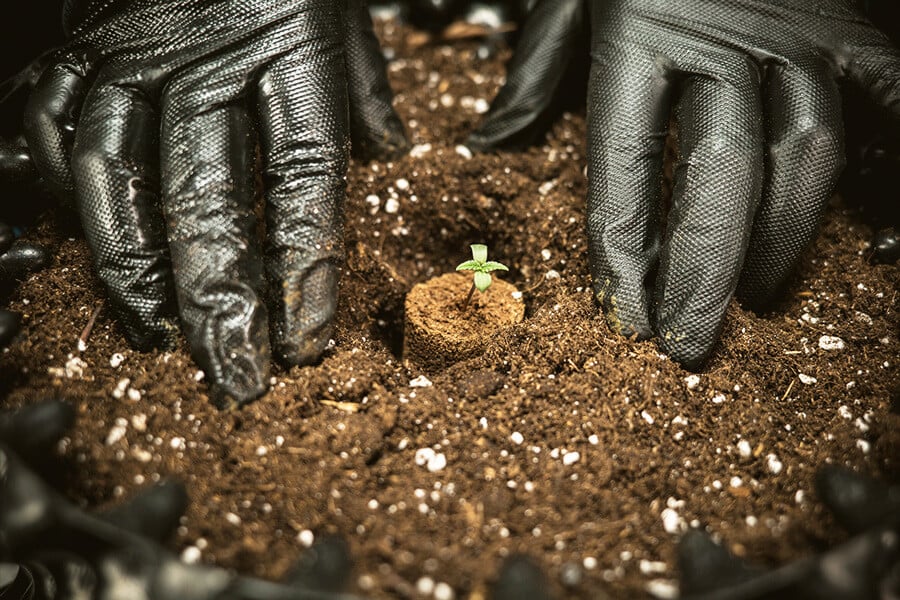
As the lifespan of autoflowering cannabis is limited, it is less forgiving when it comes to major stressors and mistakes. When plants experience high amounts of stress, growth stalls; while this may be fine for conventional cannabis that can be kept in veg longer to recover, autoflowers don’t have that luxury—they will flower regardless. As such, it’s best to start autos in their final pot right from the get-go to avoid transplant shock.
That said, you shouldn’t need very large pots for your autos as they won’t usually get very tall.
You should nevertheless choose a pot large enough so the plant doesn’t get root-bound, but instead has plenty of space to grow.
For germinating your autoflowering cannabis seeds, we recommend using the Autoflowering Starter Kit for best results.
Tip 3: Use a Root Stimulant
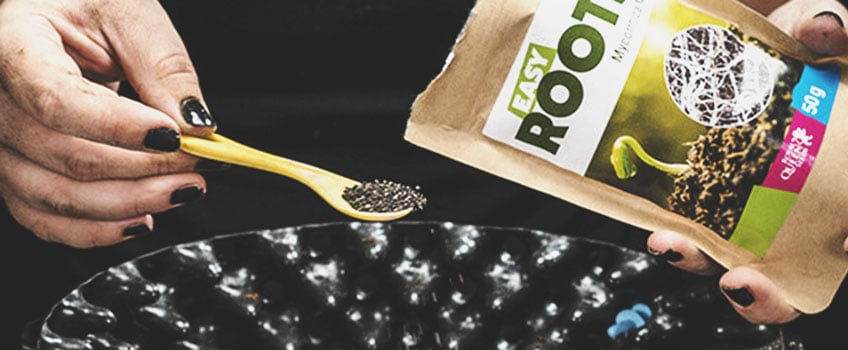
Autoflowers don’t have all the time in the world to grow. Right after sprouting, your plant will need to spend a good amount of time establishing a healthy root system. When you administer a root stimulant immediately after placing your seed in the pot, this will support your plant in this crucial process. But don’t go overboard as your seedling will be very sensitive to overfeeding. Use only the minimum recommended dose of root stimulant.
Tip 4: Grow in Light and Airy Soil
Autoflowering cannabis prefers light and airy soil that contains lower levels of nutrients than soil for photoperiod strains. As most ready-made universal potting mixes may contain too much nitrogen or other nutrients, choose only a lightly fertilised potting mix for your autoflowers. Your autoflowers also want soil that is not too compact, as this may otherwise prevent the roots from accessing adequate amounts of air.
The best solution is to make your own soil mix at home.
Recipe for DIY light and airy soil for autoflowers:
- 3 parts peat moss
- 3 parts compost
- 2 parts perlite, moistened
- 1 part vermiculite, moistened
You can find out more about making an optimal potting mix for your autoflowers in our blog The Best Soil For Growing Autoflower Cannabis.
Tip 5: Use the Right Type of Light
With autoflowers, you don’t need to worry about light schedules like you would with photoperiod plants. When growing autoflowers, you can just leave your lights on a 18/6 schedule (18h on, 6h off) for the entire grow, and can even grow them under 24 hours of light. Which schedule is “better” is open to debate. Many growers use the 18/6 schedule, as this gives good results while using less energy than a constant 24h cycle.
As for the right type of light, LEDs are now replacing HPS lighting in grow rooms and tents everywhere. They may be more expensive outright, but they use a lot less energy than HPS, so you will save massively on energy costs over time. If you’re using an LED grow light, you may want to see whether it is also equipped with UV lights. Some growers say that UV light makes for better taste and potency.
When starting your seeds, and for young plants, you can also use standard fluorescent lamps such as T5 lights. These use very little energy and don’t get warm, so there is no risk of burning your sensitive seedlings.
Tip 6: Try the Sea of Green Method
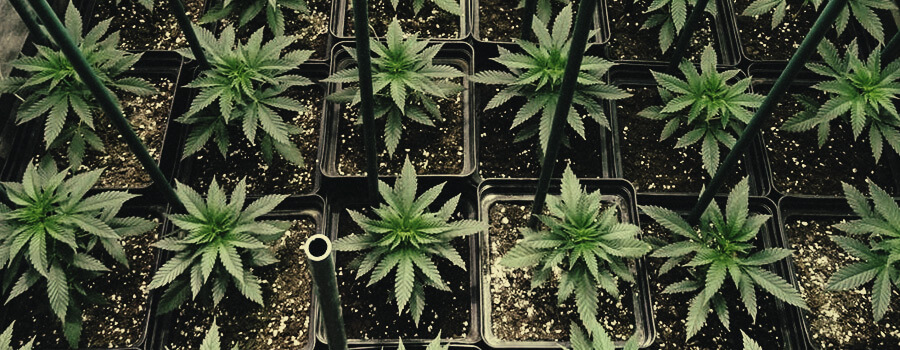
The sea of green (SOG) method is really just a fancy term for growing a lot of smaller plants in your grow room for bigger yields. Autoflowers are ideal for growing in a SOG as they are already smaller by nature.
To carry out a SOG with autoflowers, you'd simply plant your seeds directly into even smaller containers that allow you to fit as many plants as possible into every square metre of space. How many plants you want to use for your SOG, as well as their exact pot size, will depend on the space you have available. This may also vary from strain to strain. Feel free to experiment to find the ideal pot size and number of plants that produces the best yields in your indoor grow space.
Note: Depending on where you live, there may be legal limits on how many plants you can grow for personal use, so make sure you know how many plants you can have.
Tip 7: Watch Your Watering
As previously mentioned, autoflowers are less forgiving when it comes to major or sustained errors, which means you must water your autoflowering girls properly.
How do you water cannabis properly? For starters, don’t water your plants on a fixed schedule, but instead only when they need it. You should always allow the soil to dry out between waterings. A good way to check if your plants need water is to lift up the pots. You should have a pretty good idea of how light a dry pot is compared to one saturated with water. As such, only water when the pot is light and the soil has dried out. Overwatering can be deadly, so it’s better to err on the side of caution.
Tip 8: Control the PH Level of Your Water
Cannabis can only uptake nutrients when the soil surrounding the root zone has the right pH value. The optimal pH range here is 6.0–7.0. For growing in other media, such as coco, the pH should be lower, ranging from 5.5–6.5. If the pH of your water is not optimal (which is likely the case if you use tap water) and plants can’t uptake nutrients, this leads to sick specimens. The right pH is particularly important when growing autoflowers as they don’t have time to recover. You want to ensure your plants get all the nutrients they need during their short period of growth.
How do you control your water and nutrient solution pH levels? A must-have for any grower are “pH Down” and “pH Up” products, as well as a pH meter. With these on hand, you can be in control of your soil’s pH.
Tip 9: Cut the Nutrients
Many cannabis growers overfeed their cannabis plants. This isn’t too surprising, seeing that makers of cannabis nutrients want us to believe our plants require constant supplementation to survive and thrive. Nothing could be further from the truth.
Autoflowering cannabis tends to be at its healthiest when given just the right amount of nutrients. In some cases, plants can go through the entire seedling and veg phases without any supplemental nutes, as most soil mixes already contain enough macronutrients and micronutrients to support these phases of growth.
After your cannabis plants have sprouted, don’t feed them for at least two weeks. Even then, you may only want to give nutrients if a plant shows signs of a deficit, like yellow leaves. Autoflowers grown in standard potting mixes should do well all the way to flowering with no additional nutrients. From here, you can start to administer bloom-specific solutions.
You can also grow your cannabis in organic soil. This will ensure your plants have everything they need for healthy growth all the way to harvest, and you won’t ever need to administer additional nutrients! Some growers make their own organic super soils, which are perfect for growing autoflowers. That being said, it’s important the soil is not too “hot” given the sensitivity of these cultivars.
Tip 10: Don’t Top Your Autoflowers
Don’t top, prune, or pinch your autoflowers like you might do when growing conventional cannabis. With autoflowers, the only training method you should use is low-stress training (LST), where you carefully bend and tie down your plants so all bud sites are equally exposed to light. When performing LST on autoflowers, just stick with bending and skip the part where you’d top your plants. If you plan to do LST with your autoflowers as an alternative to a SOG, ensure that you start soon, but be gentle to avoid breaking your plants.
Tip 11: Ensure Good Airflow, Humidity, and Temperature
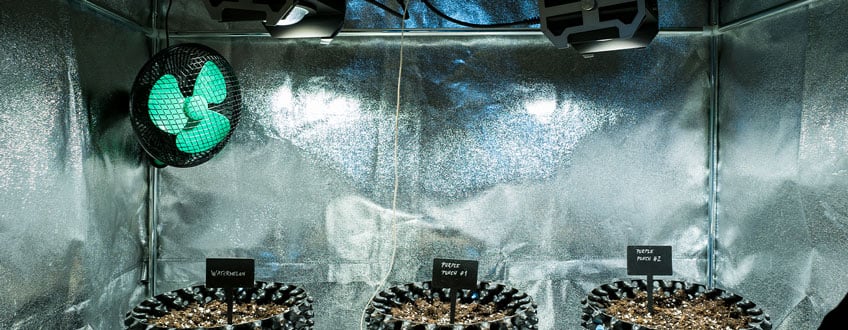
Make sure to provide your autoflowering cultivars with good airflow. A gentle breeze of fresh air from a ventilator ensures humidity levels in your grow room stay low, which helps prevent the growth of mould. If your plants have dried leaves, which is not uncommon in the later stage of flowering, remove them for some better airflow around the buds.
You also need to watch the temperature in your grow room. Cannabis does best at a moderately warm room temperature of 20–25°C. Any excess heat, but also cold spells or chilly nights, can stress your plants, slow their growth, and result in poorer yields.
Tip 12: Flush
“Flushing” is when you stop feeding nutrients, and only administer pH-adjusted water in the last 1–2 weeks before harvest. This gets rid of the remaining mineral salts that have accumulated. Without any nutrients remaining in the soil, the plant will draw stored nutrients from its foliage; this is why cannabis in late flowering turns yellow. The goal of flushing is to make for purer and better-tasting buds, as you don’t want to smoke whatever chemicals you've fed your plants. So flush them out before you harvest.
Tip 13: Harvest Gradually
You don’t need to harvest your entire plant all at once! Chances are, the top buds may be done earlier than some of the lower buds further away from your lights. These buds may need a little more time to ripen. So instead of taking your clippers and collecting them all, take only the topmost buds and allow the others a few days more to finish.
Tip 14: Harvest All Year Round
More often than not, weed cultivators don’t just want to harvest once or twice per year. Wouldn’t it be great if you always had some plants ready to harvest? With the perpetual harvest method, you can do exactly that!
Essentially, this entails having multiple plants in different stages of growth at any given time. In this way, you can time things just right so that there is always weed ready to bloom and harvest. This gives you the potential for a never-ending supply that doesn’t require excess effort from you!
With conventional cannabis, this would involve at least two separate growing areas. Luckily, with autoflowers, you can squeeze plants in different stages of growth all into the same room. As autoflowers take about 8–10 weeks from seed to harvest, all you need to do to enjoy a constant stash is offset planting by 2–4 weeks. This way, when you harvest one plant, the next is already starting to flower, waiting patiently in line.
Conclusion
Autoflowering strains have a lot going for them, and make a great addition to any grower’s repertoire. Although they don’t really allow for advanced techniques or gigantic yields, there is a lot you can do to get the most out of your autoflowers when growing indoors.
 Grow Guide Topic Finder
- Growing weed step by step
- Cannabis growing basics
- Choosing your seeds
- How to germinate seeds
- The cannabis vegetative stage
- The cannabis flowering stage
- Harvesting cannabis
- Trimming, drying, and curing
- Choosing pots and soil
-
Growing indoors
- A Complete Overview Of Growing Cannabis Indoors
- Cannabis Cultivation Tips: How To Set Up Indoor Grow Lights
- How Many Cannabis Plants Can You Grow Per Square Metre?
- Indoor Cannabis Growing: Relative Humidity and Temperatures
- Hydroponics Cannabis Growing Guide (with diagrams)
- Cannabis Micro Growing: Growing Great Weed in Tiny Spaces
- Growing outdoors
- How to grow autoflowering cannabis
- Cannabis nutrients and pH
- Cannabis troubleshooting: Nutrients
-
Cannabis troubleshooting: Growing
- Cannabis Seed Germination — Troubleshooting Guide
- How to Deal With Pythium (Root Rot) in Cannabis Plants
- Slow Cannabis Plant Growth And What You Can Do About It
- How to Deal With Leggy Cannabis Seedlings
- Watering Your Cannabis: How to Fix Overwatering and Underwatering
- Understanding Male, Female, And Hermaphrodite Cannabis
- Identifying and Treating Common Cannabis Ailments
- How To Revive a Sick Cannabis Plant
- How to Avoid Mouldy Weed During Drying and Curing
- How to Prevent and Treat Dry and Crispy Cannabis Leaves
- What Cannabis Leaves Can Tell You
- Causes and Solutions for Yellow Cannabis Leaves
-
Cannabis Strains Grow Report
- HulkBerry Automatic Grow Report
- Blue Cheese Auto Grow Report
- Purple Punch Automatic Strain Grow Report
- Triple G Automatic Grow Report
- Do-Si-Dos Automatic Grow Report
- Green Gelato Automatic Grow Report
- Haze Berry Automatic Grow Report
- Purple Queen Automatic Grow Report
- Cookies Gelato Automatic Grow Report
- Sherbet Queen Automatic Grow Report
- Sweet Skunk Automatic Grow Report
- Medusa F1 Grow Report
- Cannabis plant training
-
Weed growing tips
- The Cannabis Plant Anatomy
- How to preserve seeds - UK
- How Much Sunlight Do Outdoor Cannabis Plants Need To Grow?
- How to Control and Prevent Stretching in Cannabis Plants
- My Cannabis Plants Are Growing Too Tall: What Should I Do?
- Should You Worry About Purple Or Red Cannabis Stems?
- What To Do When Your Indoor Cannabis Won’t Flower
- How To Protect Your Cannabis Plants From Heat Stress
- How To Tell If Your Female Cannabis Plant Has Been Pollinated
- Growing Medical Marijuana
- Bud Washing: How to Clean Your Weed
- Understanding Cannabis Yield per Plant


