Contents:
Grow Report: Critical (Feminized) By Royal Queen Seeds
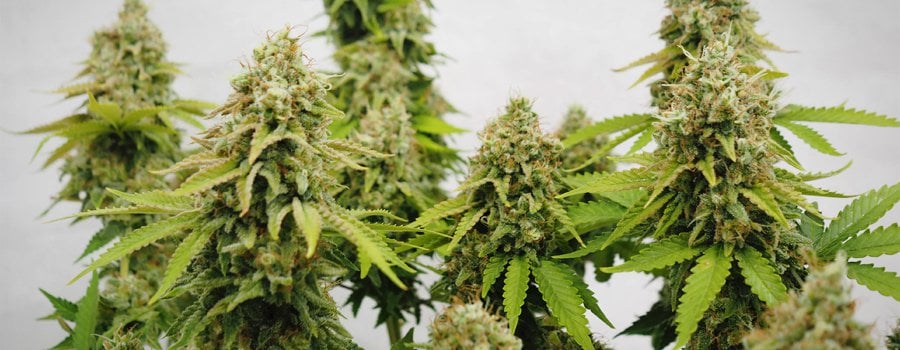
There are many traits cultivators can focus on when deciding which cannabis strain to grow: ease of growth, yield, potency, flavor, and effect are all factors that vary from strain to strain. Critical is one cannabis cultivar that optimises each of these characteristics to their full degree, and thus the strain has become a steadfast staple in the global growing community. For this report, we will follow the growing cycle of RQS’ Critical (feminized) from seed and from clone, all the way to harvest! Read on to discover how to grow this fabulous strain.
GROW SETUP
As soon as we received the seeds in the mail, we popped them into “Root Riot” clone and seed blocks placed in a bottom-heated propagator. For lighting, we used a 400W MH lamp set at 18/6, about 23.4 inches away. To keep our 1 × 1 × 2.1m enclosure cool, we had a 17.6 inches-tall ionising tower fan running, as well as two 5.9 inches fans.
As the base potting soil for the entire grow (including the clones), we used B'Cuzz Kilomix from Atami, to which we added about 10–15% extra perlite. The idea here is that an extra airy mix for the roots will suit Critical’s vigorous growth particularly well.
GROWING CRITICAL FROM SEED
Let's first focus on the process of growing Critical plants from seed. After that, we'll delve into the cloning process.
VEGETATIVE STAGE
As usual with seeds from Royal Queen Seeds, they popped fast. After three days, they had all sprouted, so we opened the vents on the propagator box. We turned the bottom heater off the next day. On day 5, we potted the seedlings into 3.3 inches pots with the prepared mix, and sat them a little closer to the lamp, about 17.6 inches. Over the next few days, we moved them gradually closer, until day 8 when we placed them directly under the lamp, at a distance of 0.7 – 0.8 feet.
Things moved along nicely. On day 15, we transplanted them into 5.9 inches pots. A note on pot size: If you’re trying to grow many plants in a limited space, you’ll want to stick with smaller-sized pots, up-potting only when necessary.
For this grow, we didn’t do any pinching or training, but instead chose to let plants grow in their normal pattern. They were not hindered in any way, and grew very quickly at this stage. It didn’t take long before it was necessary to up-pot again: On day 25, we put them into their blooming pots. Four of the 6 plants were put into 9.8 inches pots, which are a little deeper than standard flower pots.
FLOWERING STAGE
For vegging, we used Canna Terra Vega (from day 8: half-strength; from day 20: full-strength, or 10ml per litre). We didn’t really notice any slowed growth from our repotting—likely on account of the good growing vigour of the strain. By day 28, we moved the pots into the flowering room, a 2 × 1 × 2m enclosure where we set up 2x 400W HPS lamps along with two large 17.6 inches fans.
The strains didn’t waste any time. Just six days into the 12/12 cycle, the four plants started to flower. Two of them also began to stretch considerably. From there on, we started to feed them a full dose of Canna Terra Flores with every watering. It was then that we also took four cuttings from the two best-looking plants.
By day 22 of 12/12, the plants were flowering like mad and resin was already flowing. We upped the feed to double doses every watering (20ml per litre), flushing with pure water every fifth watering. It may have been too early, but as they were flowering so profusely, we also gave them four doses of PK 13/14 over four days. By day 31, it was clear that two of the four were going to be good yielders. Luckily, these happened to be the same plants we took cuttings from.
THE LAST DAYS BEFORE HARVEST
For the next ten days, all the plants put on weight. By day 38, we cut the feed back to normal doses, and on day 42, we stopped feeding altogether and continued by just flushing with water.
On day 47, we saw some of the flowers’ pistils turning brown; by day 51 of flowering, a closer inspection with an 8x magnifier showed the resin glands on two of them (the shortest two) starting to turn milky. We suspected the two taller plants weren't far behind either.
DRYING AND CURING
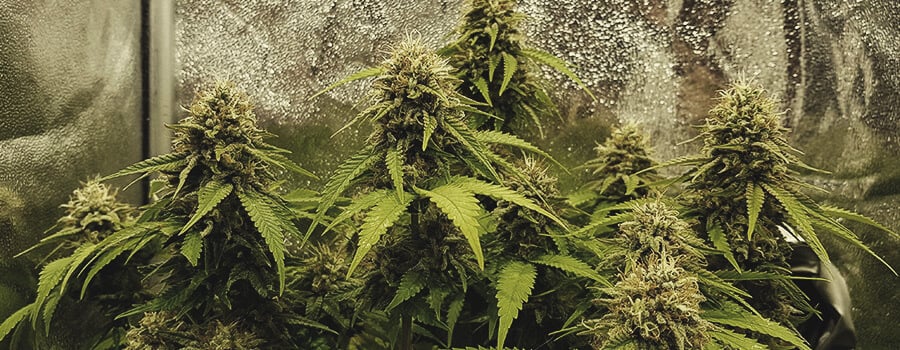
That evening, they were harvested, trimmed, and hung to dry. We noticed some variation in the growth structure of the plants and their buds: The tallest two plants had hard bud “nuggets” with greater space between each node. The two shorter plants had a softer yet denser bud structure, and the internode spacing was nice and tight.
We didn’t notice a difference in smell between the plants, as they all had an earthy and spicy aroma during bloom. Although in hindsight it’s possible that the larger ones were a bit more hashy and skunky, it’s difficult to tell as both varieties were quite strong.
The buds spent about ten days hanging in a dark cupboard to dry, benefitting from a little curing time (20 or 30 days in a glass jar) to reach their potential. As for the yield and the smoke, we’ll get to that after a digression into the art of cloning Critical.
CLONING CRITICAL: A GOOD STRAIN FOR HONING YOUR CLONING SKILLS
Not all cannabis strains are necessarily easy to clone, but Critical hasn’t become a fav among indoor weed growers for nothing. Along with how unproblematic it is to grow the strain from seed, it’s also quite forgiving with cloning, which makes it a good strain to hone your skills.
If you’ve never cloned cannabis before, no worries, as cloning is not rocket science, especially not with an easy specimen like Critical. In our experience, a relaxed “well, it may work, or it may not!” attitude will likely yield the best results when it comes to cloning.
PREPARATIONS FOR CLONING
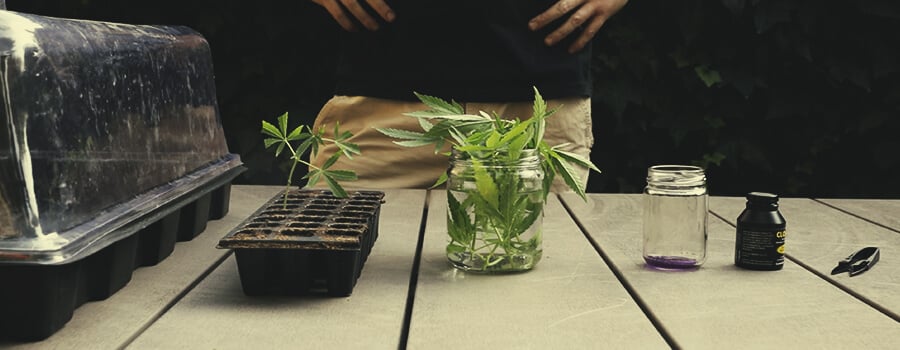
Get yourself a new, sharp utility blade, some cloning solution, some clone and seed blocks like “Root Riot” or similar, and a small, heated propagator. If you really want, you can also get Nitrozyme organic growth stimulator, but it’s not necessary.
We waited until the plants had just started to flower before taking the cuttings from Critical. But if you’re still new to cloning cannabis (or you tried it already in the past and it didn’t work out too well), it may be better to take your cuts during veg (18/6), as the vigorous growth of Critical during that time will benefit quicker rooting.
We set up a clean area on a kitchen work surface with prepared clone blocks that had been thoroughly soaked in lukewarm water. As the holes in these rooting blocks are not always “good”, you may want to grab a toothpick or skewer to redefine them. Definitely don’t “force push” a cutting into a blocked hole! You’ll also need a large glass of lukewarm water in which you can place your fresh cuts.
Know that a main reason cloning weed can fail is because your work area and tools are not clean. To thoroughly clean your working surfaces, use boiling water and detergent, and make sure you’re using sterile knives disinfected with rubbing alcohol between cuts. Also, heat up the propagator a few hours before you start your cloning action!
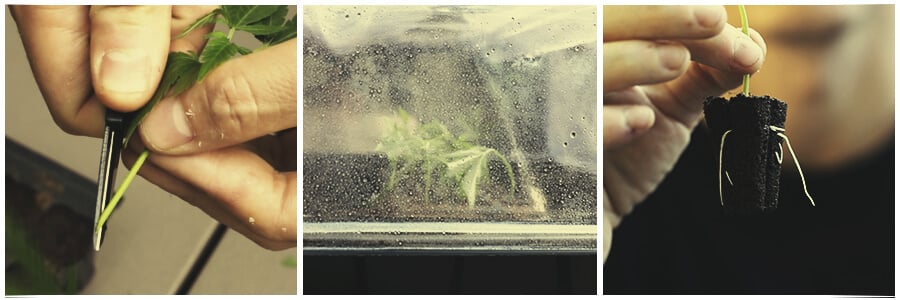
Check the upper third region of the plant you want to clone for viable cuts. With the vigorous growth of Critical, you won’t need to look long, as you’ll likely have a whole bunch of potential cuttings to choose from! Take the knife and move about 3.9 inches (3–4 nodes) down from the growing tip. Remove all leaves in the area, except the growing tip and the next set of leaves down. Cut the leaves off close to the stem, but try not to damage the stem.
MAKING THE CUT
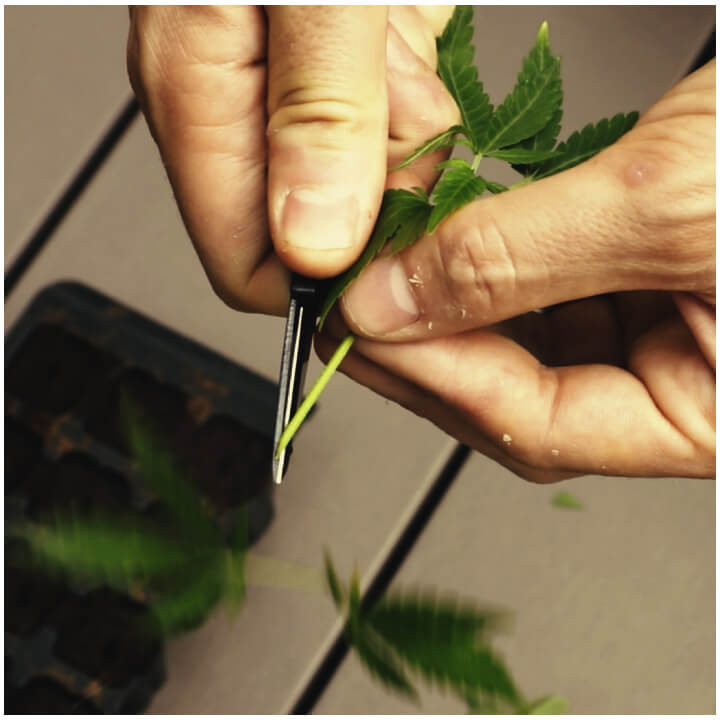
Now, make a sharp cut 1.2 – 2 inches below your chosen node and immediately put the whole cutting, cut end down, into the glass of lukewarm water.
With the cutting partially submerged, we made a clean 45° cut under the lowest node (never take the new cutting out of the water as you are doing this!). Phew! The most “risky” part is now behind us, as one could easily leave cuttings like that in the water for some days and they’d still root. We left the cuttings in the water for two minutes as this allows them to draw water and not air up the stem after the shock of being cut, and thus prevents them from fatality.
Now, with cloning solution ready and a rooting block with a nice small hole waiting, we swiftly removed the cutting from the glass of water and dipped it in the cloning solution (we normally dip at least two-thirds of the cutting for about 20 seconds). Afterwards, we carefully pushed the cutting into the rooting block, followed by a very gentle squeeze all round to secure it. We probably don’t need to mention that all of this is done with the most delicate touch possible. Don’t bend or squeeze the cutting, as this will reduce the chances of it rooting.
PUTTING CLONES INTO THE PROPAGATOR
We placed the blocks with the cuttings in the tray, and put it straight into the propagator with the vents closed. After all the cuttings were taken and in the propagator, we sprayed a mist of Nitrozyme growth enhancer all over the cuttings. This way, the cuttings can get a nice head start with a boosted enzyme foliar feed as a bonus. The propagator needs good light, but—this is important—doesn’t need too much extra heat. In the case of Critical, we had the propagator at about 17.6 inches from the 400W lamp, and had a fan blowing over the top of the unit too, just to be safe. After four days, we misted the cuttings with Nitrozyme again.
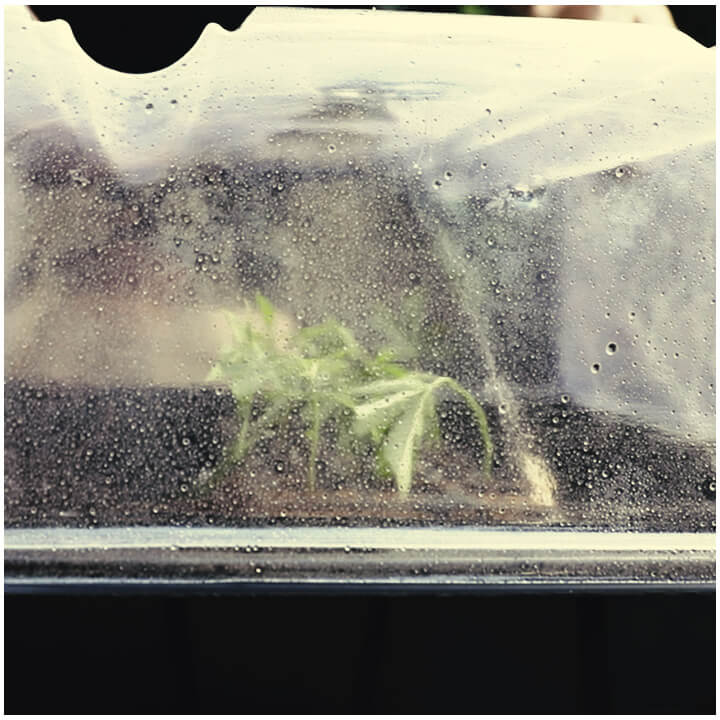
CUTTINGS ARE BEGINNING TO ROOT
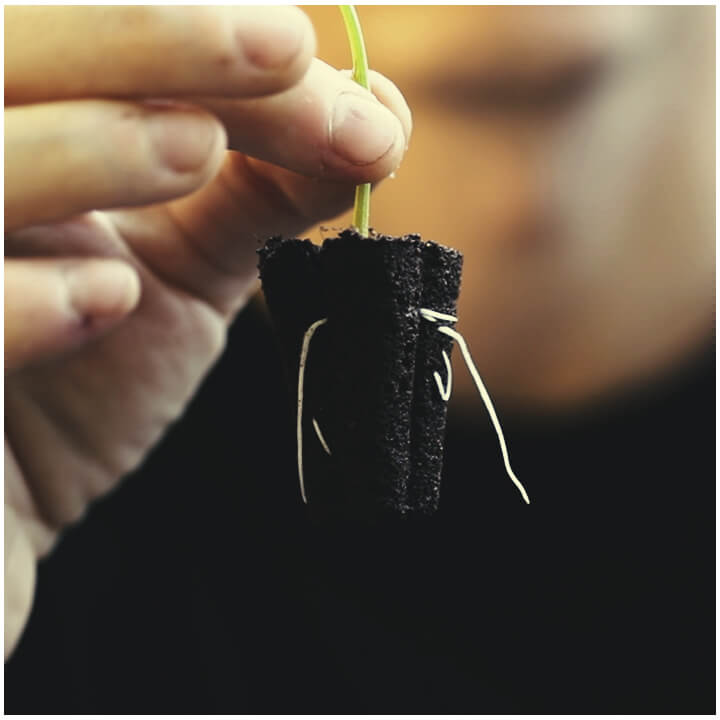
After seven days, we opened the vents on the propagator. After nine days, all four cuttings had good roots showing from the blocks, so we potted them into 3.3 inches pots, which we placed about 17.6 inches from the lamp. We used the same potting mix we used when growing from seed. Over the next 24 hours, we kept a close eye on the cuttings; on their first “exposed” night cycle, they received another Nitrozyme dose. The next day, we pinched out all sprouting tips and moved the plants closer to the lamp (1 – 1.1 feet).
REPOTTING THE CLONES
After 14 days of being in the small pots (day 23 from cutting), we potted the clones into 9.8 inches pots and immediately fed them a half dose of Canna Terra Vega. That night, we gave them another spray of growth enhancer along with 2ml of enhancer in a litre of feed water.
CLONES ARE STARTING TO FLOWER
For the next seven days, the cuttings went mad and were growing very fast. By day 21 from potting, we took two of the plants and placed them in the best spot in the flower room, feeding them a full dose of Canna Terra Flores. Both clones started to flower by day 7 of 12/12. By day 15, they were flowering madly with full resin production. In addition to their double dose feed (Terra Flores) with every watering, we decided to also give them a full PK 13/14 mix (5ml per litre) during days 17–20.
By day 30, the two plants were looking really good. One was shorter than the other and doing exactly what its mum did: budding with short internodal spacing pretty much all the way up its four stems, with a dense, fine flowering structure. Its taller sister was also doing what its mum did: creating spaced out, solid, bulging “nuggets”.
From day 31, we gave them another three days of PK 13/14 boost, at 3ml per litre. By day 35 of flower in 12/12, as we pinched them out early and had used growth enhancers, both plants had now far exceeded their mums in bud production. The taller of the two had such solid, heavy buds that support canes were now needed. From then on, we cut back the feed to a single dose every watering.
BUDS ARE GETTING FATTER
By day 42, the buds had finished their flowering “rush” and were filling out and plumping up. Resin production on both plants was at its peak. From this moment on, both plants would only be getting pure water for dinner until harvest. Day 46, and both plants were heavy with sparkling, bulging buds. The shorter one actually had some pistils turning brown already. It has to be said that in this instance, when the plants were up-potted to 9.8 inches containers, it likely would have been better to go with larger ones, like 1.1 – 1.3 feet, as Critical is a nutrient guzzler and its root system will accommodate its lust for food. So don’t go too small on your pots with this plant!
TIME FOR HARVEST
At day 48 into flowering, both plants started to “brown off”, but the resin glands were still clear. Two days later, more of their pistils had become brown, and we noticed a slight clouding in the trichomes of the shorter plant when viewed under 8x magnification. Time to harvest!
CUTTING, TRIMMING, AND DRYING CRITICAL CLONES
After cutting, trimming, and hanging the buds to dry, one thing was very apparent; these two plants had a higher yield per plant.
By comparison, the four seed-grown Criticals produced a dry trimmed weight of 37, 43, 47, and 1.7 oz for a total of 6.2 oz in 79 days. With the clones, we got a dry trimmed weight of 2.2 oz (tall plant) and 2.6 oz (short plant) for a total of 4.9 oz from only TWO clones, in 71 days from rooting (80 days from cutting)!
A word of caution: Critical buds can be susceptible to mold due to their density. Make sure to prioritise proper airflow and humidity, particularly in the last few weeks of flowering.
SMOKING CRITICAL: AROMA, TASTE, EFFECT
When Critical is dry and undisturbed, it doesn't smell much. But break open a bud, and it has a distinct scent to it—very “earthy”, almost like burnt almond and spice with a slight undertone of fuel to it. This note fades as it cures, but doesn't completely vanish, and in no way does it affect the lovely tasting smoke. If there was any “challenge” with this strain, it wasn’t with growing itself, but with handling the massively resinous (and therefore sticky) nugs.
And finally, as for smoking Critical, both variants induced a similar experience: The taste is surprisingly hashy and rich, with the denser buds perhaps tasting a bit more skunky. The high is very pleasant—a strong (but not too strong) body stone accompanied by a surge of uplifting euphoria. You may be wondering if you will get “couch-locked” after a few hits—you won’t. In fact, you will find that you can do quite a lot—but, of course, all with a silly grin on your face. We found the stone to be a bit of a creeper, and you can easily smoke two or three bowls before the first one really hits home. It's not the longest-lasting stone, but that means you can spend the evening getting totally baked, and still get up the next morning with a clear head!
Critical
|
|
Afghani x Skunk |
|
|
19 to 21 oz/m² |
|
|
3 to 5 feet |
|
|
50 - 60 days |
|
|
THC: Up to 18% |
|
|
Sativa 40% Indica 60% |
|
|
21 to 23 oz/plant |
|
|
6 to 7 feet |
|
|
Late September |
|
|
Heavy, Physically Relaxing, Stoned |
CONCLUSION: CRITICAL TICKS ALL THE RIGHT BOXES
In conclusion, we think that Critical ticks all the right boxes. It couldn’t be easier to grow or clone, and it shines with excellent yields in an amazingly short time. And, most importantly, the smoke is first class. This is yet another example of Royal Queen Seeds delivering top-quality cannabis genetics that always make growers and stoners happy! Plus, if you’re the sort of person who always wanted to try cloning, Critical is a great inaugural strain!


