Amount exceeded

4.7 out of 5 based on 58566 reviews


4.7 out of 5 based on 58566 reviews
.
Looking to grow something new? Or maybe you've had your eye on Fat Banana Automatic for a while? Either way, you'll find some inspiration in this week-by-week grow report. It covers everything—nutrition formulas, lighting, temperature, humidity, growing mediums, and even drying and curing! Find out how this fruity strain performs.
Contents:
Fat Banana Automatic offers a rapid growing cycle and consistent results. Plus, you only need to wait a matter of weeks to experience her sugary terpenes and stoning high. Do you want to give this strain a chance in your grow room? Then check out this Fat Banana Auto grow report below for some inspiration.
I kept this grow small and minimal to prove that great results can be achieved with limited space. You can mimic this grow report whether you live in a small apartment or are running a stealthy guerrilla grow. Here’s the equipment I used:


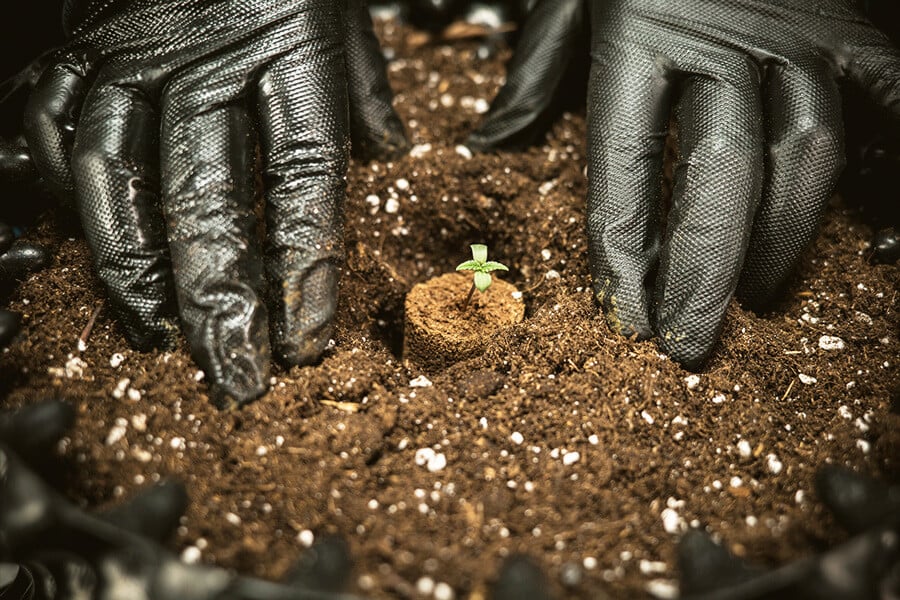
First things first; I needed to germinate my Fat Banana Auto seed and set up my growing area. Here’s what I did:
Growing medium: To create my growing medium, I added 10 litres of auto potting mix, 5g of Easy Roots Mycorrhiza Mix, and 50g of RQS Organic Nutrition into a large plastic tote and mixed thoroughly. I then transferred the mix into an 11 litre Air-Pot. Next, I prepared 2 litres of water and achieved a pH of 6.5 using a pH tester and pH regulator. I watered with another litre again five days later.
Germination: I made a small hole in the middle of the soil surface, inserted my seed, and covered it with a light layer of growing medium. I then watered again lightly to ensure the seed was soaked to trigger germination. The sprout emerged four days later.
Lighting: I rigged the lighting up to the top of the grow box and suspended it 35cm above the rim of the Air-Pot. I switched it on after the sprout emerged and left the rig running for 24 hours each day to maximise photosynthesis and plant growth.
Nutrients: During this time, the growing medium provided everything my young seedling needed to thrive.
Environment: During the first week, I recorded an average temperature of 26°C and a relative humidity of 40%.
Plant status: At the end of the first week, the sprout displayed healthy green cotyledon leaves and the tips of the first set of true leaves. The seedling featured a thick stem and looked strong and vigorous.
")
")
The official start of the vegetative phase. During this time, my plant surged in height and developed a strong foundation from which flowers would soon blossom.
During week 2, I started to feed my Fat Banana Auto plant with nutrient solution. I adjusted the position of my lights slightly and dialled in the temperature and humidity.
Lighting: I continued to blast the young seedling with light 24/7 to facilitate fast and furious growth. I adjusted the lights to hover 35cm from the highest point of the seedling.
Nutrients: I started feeding during week 2, putting together a nitrogen-rich formula with plenty of trace minerals to fuel fan leaf production. My blend looked like the following per litre of pH-regulated water:
I fed the plant with one litre of the solution on day two of week 2. This amount fully saturated the growing medium without signs of pooling or excess drainage.
Environment: During week 2, I managed to maintain an average temperature of 26°C (enough to keep the plant completely happy) and a relative humidity of 50%.
Plant status: By the end of week 2, my Fat Banana Auto specimen had developed three substantial sets of luscious true leaves, and stood at a height of 10cm.
")
")
The plant continued to grow quickly and looked extremely healthy. During week 3, it developed more fan leaves and gained some height. I adjusted nutrition slightly to further optimise growth.
Lighting: I kept the lights running for 24 hours each day, and kept the source 35cm from the canopy as the plant continued to get taller.
Nutrients: I added more nitrogen into the nutrient solution to fuel leafy growth. My solution (per litre of water) looked as follows:
I fed the plant with one litre of this formula on day one and day four of week 3.
Environment: I maintained a consistent average temperature of 26°C and a relative humidity of 50%.
Plant status: Fat Banana Auto looked happy, healthy, and flourishing at the end of week 3. It put out several new sets of fan leaves and surged to a height of 21cm. All of the new growth appeared dark green, and the stems thick and sturdy.
")
")
During the last week of the vegetative phase, I started to notice the emergence of pre-flowers. I kept feeding good levels of nitrogen, but introduced more sources of potassium and phosphorus, as well as micronutrients, to facilitate flower formation.
Lighting: I kept the light running on the same schedule of 24 hours per day.
Nutrients: To help with the establishment of healthy pre-flowers, I put together this combination per litre of pH-regulated water:
I administered one litre of this mix on days one and four of week 4. I also watered the plant with one litre of plain water each day when the top layer of the growing medium became dry.
Environment: Temperature was reduced slightly to 25°C and relative humidity remained at 50%.
Plant status: The plant had reached a height of 41cm by the end of week 4, developing a dense, leafy canopy and plenty of pre-flowers at the nodes.
")
")
Week 5 marked the start of the flowering stage. I made changes to humidity and nutrition to increase flower size and reduce the threat of rot or disease.
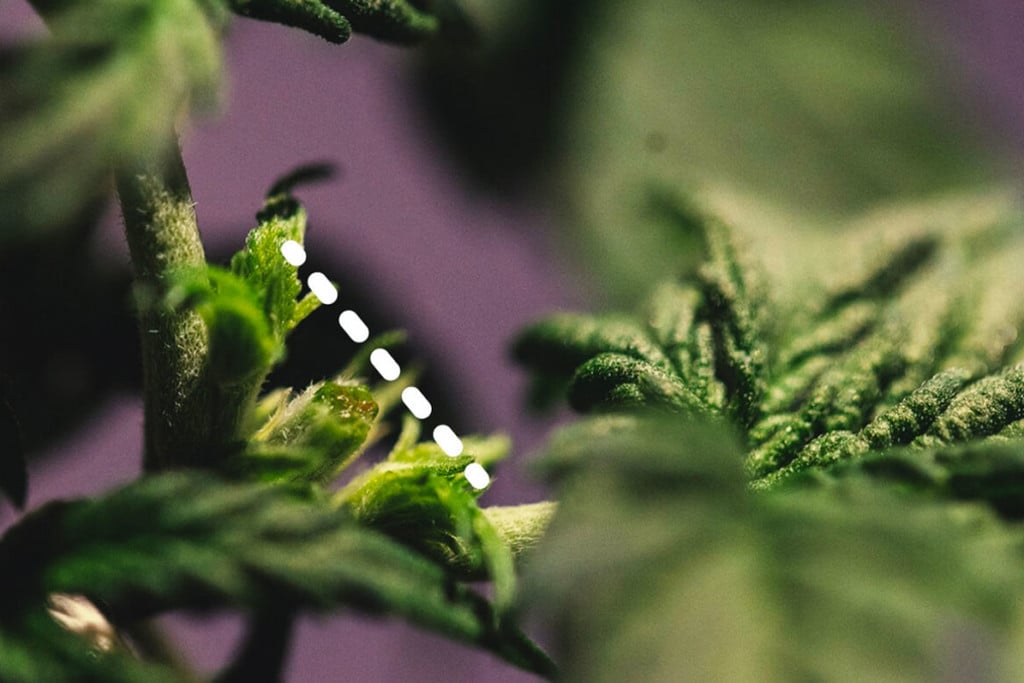
The pre-flowers on the plant started to swell into distinct colas, and the branches started to stretch significantly. I tweaked the nutrient profile once more to further accommodate flower formation, and performed some light defoliation.
Lighting: After blasting plants with light for 24 hours per day during the vegetative phase, I reduced exposure to 20 hours on and 4 hours off during the flowering stage.
Nutrients: The nutrient profile for the first week of flowering looked like the following, per litre of water:
I applied one litre of this formula on day one and day four of week 5. I also applied one litre of plain water on each non-feeding day during the week.
Environment: I kept the temperature at 25°C to keep the plant productive, but dropped the humidity slightly to 40% to prevent mould formation on the developing flowers.
Plant status: I defoliated the top of the canopy lightly during the week to improve light penetration. By the end of the week, my Fat Banana Auto specimen stood at 72cm and possessed many colas loaded with bright white pistils.
")
")
The second week of flowering saw the buds fill out slightly. The plant also packed on some height, and I noticed further pistil development.
Lighting: I maintained a flowering schedule of 20 hours on and 4 hours off.
Nutrients: I applied the following nutrient blend on days one and four of week 6. I also continued to give the plant one litre of pH-regulated water every 24 hours.
Environment: I sustained a steady temperature of 26°C. The humidity rose slightly to 48%, but it didn’t cause problems at this stage of flowering.
Plant status: I performed defoliation lower down on the plant. By removing the older fan leaves, energy was diverted toward the developing flowers. I logged a plant height of 88cm at the end of week 6.
")
")
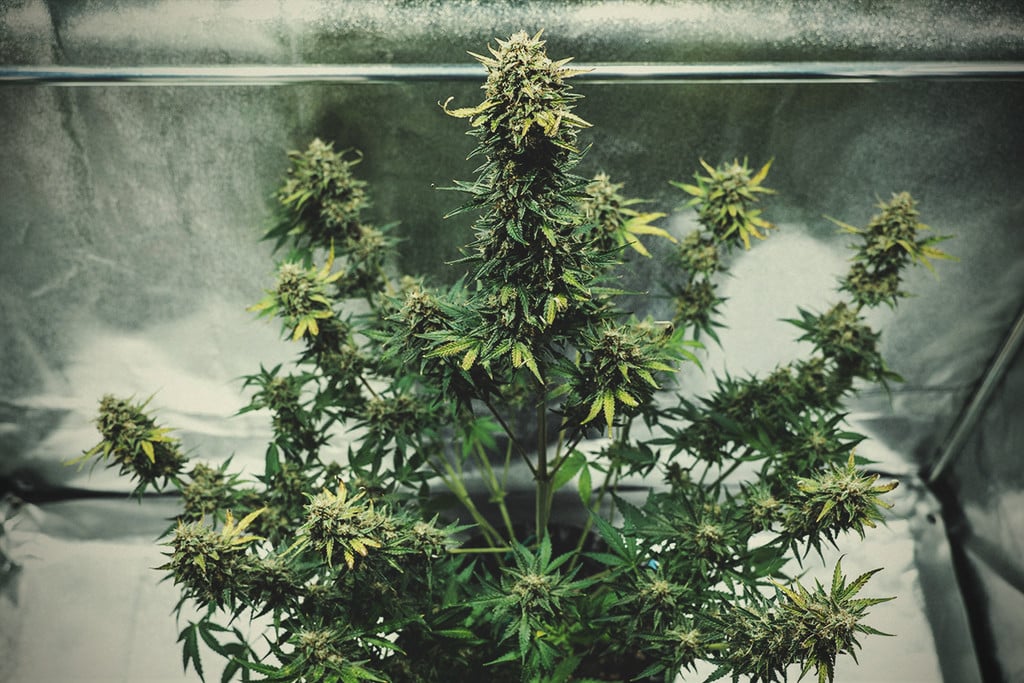
The flowering stage continued to progress nicely. Colas became more compact, trichomes started to amass, and the plant started to give off a strong odour.
Lighting: I continued the same light schedule of 20 hours on, 4 hours off.
Nutrients: I upped the nutrient concentrations to deliver higher levels of phosphorus and potassium, adding the following per litre of water on days one and four of weeks 7 and 8:
I also increased the watering volume to 1.5 litres every 24 hours.
Environment: I logged an average temperature of 25°C and a relative humidity of 45%.
Plant status: I defoliated the upper canopy by removing older, light-blocking fan leaves to expose the developing buds to more light. I recorded a plant height of 95cm.
")
")
After upping nutrients last week and observing the maturity of the flowers, I decided to start flushing the plant to improve the smoothness and taste before harvest.
Lighting: 20 hours on, 4 hours off.
Nutrients: I stopped administering any nutrients during the flush. Instead, I applied 1.5 litres of pH-regulated water every 24 hours.
Environment: I recorded a steady temperature of 25°C and a relative humidity of 47%.
Plant status: The plant remained at a height of 95cm. I defoliated heavily, removing many of the lower fan leaves as well as those casting shadows over the buds in the upper canopy.
")
")
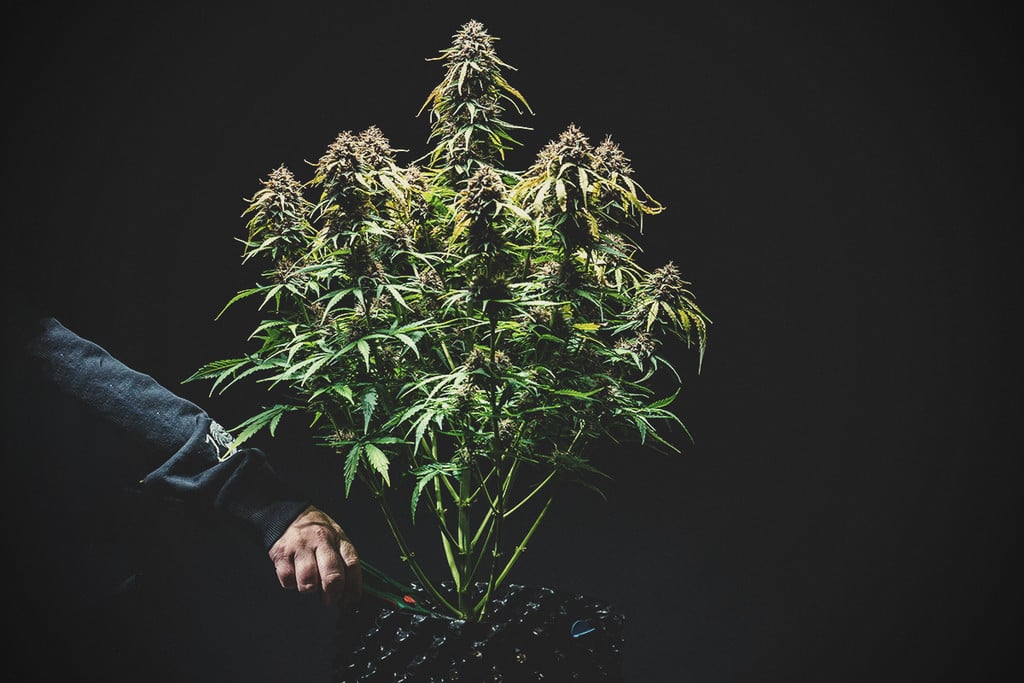
I harvested my Fat Banana Auto plant at the end of week 9, using curved trimming scissors to remove and trim the buds before starting the drying and curing process. I placed my flowers into a herb dryer and moved them into a dark room with good air circulation and a relative humidity of 45%.
My buds were fully dried after 10 days, and the yield weighed in at 70g. I then transferred the buds into curing jars for six weeks to ensure a smooth and flavourful smoke.
")
")
Fat Banana Automatic demonstrates just how far autos have come. This variety outcompetes many photoperiod strains in terms of potency, and her intense sweet and fruity tastes are unparalleled. If you’re looking for a fast-growing cultivar that requires minimal intervention and zero fuss, you need to give her a try.
Fat Banana Auto stems from a cross of parent strains Fat Banana and Cookies Auto. Both passed down valuable traits that made the progeny potent and unique. The original Fat Banana brought high levels of THC and fruity tastes to the table, whereas Cookies Auto contributed her rapid growing time and sugary terpenes. Overall, Fat Banana Automatic features 70% indica genetics, 20% sativa, and 10% ruderalis.

|
|
Fat Banana x Cookies Auto |
|
|
375 - 450 gr/m2 |
|
|
70 - 100 cm |
|
|
50 - 55 days |
|
|
Up to 22% |
|
|
Sativa 20% Indica 70% Ruderalis 10% |
|
|
90 - 175 gr/plant |
|
|
80 - 120 cm |
|
|
Calming, Clear |
|
|
Low |
|
|
65 - 70 days after germination |
You can grow Fat Banana Automatic almost anywhere, and she’ll thrive. If you take inspiration from the grow report above, you can achieve great results in small indoor spaces. Expect plants to reach 70–100cm in height and churn out 375–450g/m². If you decide to grow her outdoors in your garden or at a guerrilla growing location, you’ll watch plants peak at 120cm and deliver up to 175g/plant. Get your stash jars ready to harvest in only 9–10 weeks following germination.
After drying and curing your flowers, brace your taste buds for waves of delicious terpenes. You’ll experience flavours of banana, earthiness, and fruit with every hit. When it comes to effects, Fat Banana Automatic delivers a soothing and stoning experience. A THC level of 22% will melt your muscles and put you in the mood for some deep conversations. Reserve this strain for lazy afternoons and evenings when you don’t have much else to do.
Prep a light potting mix, set up your lights, and get a Fat Banana Automatic seed in the soil. You won’t regret it! A euphoric body high and insanely fruity terpenes are only a matter of weeks away. You don’t even have to worry about space. As proven, this variety thrives in small and compact spaces, and serves as the perfect companion for clandestine cultivators. Happy growing!