.
Cannabis Pests: How to Get Rid of Broad Mites
This article is meant to equip you with all of the information you need to identify a broad mite infestation on your cannabis plants early, and to eradicate this dreaded pest. And since prevention is better than cure, we'll also explain how to best prevent this issue in the first place.
Infestations are, at the very least, a nuisance when growing weed. At worst, they can ruin a grow completely and reduce a lot of effort to nothing. And when it comes to infestations, there are few that are less welcome than broad mites, which are notoriously hard to get rid of.
In this article, we take an in-depth look at broad mites, their life cycle, how to identify them, and what to do if you find they’ve colonised your beloved crop!
Contents:
What Are Broad Mites?
Broad mites, also known as Polyphagotarsonemus latus, are a garden pest that can be regularly found on a variety of plants, including grape vines, apple trees, and, of course, cannabis.
Despite their name, broad mites are tiny, with female mites measuring roughly 0 inches and males measuring only 0 inches. They can be found around the world, especially in greenhouses.
On cannabis plants, broad mites tend to lay eggs on the underside of new leaves. This is usually where they dwell and feed, leaving behind a toxic saliva that causes malformations and stunts the development of cannabis plants. Mostly, they are found on the newer growth, near the tops of plants.
.jpg)
.jpg)
How to Identify a Broad Mite Infestation
If you know how to identify a broad mite infestation, you'll be able to act fast and effectively. If you spend too long trying to figure out what’s going on, or otherwise treat the wrong problem, then the infestation might get worse and do a lot more damage to your plants than necessary.
The symptoms of russet and broad mites are usually characterised by yellowing foliage and stems, curling and/or drooping leaves, and stunted growth. Foliage affected by these mites might appear glossy or wet-looking, while buds will begin to brown and eventually die. Sad!
Symptoms of Broad Mites on Weed Plants
The symptoms of a broad mite infestation on cannabis plants include:
🪲 Visible mites and eggs
🟨 Yellowing foliage and stems
🥀 Curling and drooping leaves
💦 Glossy, wet-looking foliage
🍂 Buds may begin to turn brown and die off
Detecting Broad Mites With a Microscope
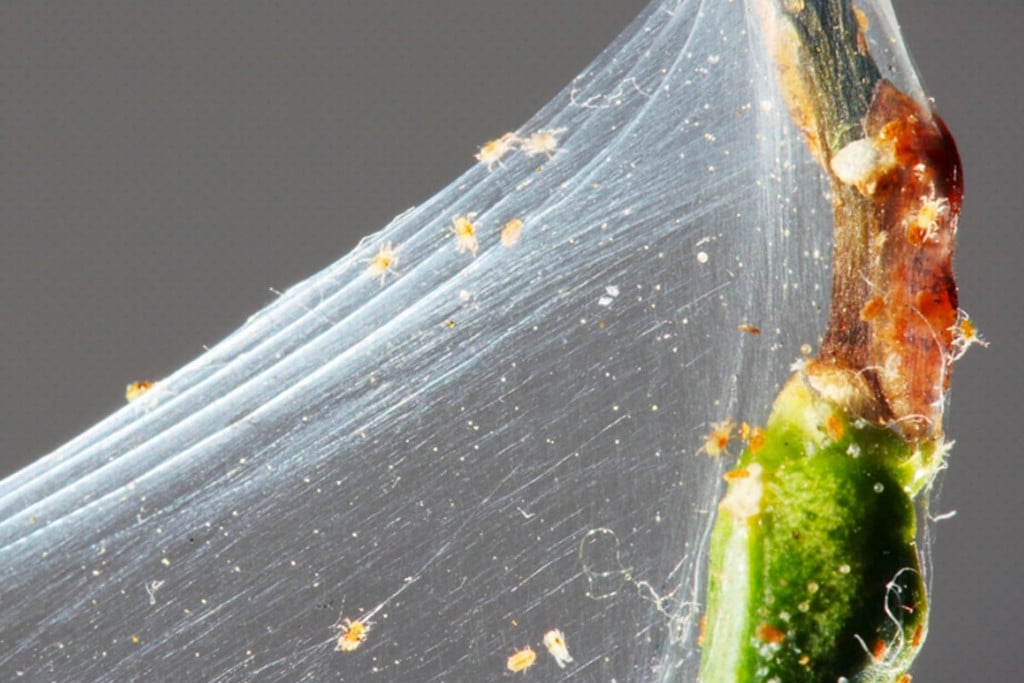
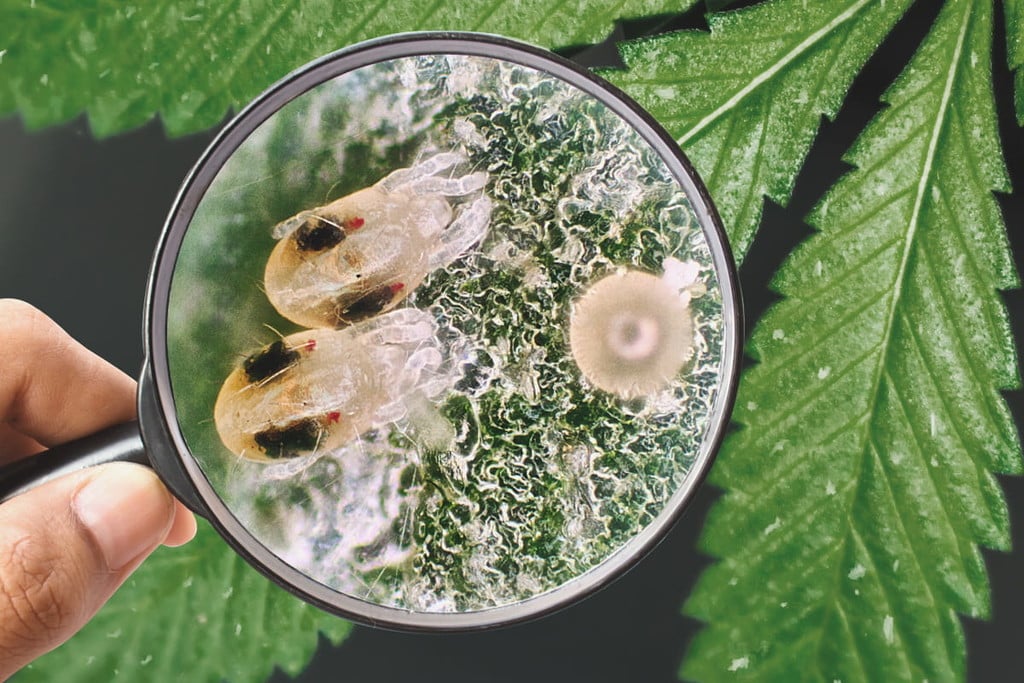
If your plant is showing signs of an infestation, you should get close to it and investigate what’s going on immediately. Due to their minuscule size, broad mites are invisible to the naked eye. So to spot them or identify their age, you'll need some kind of microscope or magnifying glass.
Looking out for eggs is one of the easiest ways to identify them, as they have peculiar tufts and can be found stationary on the underside of leaves rather than moving around. If you can find eggs, then look for anything crawling about on your plants that matches any of the descriptions we mentioned above.
.jpg)
.jpg)
Life Cycle of Broad Mites
Including the egg, there are four stages to a broad mite's life cycle:
- Egg: Eggs are laid in clutches on the underside of leaves and covered with 29–37 white tufts. They hatch after 2–3 days.
- Larvae: Once the eggs hatch, the larvae of the broad mite emerge. These have only three sets of legs and appear to be white due to the ridges along their bodies. This stage lasts one day.
- Nymph: Next, they enter the nymph phase. At this point, they are clear and pointed at each end. Usually, they are found hidden in depressions on fruits and flowers, but the females can also be found being carried around by adult males.
- Adult broad mites: After only three days of hatching, the broad mites reach adulthood, and feed and breed until they die. Males live for 5–9 days, and females for 8–13.
Anatomy of Broad Mites
Knowing how to spot broad mites, and how to identify them at each stage of their life cycle, is key to identifying an infestation and figuring out how progressed it is. For instance, finding young broad mites means that adults have arrived and already started breeding. Whereas, if you only find adults, it might mean that it is relatively new, and therefore might be easier to treat.
Here’s how to identify each stage:
- Larvae: 0.1–0 inches long. Whitish, with ridges along their bodies. Slow-moving, with only three pairs of legs.
- Nymphs: Clear and pointed at each end. 0.1–0 inches long.
- Adult broad mites: Short, oval bodies, broadest in the middle. Four sets of legs that are long and spindly and well-defined.
.jpg)
.jpg)
Feeding Habits of Broad Mites
Broad mites feed on the plant by penetrating the surface of leaves and fruits. Not only can a large infestation damage plants by sapping their energy (and sap), but broad mites' saliva is toxic and causes leaves and flowers to grow malformed, which ultimately stunts growth and reduces the final yield.
They tend to feed on tender, younger leaves first, and this is also where they are most likely to be found. Younger leaves have softer skin, which is easier for the broad mites’ mouthparts to penetrate.
How to Get Rid of Broad Mites
Broad mites are feared by cannabis growers as they are known for being one of the hardest pests to deal with or get rid of. Tough and hard to kill, once they’re on your plants, you’re going to have a hard time getting them off—but it's not impossible!
Speed is absolutely essential here, and this is why it’s so important to identify the problem quickly, so you can deal with it before it gets out of hand!
Again, it can be done, and we’re here to show you how.
1. Remove Affected Areas
First, remove any leaves or buds that have mites or eggs on them. This is going to hurt your soul and your plants, but it’s a necessary way to immediately remove a large amount of them. As they are tough to kill by other means, simply removing the majority of them will make the rest of your task significantly easier. Let go!
.jpg)
2. Neem Oil
Once you’ve removed the affected areas, you’ll still need to spray the rest of your plant with something to get rid of any lingering mites or eggs.
Neem oil is a go-to organic pesticide used by many growers. It’s effective at killing pests, but doesn’t pass up the food chain, nor does it pollute the wider environment. So, it is a much better option than synthetic alternatives.
Using neem oil is simple; just mix it in a mister according to the packet instructions and apply to the affected areas of your plant.
Keep in mind that neem oil will leave behind an unpleasant taste, so always avoid spraying it on your buds.
To limit your use of neem oil, we recommend applying it to your plants once, then monitoring their progress over the next 1–2 days before applying the oil a second time.
If you’re dealing with a hardcore infestation, feel free to apply neem oil on a daily basis. This will eventually kill them off (fingers crossed). Just remember that it’ll also put your plants under a lot of stress, so they’ll need a bit of extra love after the treatment is through. Doable.
3. Insecticidal Soap
Insecticidal plant soaps are great for spot-treating parts of your plants affected by broad mites.
In that way, they are ideal for use on smaller infestations as well as flowering plants. Just make sure to avoid getting the soap on your buds. Consider using them multiple times for best results.
You can also give your entire plant a wash with insecticidal soap. This works best when you don’t have flowers developing yet. As it’s not very harsh, you can use it at the slightest sign of an infestation. In fact, commercial growers sometimes wash their plants on a regular basis, as a preventative measure.
4. Predatory Mites
Alternatively, you can introduce predatory mites such as Amblyseius andersoni, aka broad mite killer, which will kill the broad mites themselves. Ha!
These should be applied to the top of the plant, where the newest growth is, as this is where broad mites are most likely to be found. Predatory mites can be pretty effective, especially in the earlier stages of an infestation. Still, repeat applications might be necessary to sort out an infestation.
5. Miticides/Pesticides
Unfortunately, sometimes mites can be so hard to deal with they leave you no choice but to turn to time-tested chemical insecticides and broad mite miticides.
While these products contain harsh chemicals that’ll stress your plants and produce potentially toxic runoff, they are extremely effective at dealing with a wide variety of garden pests. Only use these as a last resort, though. They're powerful chemicals.
Most of these products are designed to be applied to the affected parts of the plants and left to work for extended periods of time. In some cases, you may need multiple applications to ensure the mites have left your plants.
After that, remember to thoroughly flush your soil. Then you can pump up your nutrient routine again.
.jpg)
How to Prevent Broad Mites on Cannabis Plants
When it comes to dealing with garden pests, it's always better to prevent than treat. Therefore, always make sure your plants are growing in a good environment with plenty of ventilation/circulation and the right temperature/humidity levels.
Plus, always make sure to inspect your plants regularly and act quickly as soon as you see any signs of stress. Mite infestations are much easier to handle when caught early.
1. Start From Seed
If you start from seed, you know for sure that your plants won’t begin life infected. Clones, on the other hand, can come already-infected with broad mites (or any other pest), and then you’ll have problems on your hands from day one.
Of course, sometimes there are good reasons to buy clones rather than seeds. So, if you’re getting clones, ensure they’re from a highly trusted source that will check them for pests before giving them to you. Crucial.
2. Periodic Preemptive Sprays
As mentioned, sometimes commercial growers will wash their plants as a preventative measure using insecticidal soap, or even neem oil. You could do this yourself, especially if you grow outdoors. But in most cases it isn’t necessary and involves a lot of extra effort.
Broad Mites on Cannabis: Prevent First, Treat Later
Broad mites are one of the worst infestations a cannabis crop and its grower can face. And while, of course, there are effective steps you can take if one does happen to occur, it’s much better to prevent it in the first place.
With this article, you should find yourself better armed to identify and treat this problem if it does enter your life. Good luck!


