Amount exceeded

4.7 out of 5 based on 58502 reviews


4.7 out of 5 based on 58502 reviews
Three simple steps to mastering the cannabis seedling stage.
Contents:
Cannabis seedlings can be tricky to keep alive, especially for rookie growers. With a solid understanding of seedlings and their requirements, though, the all-important seedling stage can be a lot less threatening. Keep readingfor three simple steps to growing healthy seedlings.
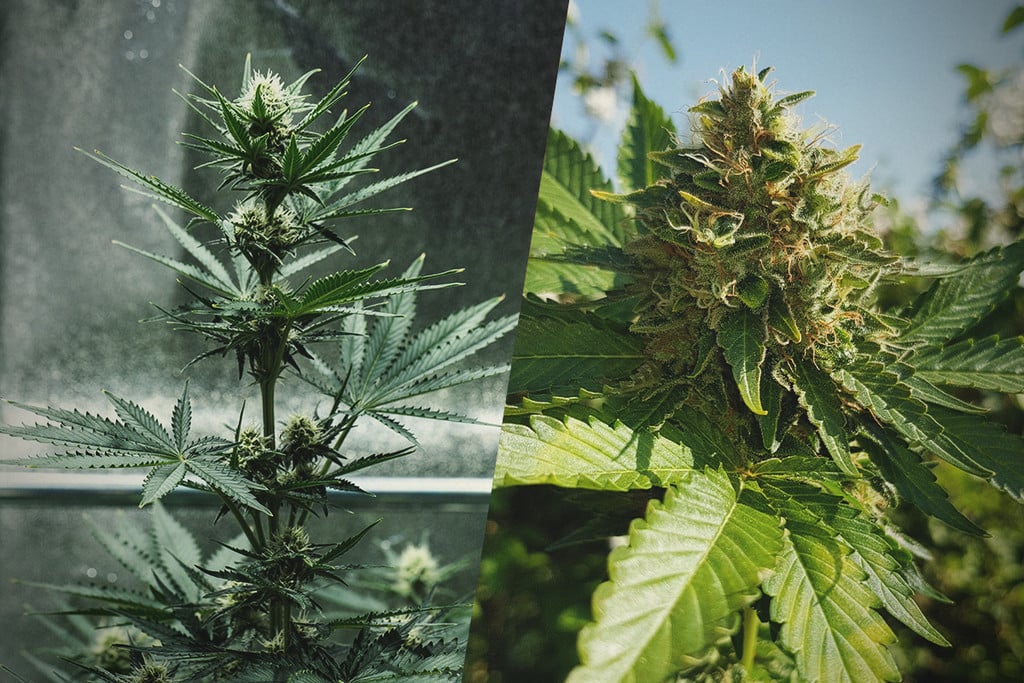
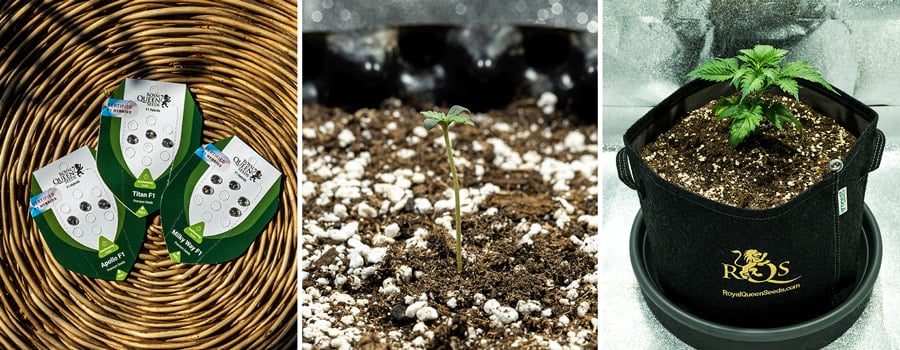
When sourcing your seeds, be sure to actively search out the right strain for you; your experience and skill as a grower, budget, grow equipment, preferences in taste and effect, and whether you’re growing indoors or outdoors will determine which strain will yield the best results for you.
As for the medium,
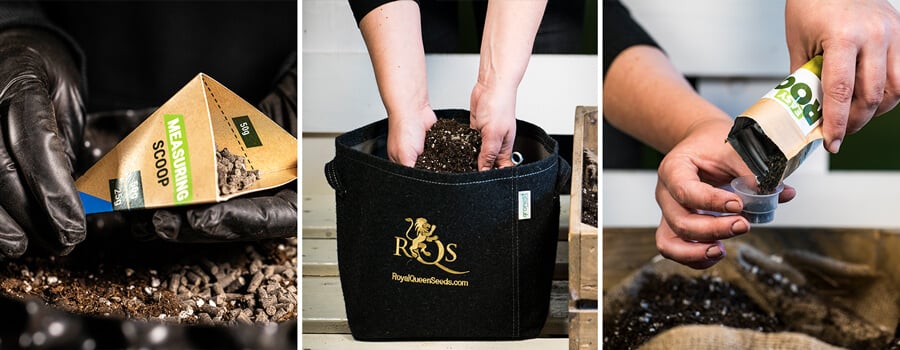
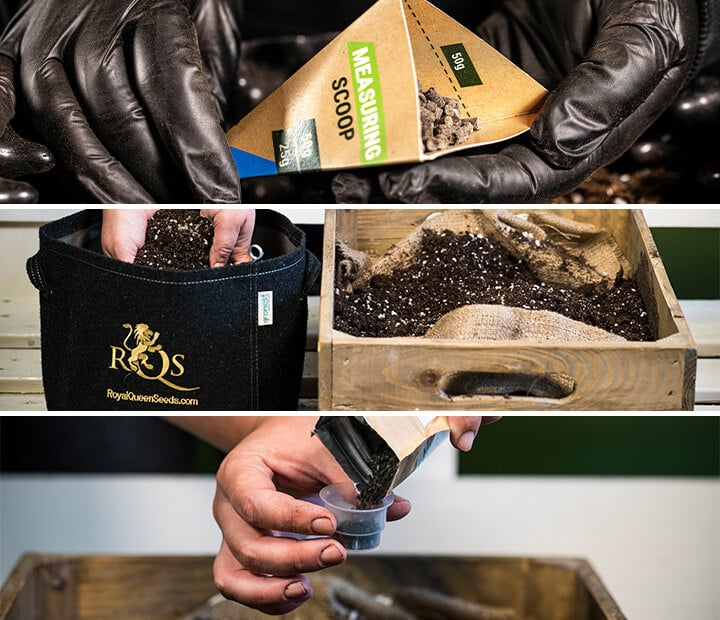
we always recommend growing in a light, well-aerated, slightly acidic soil with a pH of 6.3–6.5. We recommend using between 20–50% perlite in your medium to aid with soil aeration and nutrient retention. The more nutrients you plan to give your plants, the more perlite you should add to your soil to help with drainage and prevent nutrient lockout.
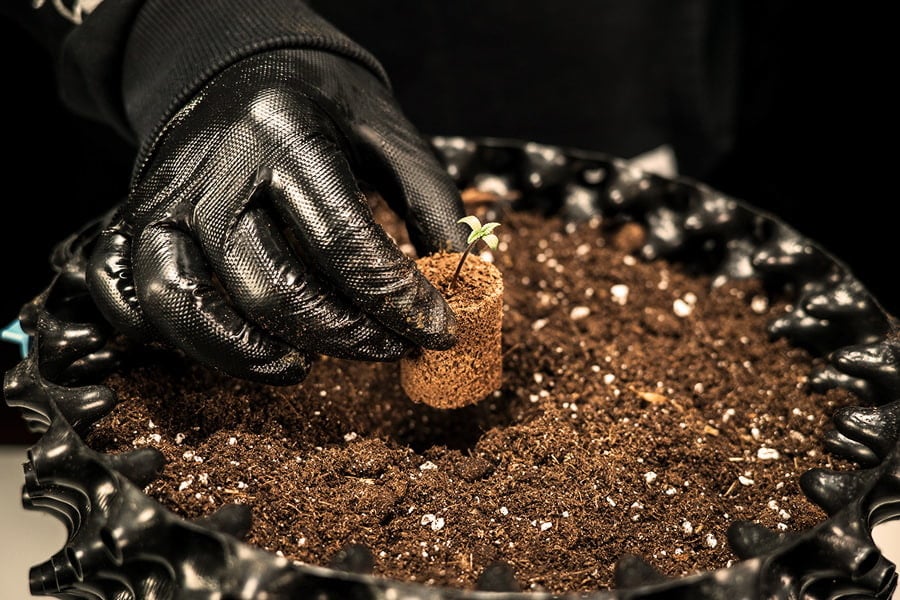
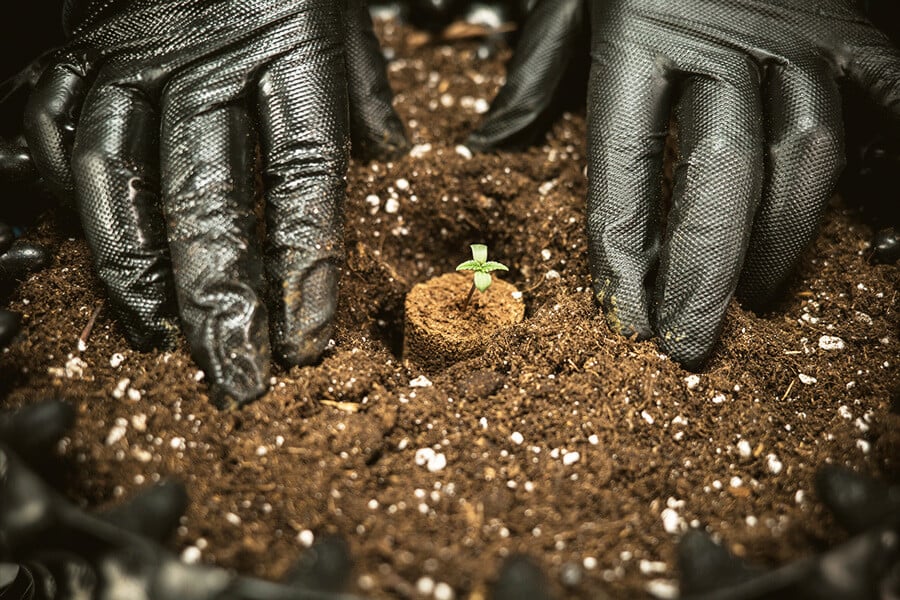
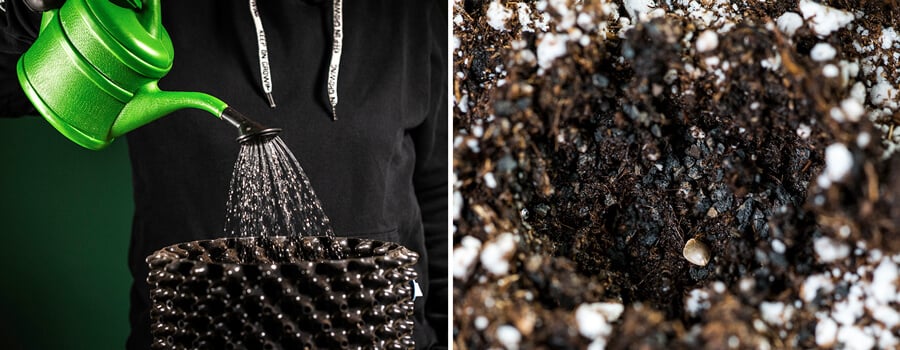
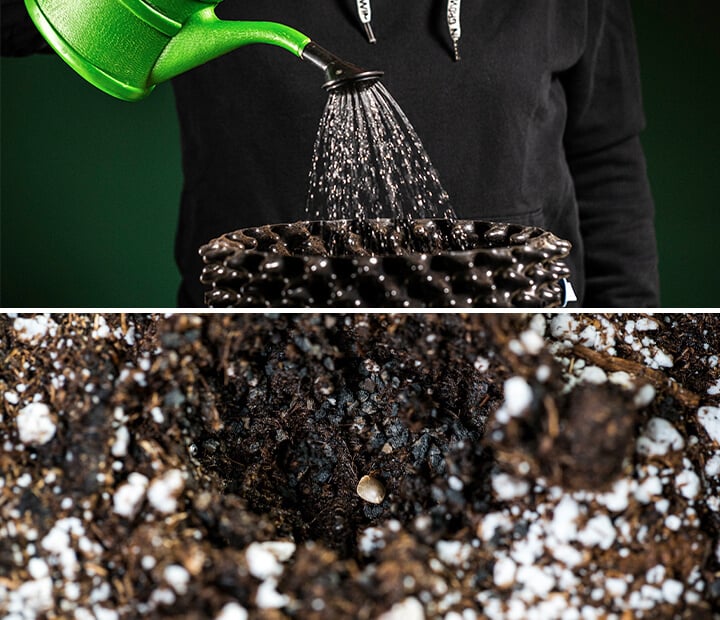
Remember to water just around the stem of your seedlings, and only once the soil has completely dried out (see the section on over/underwatering below for more info). Also, keep in mind that seedlings (especially autoflowering varieties) are extremely sensitive to nutrients. Never plant them into hot (nutrient-rich) soil and don’t start feeding them until they’ve grown 3–4 sets of true leaves.
When it comes to picking pots, we recommend the following approaches for autoflowering and feminized seedlings.
When growing autoflowers, we recommend planting them directly in their final pots. Because of their short life cycle, it’s best to avoid putting autoflowering strains through any kind of unnecessary stress, including transplanting. While the exact pot size you use will vary depending on the strain you’re growing and the size of your grow space, most auto growers use pots between 5–15l.
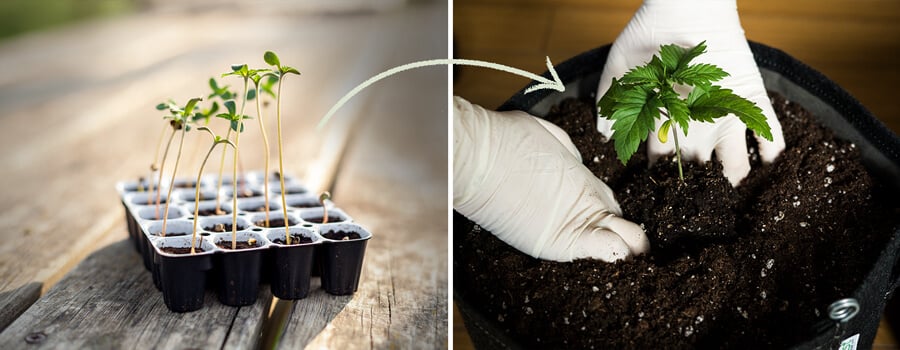
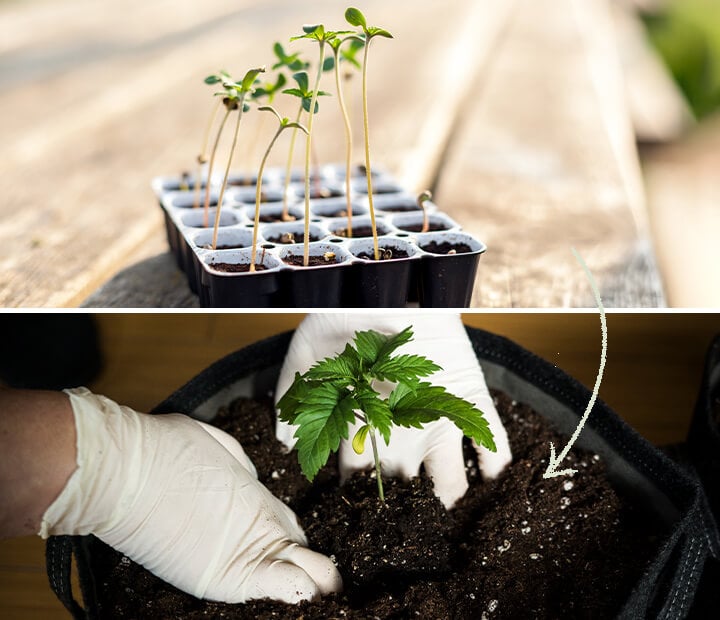
If you’re growing feminized seeds, transplanting isn’t as much of an issue since these plants have time to recover from the stress. Using Easy Start germination pots, you can support robust health right from the beginning. You’ll want to transplant your seedlings just before they start outgrowing their starter pots. We typically recommend transplanting once they’ve grown sets of true leaves that spread out to cover the full circumference of their current container.
From here, most indoor growers move their plants directly into 12l pots, but you can go above or below that to suit your particular strain and grow setup. Keep in mind that you can (and should) up-pot feminized photoperiod plants a few times to max-out development, meaning you don’t need to transplant your seedlings into a giant pot right away.
From cheap nursery containers to sophisticated smart pots, growers are spoilt for choice when it comes to picking the right container for their cannabis plants. And while it’s possible to grow great weed in cheap plastic propagation containers, there are a couple of things you’ll want to keep in mind when choosing pots for your weed plants.
1. Drainage holes
Make sure your pots drain well to protect your plants against fungal pathogens and root rot. If your pots don't already contain holes (or some other kind of mesh to allow runoff), you'll need to puncture them yourself.
2. Aeration
One of the functions of a plant's substrate is to serve as a site for air exchange between the roots and the environment. Smart pots like the RQS Fabric Pot help your plant’s roots respire by allowing more oxygen to reach them. This translates into faster, more vigorous growth, healthier plants, and a better harvest.
3. Pot size
Keeping tiny seedlings in huge pots increases the risk of overwatering, as your plant’s roots won’t be big enough to extract all the water from their substrate. Any water that stays in the substrate will effectively drown the roots and attract pathogens and pests into your garden/grow room.
If you're learning how to germinate weed seeds, keep in mind that they need four essential things: moisture, warmth, darkness, and time. To ensure you grow healthy seedlings, germinate your seeds using one of the following techniques.
Carefully place your cannabis seeds between a few moist pieces of paper towel, and place it all in a plastic container with a lid. Keep the container in a warm, dark place (temperatures between 20–25°C are ideal). Leave a slight crack in the lid to allow for some fresh air exchange.
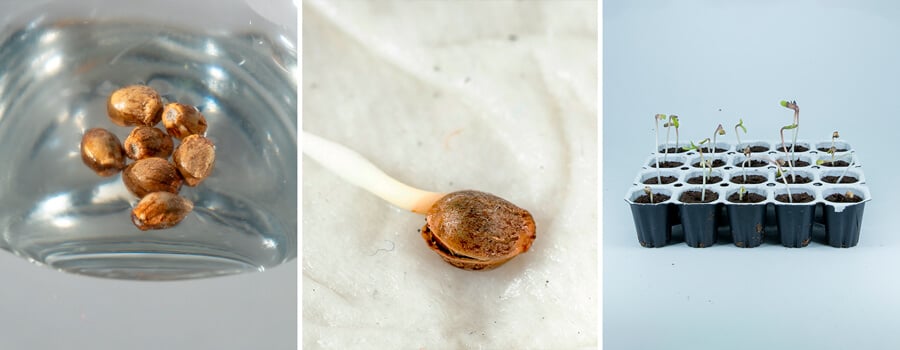
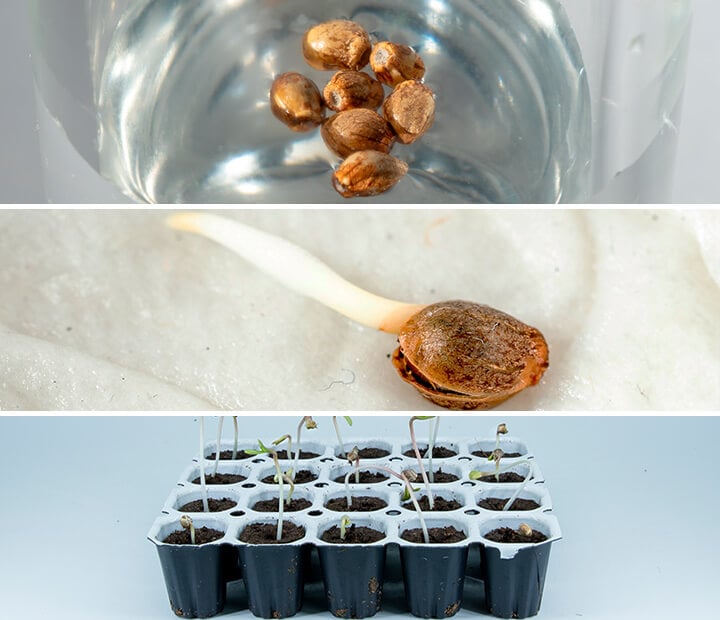
Simply drop your seeds into a glass of water and let them sit in a cupboard for 24–48 hours at 20–25°C. Once you see the first signs of taproots sprouting from your seeds, they’re ready to plant. If your seeds don’t germinate after 48 hours in water, switch to the paper towel method. Don’t keep the seeds submerged for more than 48 hours or they’ll rot.
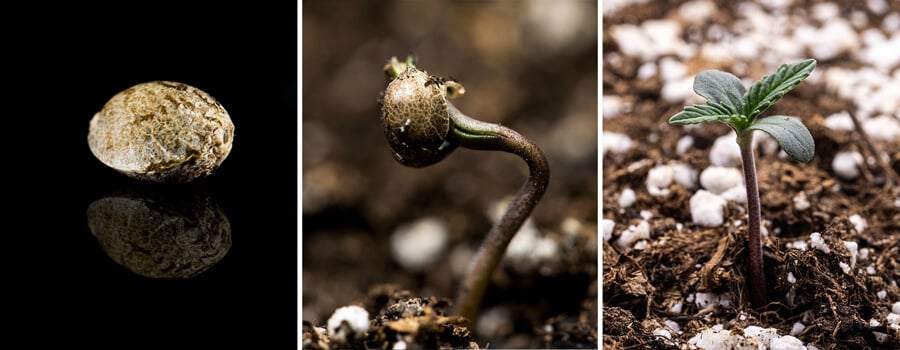
Your seeds are ready to plant once they’ve cracked open and released a small, white taproot. Plant your germinated seeds one knuckle (roughly 3–5 millimetres) deep with the taproot facing down. That way, your seedlings won’t have to reorient themselves.
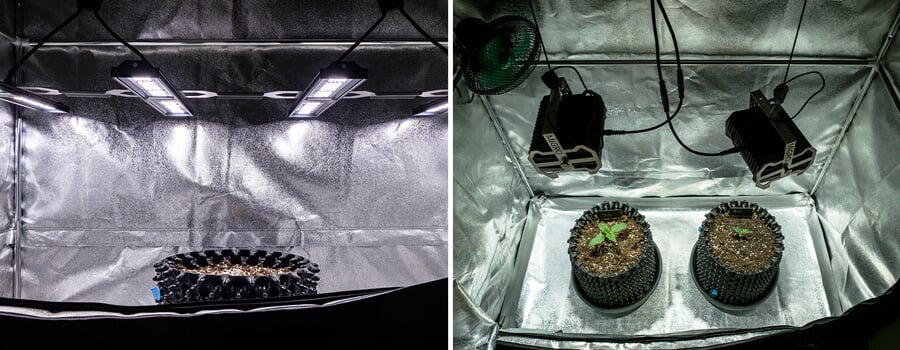
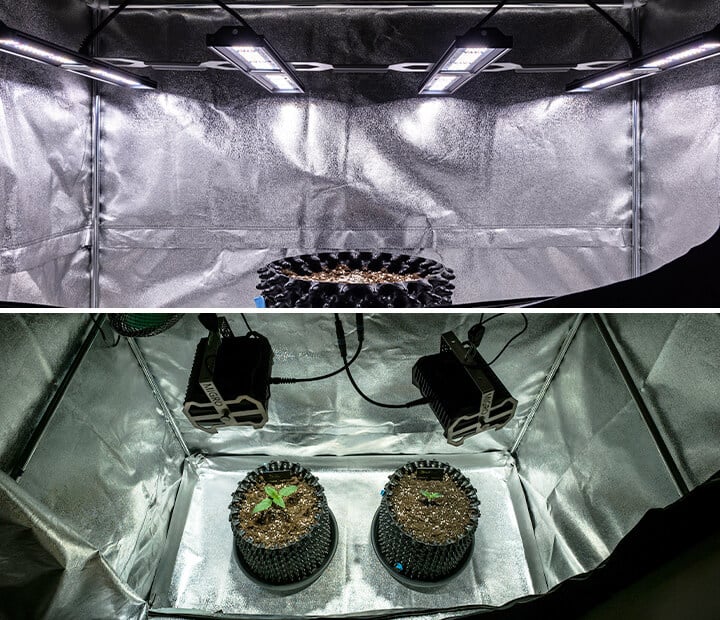
Alternatively, use the RQS Autoflowering or Feminized Starter Kits to provide your seeds with the perfect conditions from the get-go. This kit contains starter pots filled with perlite and beneficial bacteria, as well as a propagator and lights to breathe life into your seeds.
Now that your seedlings are in their soil, the real challenge begins. Cannabis seedlings are extremely fragile; armed with nothing but frail roots and a small set of cotyledons (that first set of small rectangular leaves), minor stressors can take down your seedlings in just a couple of hours. By taking the time to understand your seedlings and their specific needs, however, you’ll automatically know how to optimise their environment and help them grow into strong vegetative plants.
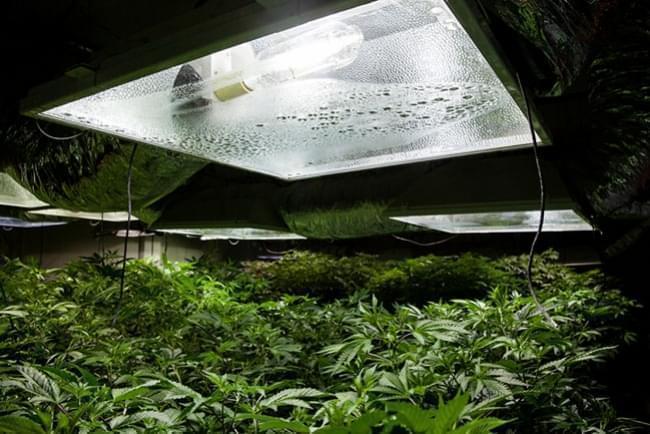
Seedlings have very particular needs when it comes to temperature, humidity, and lighting, and missing the mark in any of these areas can prove fatal for such small plants. For best results, we recommend growing seedlings in a propagator where you can easily create the perfect environment for them to flourish in.
Free RQS
Grow Guide!
Cannabis seedlings like daytime temperatures of 20–25°C and nighttime temperatures that are roughly 4–5°C cooler. High temperatures will stress your seedlings and stunt their growth, which, at such an early stage, can prove fatal. Dry leaves with curled up edges are a telltale sign of heat stress. With time, your seedlings might also develop other symptoms, including pale foliage and red or purple stems. Heat stress can also cause weak, wilting leaves with downward folding tips.
Cold temperatures, on the other hand, can freeze a seedling’s cells and affect its ability to transport and use nutrients, water, and oxygen. This will result in stunted growth and eventually death if not dealt with properly. Wilting foliage, slow growth, and poor plant turgor are some signs that the temperature in your grow room or propagator is too low.
While their roots are young and still developing, cannabis seedlings absorb water via osmosis in their leaves. To optimise this process, it’s super important to keep relative humidity levels at 65-70%.
Humidity levels below 20% will seriously stunt the growth of your seedlings and may cause them to develop symptoms similar to some nutrient deficiencies (yellow or spotted leaves). Humidity levels above 60%, on the other hand, will cause your plants to develop wet spots that can cause foliage to wilt or rot, as well as attract fungi and/or other pathogens and pests. Once your seedlings enter the vegetative phase, you should keep relative humidity at 50%.
Seedlings are sensitive to light and will burn under strong HID or LED bulbs. Like adult plants, seedlings will develop burnt, crinkled leaves when suffering from light stress. Alternatively, seedlings that don’t get enough light will grow tall and lanky and topple over.
For best results, we recommend growing your seedlings under an 18/6 light cycle using CFL bulbs with a blue light spectrum for the first 10–14 days. Once they’ve developed healthy true leaves and at least 2–3 nodes, you can move them under stronger HID or LED lights to start vegging.
Outdoor growers obviously don’t have the liberty of being able to change the temperature or humidity with the push of a button. If you're an outdoor grower, you have three options on how to tackle the seedling stage:
How often you should water your cannabis seedlings depends on a variety of factors. The best way to promote the health of your seedlings is to start them off in a high-quality, well-aerated medium. You'll want to grow them in well-draining pots (fabric pots or Air-Pots work best) and, where possible, under standard CFL lights hanging roughly 25–45cm (9–18") from the top of your pots.
The type of grow lights you use, the size of your pots, the exact composition of your soil, and the temperature and relative humidity in your grow room/garden will directly impact how often you should water. Just remember that knowing when and how much water to give each seedling will come with time and practice.
Cannabis seedlings like warm and moist (but not wet) conditions. During the earliest days of their life cycle, seedlings take up water via their leaves, as their root systems are still underdeveloped.
Remember—there is no universal watering schedule; how and when to water your young plants will vary depending on the factors mentioned earlier. A good rule of thumb is to only water your seedlings when their soil has dried out. You can stick your finger roughly 2cm into the soil to test whether it is dry or not.
When it's time to water your seedlings, it's best to do so early in the morning or just before you switch on your grow lights. This will allow your plant to take up water during the day as it grows. Plus, the warmth from the sun or your grow lights will also evaporate some of the water in your soil, which will help to prevent the buildup of unwanted bacteria and fungi.
Water your seedlings whenever their soil is dry. This could be every 3–7 days, depending on:
Again, there is no one-size-fits-all approach to watering cannabis seedlings, and the exact amount of water you give your plants will depend on the size of their pots. In most cases, you won't need to give your seedling more than 1–2 cups of water at a time.
We’ve all been there; your seedlings look perfectly healthy, then suddenly you find them slumped over the edge of their containers. Within 24 hours (or sometimes less), they’ve shriveled up and died.
This phenomenon, known colloquially as “damping off”, is caused by fungi like Pythium, Botrytis, and Fusarium. While these fungi can lie dormant in soil, they grow and thrive in overly wet conditions. Overwatering and high humidity, for example, are some of the most common causes of damping off.
Unfortunately, by the time your seedlings show the first signs of damping off (a limp and discolored stem), there’s nothing you can do to save them. We just recommend removing the affected seedlings from your grow room or propagator ASAP to avoid spreading the fungi.
To prevent damping off, make sure to keep close tabs on the temperature and relative humidity in your grow space, and avoid overwatering your plants. Also, make sure both your soil and pots drain well.
Finally, to minimise the chance of a Pythium, Botrytis, or Fusarium infestation even further, be sure to always use new soil or sterilise your soil by baking it in the oven until it reaches a temperature of 85°C.
Healthy cannabis plants look vibrant and green, and any sort of discoloration on a plant’s leaves or stems can be a sign of nutrient stress.
Remember, cannabis seeds are jam-packed with nutrients to help get your seedlings through the first stage of their life. Once these nutrients run out, it’s time for you to step in and give your plants the added nutrients they need to veg and flower properly.
Pests and plagues can destroy seedlings in less than a day. To prevent this from happening, it’s super important to keep the environment around your seedlings clean and at optimal temperatures and humidity levels. Avoid overwatering, and remember to read up on common cannabis pests so you can spot and treat them early. Some common pests to look out for include:
Seedlings stretch in order to get closer to their light source. To keep your seedlings from developing unnaturally long, flimsy stalks, grow them under blue spectrum CFLs located roughly 5cm from the top of the plants. Also, avoid keeping your seedlings in the dark for 24 hours after germination (a common piece of advice on grow forums), as the lack of light will force your seedlings to stretch abnormally.
Unfortunately, transplanting seedlings is far from an exact science; rather than following a strict calendar or schedule, it’s all about paying attention to your plant and knowing which cues to look out for.
As we mentioned earlier, a good rule of thumb is to transplant seedlings when their leaves fully cover the circumference of their container. After about one week, try checking on your seedlings’ roots. If you can completely remove a seedling and all its soil, it is ready to transplant.
Remember to be very gentle when handling your seedlings and transplanting them. Any diminute damage to their roots can result in a ton of stress that, for such young and fragile plants, can take a while to recover from.
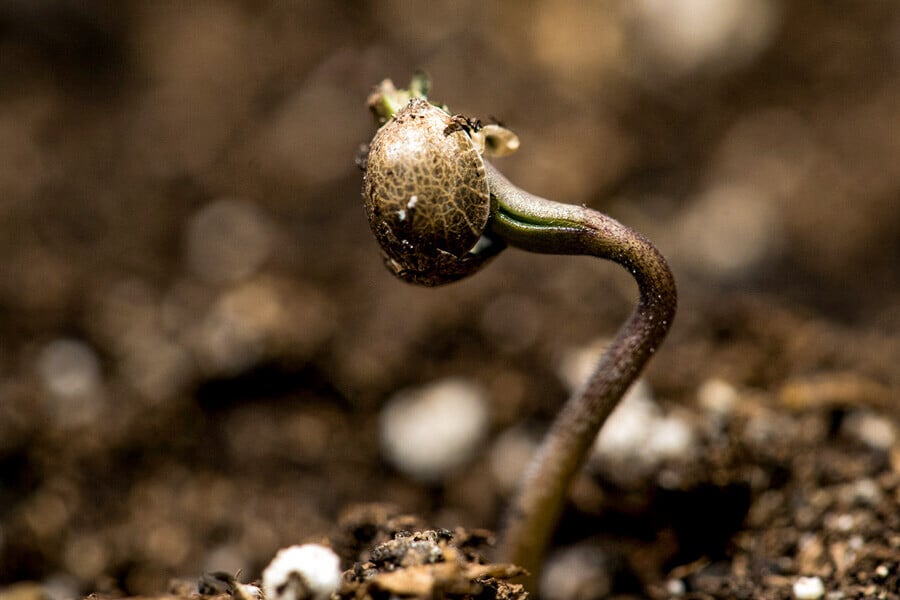
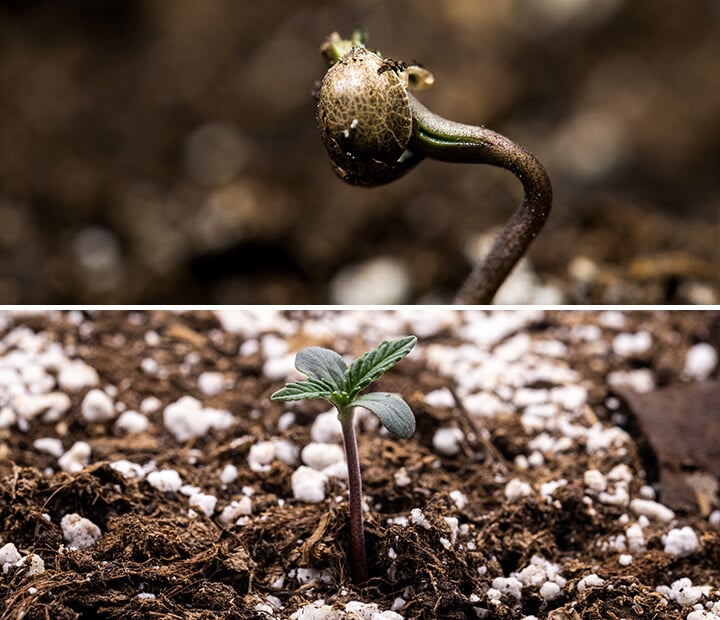
Inside that dark, hard shell, cannabis seeds house all the necessary genetic information to sprout and grow into big, luscious plants. When exposed to humidity and warmth, seeds are able to absorb water from their environment. This process is known as imbibition, and it’s the key to life for all plants.
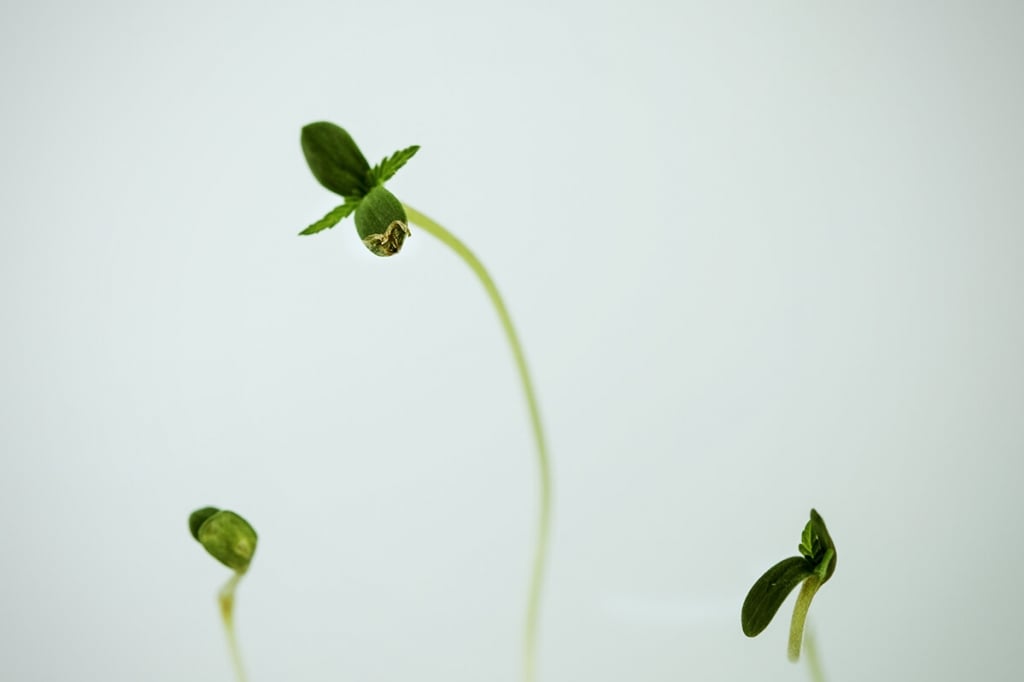
Once water enters a seed, it activates special enzymes that trigger the growth of the taproot (the small white root that pops out of seeds when germinated properly). This root starts to push deeper underground in search of more water while the seed sends a shoot up and out of the soil in search of light.
Cannabis seeds already contain two cotyledons (or embryonic leaves) that unravel and push the seed casing from the shoot. After the cotyledons emerge, cannabis plants will develop their first set of true leaves. These will grow out of the main stem and have just one finger.
During the early stages of their lives, cannabis seedlings get all their energy from stores inside the seed. As their roots develop, they can absorb water via their leaves. Once your plants have developed their first sets of true leaves (that is, leaves with at least 5–7 fingers), they are no longer considered seedlings and are officially vegging.
Remember, rapid growth and vibrant green foliage are telltale signs of healthy seedlings.
Now that you know the theory behind growing healthy cannabis seedlings, it’s time to get your hands dirty. Remember to invest in one of our Starter Kits for the best, most reliable results, and keep reading our blog for more tips on how to grow weed at home.