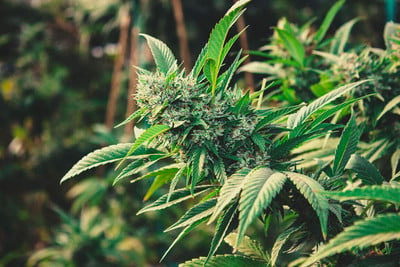
Legendary OG Punch Grow Report
The following grow report documents my experience cultivating Legendary OG Punch. I aimed to employ a relatively simple and cheap setup to see what kind of yield I could produce. Overall, I found the cultivar to display hardy genetics, a lovely earthy and fruity terpene profile, and a well-balanced psychoactive effect.
Before we delve into my process, let’s take a look at her genetic profile and what tempted me to grow her in the first place.
Contents:
A LOOK AT LEGENDARY OG PUNCH’S GENETICS
Descending from parent strains Legend OG and Purple Punch, Legendary OG Punch features a near-perfect genetic balance between indica (60%) and sativa (40%). Legend OG brought a stoning indica high and sedating terpenes to the table, whereas Purple Punch gifted her exceptional trichome production and fruity flavours.

Legendary OG Punch
|
|
Legend Og x Purple Punch |
|
|
350 - 400 gr/m2 |
|
|
90 - 160 cm |
|
|
55 - 60 days |
|
|
THC: Up to 19% |
|
|
Sativa 40% Indica 60% |
|
|
500 - 550 gr/plant |
|
|
180 - 220 cm |
|
|
Early October |
|
|
Calming, Clear |
SETUP
I elected to use a simple and cost-effective setup during this growing operation. Growers can easily install this rig in a closet, small spare room, or bedroom.
- 120 × 60cm box
- 200m³/h extraction fan + tubing
- 2x 100W white spectrum LED light
- 200W purple spectrum LED light
- Mist maker
- Timer
- Humidity sensor
- Digital thermo-hygrometer
GERMINATION
I decided to soak the seed to initiate germination. I’ve found this method helps to speed up the process and give the seed a head start compared to sowing directly in a container. I placed it in a glass of reverse osmosis water, which provides a clean and soft environment for the emerging root. I also added a few drops of hydrogen peroxide to take out any potential bacterial or fungal pathogens.
While waiting for germination to occur, I decided to prepare the substrate I would be using for the entire grow. I grabbed a 3l Air-pot and filled it halfway with an organic potting mix. I then added Easy Roots Mycorrhiza Mix. The fungi in this blend synergise with cannabis roots and help them uptake nutrients from the growing medium. I also added in some dolomite powder to avoid having to supplement calcium and magnesium later down the line. I gave the substrate a good mix, filled the rest of the pot with potting soil, and mixed it thoroughly again.
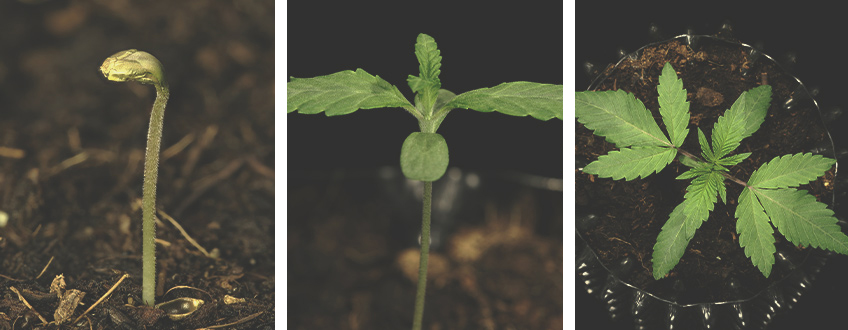
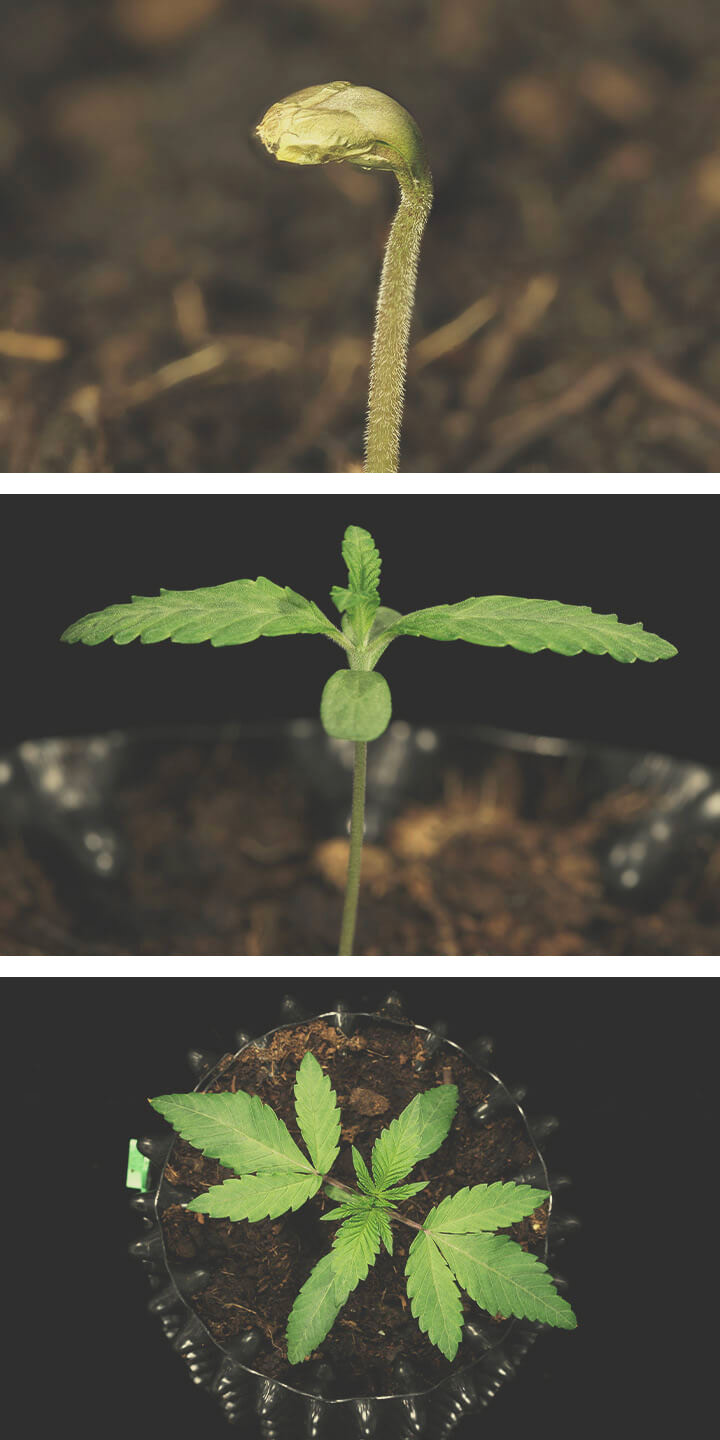
After 48 hours passed, I could see the root tip beginning to emerge. I watered the pot and pressed a 2cm hole into the centre. I placed the seed inside and covered it with a light layer of soil. The seedling emerged two days later.
VEGETATIVE PHASE
I used only the white LED lights throughout the vegetative phase. I placed the pot in the middle of the grow box and positioned the lights to hang 1m over the top of the container. I plugged both lights into a timer set to a 18/6 schedule.
With the lighting taken care of, I set about dialling in the rest of the environmental variables. I wanted to maintain a temperature of 22°C throughout the entire grow. Luckily, my grow room sat around this mark with little effort. All it took was a quick blast of the radiator if temperatures started to get too chilly.
I also wanted to keep humidity levels at around 65% during veg—enough to keep the plant healthy while reducing the risk of mould forming. I rigged up a mist maker to an inside wall of the box. I plugged the device into a humidity sensor that would fire it up if things got too dry. I attached a simple digital thermo-hygrometer to the back wall to monitor humidity and temperature all in one place.
I watered the substrate with 0.25l per day—enough to keep her hydrated without drowning the roots and exposing them to rot.
I only fed her organic nutrients; however, the substrate was already quite high in key nutrients, so I diluted half of the recommended dose with reverse osmosis water and followed the feeding chart on my product of choice.
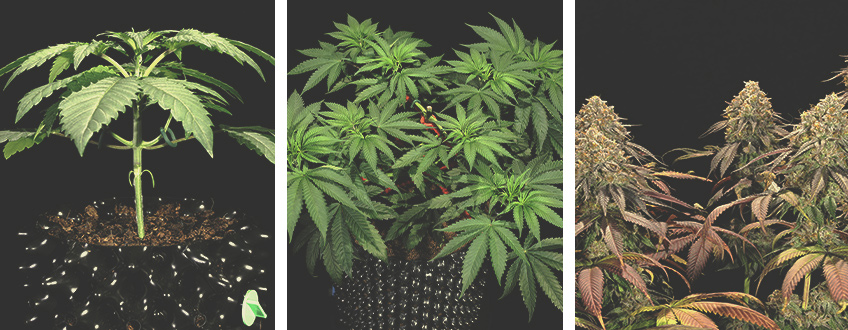
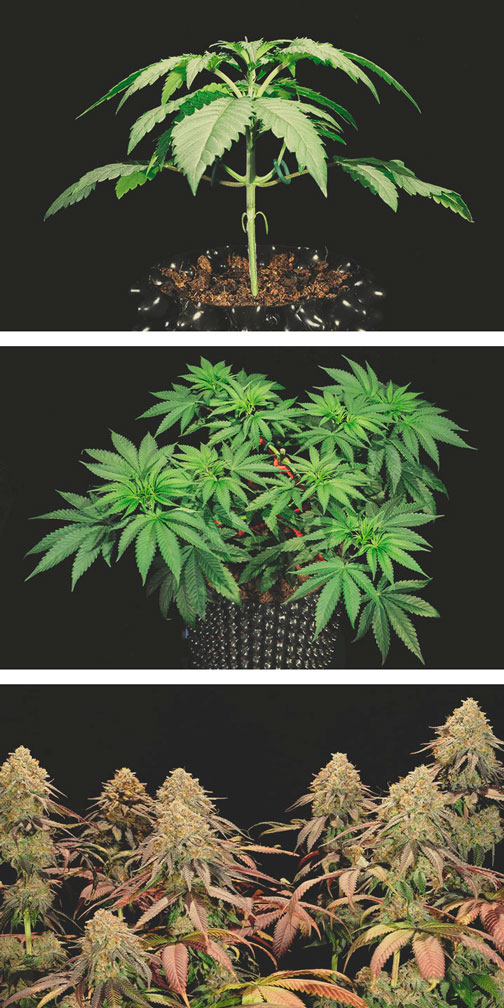
By week three, the plant had produced some significant growth. She stood at 15cm and displayed several well-established nodes. I decided to go ahead and carry out some low-stress training to expose more of her future bud sites to the light. I gently bent the main stem over to one side, parallel to the ground. I hooked a soft garden tie to the middle of the stream and attached the other end to the rim of the pot to keep the plant in position. I adjusted the lights to hang 95cm from the tip of the reformed canopy.
Although successful, I did inflict some heavy damage during this move. One of the side branches was torn and hung from the main stream by only a few fibres. I wrapped a plaster around the node and hoped for the best. Amazingly, it didn’t take long for this hardy lady to repair herself!
I left her to adjust to her new structure for one week. Next, I topped her just above the fourth node during week four. I continued to perform low-stress training on the new side branches over the next four weeks to keep the canopy open and all of the bud sites at around the same height.
During week six, I transplanted her into a larger 15l Air-pot to allow the root system to expand and the plant to gain more height.
INITIATING FLOWERING
At week eight, I decided to bring vegging to a close and initiate flowering. I rigged up the purple LED light alongside the white ones and changed the timer to a 12/12 cycle. At this stage, the plant was around 40cm in height. I continued with the same feeding schedule and relied on the dolomite to supply adequate magnesium and calcium. I also repositioned the light to hang 40cm above the tip of the canopy to boost the intensity.
FLOWERING STAGE
During the flowering stage, I adjusted the settings on the humidity controller to maintain 40% humidity. This would increase the dryness of the air and further reduce the risk of mould as the buds began to form. I increased watering to 0.7l per day to meet the demands of the bigger pot and the metabolic activity of the flowering stage.
Thanks to my training efforts, small preflowers began to emerge into an even canopy of equally sized colas. To let even more light through, I decided to defoliate. I removed a lot of the large, light-blocking fan leaves, but left enough behind to support optimal photosynthesis.
The plant surged in height during the flowering phase, peaking at 120cm during week 16. By this time, her colas had filled out, displaying a thick coating of trichomes accented by dark orange pistils. I restricted her feeding cycle and flushed her for two weeks before harvest time.
Unfortunately, life got very busy just before harvest. I had to leave the buds on the plant for an additional two weeks, but she took it extremely well. Her fan leaves wilted and dropped, but the buds remained in great condition.
I chopped her at the base of the stem and hung her out to dry in a dark room. I dry-trimmed the flowers and placed them in curing jars for several weeks. Finally, it was time to smoke!
EFFECT, FLAVOUR, AND AROMA OF LEGENDARY OG PUNCH
Legendary OG Punch produces a well-rounded effect. After a bong or blunt hit, things start out very cerebral. The high goes straight to the head as high levels of THC light up the mind: Creative thoughts and the desire to socialise characterise this period of the high.
The body high turns up to the party about an hour or so later. As the head high begins to taper off, a soothing physical sensation takes hold. Prepare to feel your muscles unlock and relaxation kick in. Oh, and you’ll be wanting something to eat pretty soon. Although the physical side of the high stones the body, it’s not overpowering. You can happily carry on your day as normal, just much more relaxed than usual. She's equally suited for a great wake and bake or a chill evening smoke to unwind with.
Legendary OG Punch’s flowers aren’t just visually appealing; they smell great too! Her trichomes produce an enormous amount of tasty terpenes during the flowering stage. Myrcene and caryophyllene stand out in the mix with tastes and aromas of spice, pepper, and earthiness. Limonene and pinene provide refreshing undertones of pine, citrus, and sweetness.


