

Included FREE items


 Cannabis Grow guide by Royal Queen Seeds
- Growing cannabis step by step
- Cannabis growing basics
- Choosing your seeds
- How to germinate seeds
- The cannabis vegetative stage
- The cannabis flowering stage
- Harvesting cannabis
- Trimming, drying, and curing
- Choosing pots and soil
-
Growing indoors
- A Complete Overview Of Growing Cannabis Indoors
- Cannabis Cultivation Tips: How To Set Up Indoor Grow Lights
- How Many Cannabis Plants Can You Grow Per Square Metre?
- Indoor Cannabis Growing: Relative Humidity and Temperatures
- Hydroponics Cannabis Growing Guide (with diagrams)
- Cannabis Micro Growing: Growing Great Weed in Tiny Spaces
- Growing outdoors
- How to grow autoflowering cannabis
- Cannabis nutrients and pH
- Cannabis troubleshooting: Nutrients
-
Cannabis troubleshooting: Growing
- Cannabis Seed Germination — Troubleshooting Guide
- How to Deal With Pythium (Root Rot) in Cannabis Plants
- Slow Cannabis Plant Growth And What You Can Do About It
- How to Prevent and Fix Stretching in Cannabis Seedlings
- Watering Your Cannabis: How To Fix Over And Underwatering
- Understanding Male, Female, And Hermaphrodite Cannabis
- Identifying and Treating Common Cannabis Ailments
- How To Revive a Sick Cannabis Plant
- How to Avoid Mouldy Weed During Drying and Curing
- How to Prevent and Treat Dry and Crispy Cannabis Leaves
- What Cannabis Leaves Can Tell You
- Yellow Cannabis Leaves
-
Cannabis Strains Grow Report
- HulkBerry Automatic Grow Report
- Blue Cheese Auto Grow Report
- Purple Punch Automatic Grow Report
- Triple G Automatic Grow Report
- Do-Si-Dos Automatic Grow Report
- Green Gelato Automatic Grow Report
- Haze Berry Automatic Grow Report
- Purple Queen Automatic Grow Report
- Cookies Gelato Automatic Grow Report
- Sherbet Queen Automatic Grow Report
- Sweet Skunk Automatic Grow Report
- Medusa F1 Grow Report
- Cannabis plant training
-
Weed growing tips
- The Cannabis Plant Anatomy
- How to preserve seeds
- How Much Sunlight Do Outdoor Cannabis Plants Need To Grow?
- How to Control and Prevent Stretching in Cannabis Plants
- How And When To Transplant Your Cannabis Plants
- My Cannabis Plants Are Growing Too Tall: What Should I Do?
- Should You Worry About Purple Or Red Cannabis Stems?
- What To Do When Your Indoor Cannabis Won’t Flower
- How To Protect Your Cannabis Plants From Heat Stress
- How To Tell If Your Female Cannabis Plant Has Been Pollinated
- Growing Medical Marijuana
- Bud Washing: How to Clean Your Weed
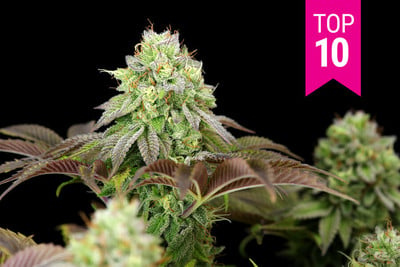
Complete Guide To The Cannabis Flowering Phase

We guide you through the cannabis flowering phase, from the first week all the way to harvest.
Contents:
Ahhh, the bloom phase. After weeks of caring for your strains, pruning and training them in order to promote as much vegetative growth as possible, it’s time to turn your focus to helping them flower. In this article, we’ll show you exactly how to do that.
Entering The Flowering Phase
When exactly your plants are ready to flower will depend on a number of factors. If you’re growing outdoors, your plants will only start flowering toward the end of the summer when the days naturally get shorter. If you’re growing indoors, you’ll have a lot more control over your plant’s flowering phase. Most growers will move their plants into bloom after about four weeks of vegetative growth, but you can technically keep them in this phase indefinitely.
Once your plants receive less light, they’ll automatically start focusing their energy on growing buds rather than foliage. For the best possible harvest, you’ll want to help them along with the right nutrients, lighting, and environmental conditioning.
Below is a detailed overview of a regular eight-week flowering period. While some strains have shorter and/or longer flowering times, this guide will help you understand what to expect as your plants approach harvest, and what you can do to maximise the quality of the buds they produce during this vital stage.
 |
 |
 |
 |
| Flowering phase (Week 1) | Flowering phase (Week 2) | Flowering phase (Week 3) | Flowering phase (Week 4) |
 |
 |
 |
 |
| Flowering phase (Week 5) | Flowering phase (Week 6) | Flowering phase (Week 7) | Flowering phase (Week 8) |

Flowering phase (Week 1)

Flowering phase (Week 2)

Flowering phase (Week 3)

Flowering phase (Week 4)

Flowering phase (Week 5)

Flowering phase (Week 6)

Flowering phase (Week 7)

Flowering phase (Week 8)
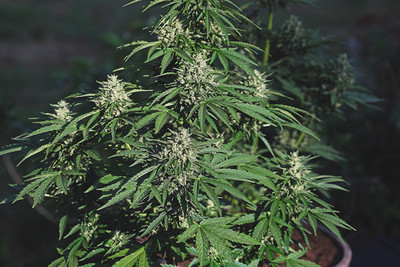
Weeks 1–3
• What to expect: Flowering stretch, white hairs (pistils), and noticeable aromas.
Many growers think that as soon as they flip their plants into flower, they’ll stop growing and start developing buds. But that couldn’t be further from the truth.
During the first week or so of flowering, plants will actually experience a period of accelerated growth and stretching. This “flowering stretch” is completely normal as they try and outgrow surrounding vegetation in order to get the most sun possible to ensure higher chances of reproduction—plus, a longer internodal distance means more space for flower clusters, and better light penetration. Just how much growth you can expect to see during this first week will vary depending on what strain you’re growing, but some strains can almost double in height during this time.
Week two of flowering is usually when you can confidently “sex” your plants. Females will start growing long, white pistils at their nodes (bud sites). Males, on the other hand, will develop round pollen sacs. If you’re growing from regular seeds, make sure to sex your plants early and separate your males and females quickly to avoid pollination (unless you’re breeding, of course).
By week three, your plants will gradually stop stretching and really focus on developing their buds. While the buds will still be small, you’ll notice larger calyxes and the development of some trichomes.
Best Practices
• Nutrients: A cannabis plant’s nutrient requirements will change dramatically as it starts flowering. In this early stage, your plants will respond well to nutrient solutions with higher concentrations of phosphorus and potassium. What exact NPK formula you go with is up to you—just be careful not to go too heavy during this preliminary stage to avoid burning your plants. At what stage you decide to drive up your nutrients is also up to you, but we recommend doing so during week two.
• Overfeeding/deficiencies: Properly shifting from veg to bloom nutrients can be tricky, especially if you’re a rookie grower. Make sure to keep a close eye on your plants and look out for signs of deficiencies or overfeeding (dead, burnt, or yellow foliage).
• LST: Low-stress training can be a great way to manipulate your plants and deal with the added stretching of the early flowering phase. LST will also help you create an even canopy and ensure your plants’ lower buds get enough light.
• Temperature: Cannabis responds well to cooler temperatures during the flowering stage. Each plant will be a little different, and every grower will have their own advice on finding the perfect temperature for flowering. However, we recommend keeping daytime temperatures around 26°C and nighttime temperatures around 16–18°C. Keeping your nighttime temperatures relatively low is super important for better bud development.
Nutrients, Lighting, Temperature, And Humidity
| NPK |
|
5-7-10 approx. |
| EC |
| 1.2–1.5 |
| HUMIDITY |
| 50–60% RH |
| TEMPERATURE (Day/Night) |
| 26°C / 16–18°C |
| NPK | EC | HUMIDITY | TEMPERATURE (Day/Night) |
|
5-7-10 approx. |
1.2–1.5 |
50–60% RH |
26°C / 16–18°C |
Weeks 3–4
• What to expect: Bigger buds and more intense aromas.
By weeks 3 and 4, your cannabis plants will have stopped growing altogether and will be focusing entirely on developing buds. You should notice their flowers getting bigger on a daily basis, developing thick calyxes, more white pistils, and a nice layer of trichomes. Your plants will also start taking on more noticeable, complex aromas.
Best Practices
• Feeding: As your plants grow bigger buds, they’ll need more nutrients. Again, the exact nutrient solution you use during this stage of flowering is up to you, but make sure to pay close attention to how your plants react to any changes in feeding. A common NPK formula used during mid-flowering is 6-10-15.
• Humidity and airflow: It’s really important to keep an eye on humidity and airflow. Stagnant, humid air creates a breeding ground for mould and bacteria, and also attracts pests. To be in the clear, we recommend keeping your relative humidity at 40–50% and using fans or ventilation to keep air circulating around your grow room.
Nutrients, Lighting, Temperature, And Humidity
| NPK |
|
6-10-15 approx. |
| EC |
| 1.5 approx. |
| Humidity |
| 50% RH |
| Temperature (Day/Night) |
| 24-26°C / 16–17°C |
| NPK | EC | HUMIDITY | TEMPERATURE (Day/Night) |
|
6-10-15 approx. |
1.5 approx. |
50% RH |
24-26°C / 16-17°C |
Weeks 4–6
• What to expect: Full-throttle flowering and big, dense buds. Aroma will be nearing its peak.
By weeks 5 and 6, your plants will be well into flowering. Their buds should be big, thick, and loaded with white pistils. They will also be developing a thick coat of trichomes, which should be giving off a nice, pungent aroma. If you haven’t invested in an extractor and air filter by now, this might be a good time to do so.
If you take a closer look at your buds, you should notice some pretty drastic changes from how they looked a few weeks back. The calyxes should be notably larger, and the buds should look and feel denser and heavier. Some fast-flowering strains may be approaching harvest time already, in which case the buds should look even more mature (with more trichomes and darker-coloured pistils).
Best Practices
• Feeding: This period (weeks 5 and 6) is considered peak flowering time for most cannabis strains. Make sure to keep a very close eye on your plants and look out for any signs of nutrient deficiencies or overfeeding. Depending on the size of your buds, you may want to dial up your nutrients one more time to help them produce the best possible harvest. Remember that, by this stage, your plants won’t need much nitrogen, which is more important for vegetative growth rather than blooming. Besides phosphorus and potassium, flowering plants have higher demands for calcium.
• Stress: Whatever you do, you’ll want to avoid stressing your plants during this stage to prevent stunting the growth of their buds or, even worse, triggering hermaphroditism. Stress can trigger flowering females to produce pollen and self-pollinate in one final attempt to reproduce before dying.
• Support: You’ll be surprised by how heavy fresh cannabis flowers can be. If your plants are struggling to support the weight of their flowers, consider using bamboo stakes and string or plant clips to keep your plants upright and prevent them from tumbling over.
• Humidity and temperature: Keep humidity at around 30–40% from here on out to avoid any problems with mould or pests. Also, keep your daytime temperatures at 25°C max, and nighttime temperatures around 16–17°C.
Nutients, Lighting, Temperature, And Humidity
| NPK |
|
5-9-12 approx. |
| EC |
| 1.5–1.6 |
| Humidity |
| 30-40% RH |
| Temperature (Day/Night) |
| 24-26°C / 16–17°C |
| NPK | EC | Humidity | Temperature (Day/Night) |
|
5-9-12 approx. |
1.5–1.6 |
30–40% RH |
24-26°C / 16–17°C |
Weeks 6–8
• What to expect: Last stages of bloom and harvest.
Weeks 6, 7, and 8 make up the final stages of flowering for most strains. By this stage, the buds on your plants should be dense, firm, and coated with a thick layer of trichomes. The trichomes should be transitioning from completely clear to milky white, with a select few turning amber. This is a telltale sign harvest is here. You can verify this by "zooming in" on them using a pocket scope or magnifying glass. The pistils will continue to get darker during these final weeks too—another sign that your plants are almost ready for harvest.
In these final weeks, phosphorus, potassium, and calcium are still your most important nutrients. Two weeks before harvest, however, you’ll want to flush your plants with plain, pH-balanced water. This encourages them to take up all remaining nutrients, and helps preserve the natural flavour of your buds.
During this last flush, your plants will develop some yellow leaves as they consume all the remaining nutrients stored in their foliage.
Again, your buds will be ready to harvest once the majority of trichomes have turned milky white. Weed harvested earlier tends to have more of an uplifting, euphoric effect. On the other hand, weed harvested later tends to produce a more relaxing, sleepy stone. Although it hasn't been comprehensively verified, it is believed that cannabis plants produce more CBN (degraded form of THC) and myrcene toward the end of their life cycle.
Best Practices
• Nutrient flush: Always remember to flush your plants with pH-balanced water two weeks before you harvest.
• Humidity: Keep humidity between 30–40% max to avoid problems with mould or pests.
• Bud maturity: Keep a close eye on your plants during your two-week flush. You’ll know your buds are ready to harvest using the trichome method described above.
• 48–72 hours of darkness: To try and raise the potency of your weed, consider leaving your plants in complete darkness for a full 48–72 hours before harvest. Some growers swear by this trick, claiming it helps plants produce more trichomes, resulting in more potent weed.
Nutients, Lighting, Temperature, And Humidity
| NPK |
|
4-7-10 approx. |
| EC |
| 1.7–1.8 |
| Humidity |
| 30–40% RH |
| Temperature (Day/Night) |
| 24-26°C / 16–17°C |
| NPK | EC | Humidity | Temperature (Day/Night) |
|
4-7-10 approx. |
1.7–1.8 |
30–40% RH |
24-26°C / 16–17°C |
Don't Rush To Harvest
Growers can get a bit anxious in the final weeks of flowering. However, try to contain yourself and avoid harvesting your plants too early. While a week might seem like an insignificant period of time, it can make a huge difference to the flavour, quality, and strength of your stash. Make sure to pay close attention to your plants throughout their flowering cycle, be patient, and you’ll surely be rewarded with some top-shelf bud. If you're eager to learn more about the last weeks of bloom, including how to administer bloom boosters, how to keep noise down, how to calculate your flowering phase based on pot size, and more, check out the next post in our series!

Part. 1: The Germinating Phase. Give your seeds the best possible start in life by reading our definitive guide to germination.
Part. 2: The Vegetative Phase. The germinated seeds peak out above ground and immediately spring up.
Part. 4: The last weeks of flowering stage. After weeks of mounting excitement the long-awaited moment the harvest is finally within arm's reach.
Part. 5: Harvest Time. Learn every step of the cannabis harvest and post-harvest process.


Grow Cannabis With RQS
.jpg)
Nutrients and boosters


 Grow Guide Topic Finder
- Growing cannabis step by step
- Cannabis growing basics
- Choosing your seeds
- How to germinate seeds
- The cannabis vegetative stage
- The cannabis flowering stage
- Harvesting cannabis
- Trimming, drying, and curing
- Choosing pots and soil
-
Growing indoors
- A Complete Overview Of Growing Cannabis Indoors
- Cannabis Cultivation Tips: How To Set Up Indoor Grow Lights
- How Many Cannabis Plants Can You Grow Per Square Metre?
- Indoor Cannabis Growing: Relative Humidity and Temperatures
- Hydroponics Cannabis Growing Guide (with diagrams)
- Cannabis Micro Growing: Growing Great Weed in Tiny Spaces
- Growing outdoors
- How to grow autoflowering cannabis
- Cannabis nutrients and pH
- Cannabis troubleshooting: Nutrients
-
Cannabis troubleshooting: Growing
- Cannabis Seed Germination — Troubleshooting Guide
- How to Deal With Pythium (Root Rot) in Cannabis Plants
- Slow Cannabis Plant Growth And What You Can Do About It
- How to Prevent and Fix Stretching in Cannabis Seedlings
- Watering Your Cannabis: How To Fix Over And Underwatering
- Understanding Male, Female, And Hermaphrodite Cannabis
- Identifying and Treating Common Cannabis Ailments
- How To Revive a Sick Cannabis Plant
- How to Avoid Mouldy Weed During Drying and Curing
- How to Prevent and Treat Dry and Crispy Cannabis Leaves
- What Cannabis Leaves Can Tell You
- Yellow Cannabis Leaves
-
Cannabis Strains Grow Report
- HulkBerry Automatic Grow Report
- Blue Cheese Auto Grow Report
- Purple Punch Automatic Grow Report
- Triple G Automatic Grow Report
- Do-Si-Dos Automatic Grow Report
- Green Gelato Automatic Grow Report
- Haze Berry Automatic Grow Report
- Purple Queen Automatic Grow Report
- Cookies Gelato Automatic Grow Report
- Sherbet Queen Automatic Grow Report
- Sweet Skunk Automatic Grow Report
- Medusa F1 Grow Report
- Cannabis plant training
-
Weed growing tips
- The Cannabis Plant Anatomy
- How to preserve seeds
- How Much Sunlight Do Outdoor Cannabis Plants Need To Grow?
- How to Control and Prevent Stretching in Cannabis Plants
- How And When To Transplant Your Cannabis Plants
- My Cannabis Plants Are Growing Too Tall: What Should I Do?
- Should You Worry About Purple Or Red Cannabis Stems?
- What To Do When Your Indoor Cannabis Won’t Flower
- How To Protect Your Cannabis Plants From Heat Stress
- How To Tell If Your Female Cannabis Plant Has Been Pollinated
- Growing Medical Marijuana
- Bud Washing: How to Clean Your Weed
Categories

Grow Cannabis With RQS
Nutrients and boosters


