

Included FREE items


 Cannabis Grow guide by Royal Queen Seeds
- Growing cannabis step by step
- Cannabis growing basics
- Choosing your seeds
- How to germinate seeds
- The cannabis vegetative stage
- The cannabis flowering stage
- Harvesting cannabis
- Trimming, drying, and curing
- Choosing pots and soil
-
Growing indoors
- A Complete Overview Of Growing Cannabis Indoors
- Cannabis Cultivation Tips: How To Set Up Indoor Grow Lights
- How Many Cannabis Plants Can You Grow Per Square Metre?
- Indoor Cannabis Growing: Relative Humidity and Temperatures
- Hydroponics Cannabis Growing Guide (with diagrams)
- Cannabis Micro Growing: Growing Great Weed in Tiny Spaces
- Growing outdoors
- How to grow autoflowering cannabis
- Cannabis nutrients and pH
- Cannabis troubleshooting: Nutrients
-
Cannabis troubleshooting: Growing
- Cannabis Seed Germination — Troubleshooting Guide
- How to Deal With Pythium (Root Rot) in Cannabis Plants
- Slow Cannabis Plant Growth And What You Can Do About It
- How to Prevent and Fix Stretching in Cannabis Seedlings
- Watering Your Cannabis: How To Fix Over And Underwatering
- Understanding Male, Female, And Hermaphrodite Cannabis
- Identifying and Treating Common Cannabis Ailments
- How To Revive a Sick Cannabis Plant
- How to Avoid Mouldy Weed During Drying and Curing
- How to Prevent and Treat Dry and Crispy Cannabis Leaves
- What Cannabis Leaves Can Tell You
- Yellow Cannabis Leaves
-
Cannabis Strains Grow Report
- HulkBerry Automatic Grow Report
- Blue Cheese Auto Grow Report
- Purple Punch Automatic Grow Report
- Triple G Automatic Grow Report
- Do-Si-Dos Automatic Grow Report
- Green Gelato Automatic Grow Report
- Haze Berry Automatic Grow Report
- Purple Queen Automatic Grow Report
- Cookies Gelato Automatic Grow Report
- Sherbet Queen Automatic Grow Report
- Sweet Skunk Automatic Grow Report
- Medusa F1 Grow Report
- Cannabis plant training
-
Weed growing tips
- The Cannabis Plant Anatomy
- How to preserve seeds
- How Much Sunlight Do Outdoor Cannabis Plants Need To Grow?
- How to Control and Prevent Stretching in Cannabis Plants
- How And When To Transplant Your Cannabis Plants
- My Cannabis Plants Are Growing Too Tall: What Should I Do?
- Should You Worry About Purple Or Red Cannabis Stems?
- What To Do When Your Indoor Cannabis Won’t Flower
- How To Protect Your Cannabis Plants From Heat Stress
- How To Tell If Your Female Cannabis Plant Has Been Pollinated
- Growing Medical Marijuana
- Bud Washing: How to Clean Your Weed
The Complete Guide To Germinating Cannabis Seeds

Before you can be met with bountiful hauls of dank buds, there are several stages of cannabis growing that take precedence. Unless you can successfully germinate cannabis seeds, you won’t have a plant to harvest. Give your seeds the best possible start in life by reading our definitive guide to germination.
Contents:
The Art Of Germinating Cannabis Seeds
Often overlooked, it is all too easy to assume that the vegetative and flowering stages of cannabis growth are the most critical parts of the plant's life cycle. However, with the chance of failure high unless you know what you're doing, poor planning when it comes to germination can make or break your next grow. Giving your cannabis seeds the best possible start on their journey to bulging buds is a surefire way to encourage a healthy and robust plant.
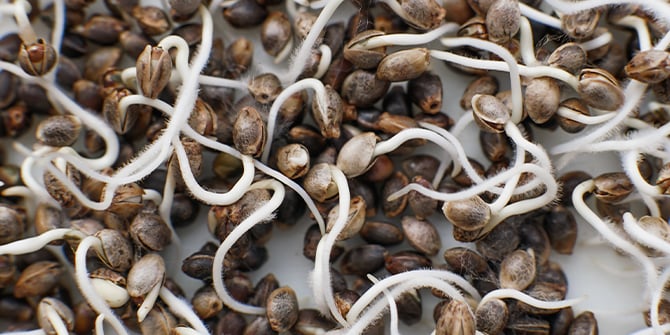
Small, fragile, and in desperate need of a helping hand, there are several ways you can germinate your cannabis seeds.
All methods have varying degrees of success, with both advantages and disadvantages. It is important to note that even with advanced growing expertise and top-of-the-line equipment, you may still end up with a few failed seeds. This is a natural part of dealing with a living organism. At Royal Queen Seeds, we provide a wide range of high-quality regular and feminized cannabis seeds. We label our genetics clearly, so you don’t have to worry about any unwanted surprises.
What To Look Out For In Cannabis Seeds
Regardless of where you get your seeds from, it is best to give them a slight (and delicate) inspection before planting. Most of the time, all seeds will germinate; however, poor-quality seeds will produce a weaker plant. Unfortunately, that is something you will not find out until well into the vegetative and flowering stages.
To avoid disappointment, seeds that have a darker colouration stand a better chance of germinating, while pale green or white seeds are likely to fail. Even if dark seeds look slightly damaged, they should be planted anyway. There is a good chance they will still germinate, even if the outer shell is somewhat crushed.
Germination Temperature Plays A Crucial Role
Before we jump straight into the germination methods, there are a couple of germination golden rules. For the best results, we recommend staying within these guidelines, no matter how you choose to germinate. That being said, of all the factors to consider, temperature is one of the most critical. Seeds will always seek out even the smallest amount of moisture, but they use temperature as a sign that they need to do so.
- The ideal temperature is between 22° and 25°C (71–77°F)
- Your growing environment should be damp/moist, but never wet
- Relative humidity range should be between 70% and 90%
- Seeds favour fluorescent lighting (Cool White code 33)
- Minimise the amount of seed handling you do
- In hydroponic/rockwool plugs, the ideal PH value is 5.8–6.2
| -15 °C | 17 °C | 23 °C | +25 °C |
| ⚠️ DANGER ZONE | IDEAL NIGHT TEMPERATURE | IDEAL DAY TEMPERATURE | ⚠️ DANGER ZONE |
| -15 °C | ⚠️ DANGER ZONE |
| 17 °C | IDEAL NIGHT TEMPERATURE |
| 23 °C | IDEAL DAY TEMPERATURE |
| +25 °C | ⚠️ DANGER ZONE |
What Is An Expected Germination Time?
Three fundamental principles will trigger that first small taproot to appear: warmth, moisture, and darkness. With the promise of moisture, a single root will take shape before slowly developing into the cannabis plant we know and love. In the right conditions, seeds will begin to develop within 12–36 hours of moisture being introduced to them.
Timescales can vary, as it all depends on how ideal your germination environment is (see the golden rules above). Even the worst grower could make a seed germinate, but it may take a few weeks and, of course, increases the risk of a weaker plant.
Choosing Your Germination Method
-
Glass Of Water Approach


Arguably one of the least effective methods, but it is still viable. Incredibly simple to facilitate, beginner growers may opt to germinate their seeds in a glass of water. Half-fill a glass or bowl with water that is approximately 22°C (71°F).
After 3–5 days, the seeds will start to open, and you should see tiny white tips appear. Once these roots reach 1–2cm in length, use extreme care to transfer them from the water to pre-prepared soil pots.
The soil pots will need small holes (roughly 10–15mm deep) for the newly germinated seeds to be placed into. Once the seeds are secure, you will want to place a fluorescent light 13–15cm (5–6 inches) away to encourage growth. Finally, don’t risk overwatering your seeds at this early stage. Use a plant mister to make sure they stay damp but not soaking wet.
-
Wet Kitchen Towel Method


Probably one of the most common methods of germination. The kitchen towel method comes in several iterations. Some growers use cotton wool pads or absorbent pieces of paper. For this guide, we will be using kitchen towel as it is readily available and holds moisture relatively well.
Place one sheet of damp kitchen towel on a flat surface. Space your seeds a few centimetres apart before placing the second piece of kitchen towel over the top. You need to ensure both pieces are damp, not wet. Once again, when the white root tips reach 1–2cm, move the seeds (carefully) to soil pots. Use the same guidance found above for planting techniques.
-
Planting Directly Into Soil


Planting directly into your growing medium prevents having to move seeds when they are at their most fragile. That first root tip is covered with microscopic filaments that are easily damaged. Given that both a cup full of water and moist paper towels are more prone to temperature fluctuations from their environment, planting in soil is a much safer option.
Start by filling pots with a premium-quality soil that has been soaked in water. Many growers also choose to lace the water with a root stimulator. Make a hole roughly 10–15mm deep. This will be your seed’s new home. Remove the seeds from their packet and place them into the pre-dug holes. Loosely cover the seeds, but be careful not to compress the soil above the seed too much. The root will struggle to penetrate solid soil, slowing plant growth. Lightly spray the top of where you placed the seed so that your growing medium stays moist.
If you don’t like the idea of pre-soaking your soil, you can use a spray to moisten the holes before you plant each seed. With enough moisture surrounding your seeds, you can still encourage a root to develop.
Your growing pots will need to be placed in a damp climate that is within the temperature range listed under our golden rules. After 4–10 days, you should see a young seedling sprout, while the roots will have begun to develop underneath the soil. The entire plant and its soil can now be transferred to a larger pot, where normal growing routines should start.
-
Using Stone Wool Blocks


Maintaining the ideal temperature (between 22–25°C/71–77°F) and moisture for germination is tricky. Leaving seeds out in the open environment or on a windowsill is far from ideal; a DIY climate-controlled cupboard would do a much better service. A warming mat is perfect for maintaining a constant temperature, but it doesn't tackle the issue of moisture.
You will need to invest in a few pieces of unique equipment, but by using stone wool blocks, you can create a perfect utopia for germinating cannabis seeds. Soak the stone wool blocks in the same way you would a soil medium. The wool will retain the moisture and prevent the need to water during the early stages of germination. After the wool blocks are soaked, stick them in a plastic tray that also has a lid. Large cake tubs are ideal.
The dome of the plastic container will create your seeds’ own mini tropical climate. If you then place all the components in a temperature-controlled cupboard, you will have created a self-perpetuating supply of moisture—no need to touch the seeds again until they are ready to be transferred to your final growing medium as a young seedling. Using the stone wool block method, your seeds should germinate in one to two days.
Two or three weeks after germination, your young seedlings should be ready for their new home. At this point you have two options; transplanting them into soil pots, or taking on the challenge of hydroponics. You’ll know when the seedlings are ready to be moved because the root system should start to poke out of the bottom of the wool blocks. As long as the roots haven’t begun to engulf the bottom half of the wool block, they will seek out water and nutrients in their new surroundings and continue to grow downwards.
-
RQS Soil Plugs


RQS Soil Plugs are another great option when it comes to germinating seeds. They are easy to use and contain a carefully crafted formula of ingredients designed to help seedlings thrive. Composed of the highest-quality peat and coir, they provide a superb balance of aeration and water retention.
This ensures seeds don’t dry out, while also preventing fungal diseases that cause the dreaded damping off.
RQS Soil Plugs contain key micronutrients that seedlings require for optimal growth and development. The addition of active biologicals also helps to establish the root microbiome with beneficial organisms that fend off pathogens and assist in nutrient uptake and organic matter breakdown. Furthermore, the pH-balanced nature of these plugs means cannabis roots can easily absorb nutrients without the risk of lockout.
They’re super easy to handle and take any hassle out of transplanting. Once roots begin to appear, you can transplant seedlings directly into soil or hydroponic systems.
To use RQS Soil Plugs, place a single seed of your choice into each plug. Place your plugs into a propagation tray and mist them with water—just enough to get them moist. Use a clear-plastic lid to maintain humidity, and aim for the temperature and humidity conditions discussed above. Use a small hygrometer to keep track of these important figures.

-
Royal Queen Seeds Feminized Starter Kit


There is, of course, a far simpler way to germinate seeds. Ideal for beginners, the feminized starter kit by Royal Queen Seeds has everything you need to kick-start your next cannabis project.
The Royal Queen Seeds Feminized Starter Kit contains:
- 3x RQS Critical feminized seeds
- 20x Easy-Start seedling pots
- 1x Propagator Pro
- 1x pack of Bacto
- 1x perlite
- 1x fluorescent lights
- 1x instruction manual
- 4x AA batteries
- 1x Royal Queen Seeds catalogue
*You will also need a measuring cup and a stirrer (not included in the kit).

1. Gently remove the foil from the back of the seed packet and place them carefully into a dry container.
2. You will need a shallow container that is large enough to accommodate the seed tray. Fill the container with one litre of lukewarm water (22–25°C/71–77°F). Pour in the packet of Bacto enzyme, allowing it to dissolve before setting the seed tray into the container to soak. The seed tray only needs to be immersed for 5–10 seconds. Do not discard the Bacto mixture after the seed tray has been soaked.
3. After removing the seed tray from your shallow container, poke a 10–15mm deep hole into the soil of each pot, and delicately transfer your seeds from their dry container into each hole. Remember, one seed per pot.
4. Using the supplied propagator, sprinkle a 15mm-thick layer of perlite into the bottom of the tray.
5. Place your seed tray into the propagator, adjust the walls, and position the lid. The lid comes with an on/off switch for the already-attached lights.
6. Check the water level in your reservoir once a day. Your aim is to maintain an even level. After 1–7 days, the seeds should have sprouted, with visible leaves appearing. Once the seedling is 3cm tall, transfer it to your final growing medium.
If In Doubt, Think Springtime Conditions
No matter which method you choose, always think about what conditions would naturally be like in spring. In their natural environment, cannabis seeds would start to sprout in-line with the seasonal change from winter to spring. Moisture is still high, and temperatures will be naturally rising. Always ask yourself the question, “Does my germination setup replicate spring conditions”. If the answer is yes, there is a good chance germination will be a success.
Giving Your Seeds The Best Possible Start In Life
In most cases, germination will go off without a hitch. However, there are a few troubleshooting issues we can help with.
-
Lighting
The first is lighting. Your seed/young seedling will only need fluorescent or CFL grow lights, at least to begin with. While plants need light to thrive, too much of a good thing will damage cannabis in its first few weeks.
Position lights about 15cm from seeds. Once your seedling has developed its first proper leaves (they will have jagged edges), you can move the lights as close as 5cm. If you are concerned about damaging your seedling, place your hand between the leaves and your lights. If you cannot hold your hand in place for ten seconds without it being too hot, move the lights 2cm away. Repeat until you are comfortable with the temperature.
As young seedlings grow quite quickly, you will need to keep adjusting lights to get the best results. After two weeks under fluorescent lights, you will be able to switch to high-powered HPS or MH-style grow lights.


-
Upside-down Seeds
Don’t panic, where possible roots will always grow downwards. It is not necessary to try and reposition the seed yourself. Disturbing the seed at this crucial time will do more damage than good. In most scenarios, what you are actually seeing is not a root protruding from the top of the seed, but the stem of a cannabis plant.
If you are ever unsure, always wait a few days for the first leaves (cotyledons) to appear. As long as a seed’s requirements have been met, the seedling should sort itself out. The best approach is not to panic; follow the golden rules and your young seedling will be ready to transfer to a larger pot in no time.


Germination And Beyond
When Do You Start Feeding?
It will depend on the growing medium you are using, but in most cases, you will not need to supply any nutrients for the first 2–3 weeks. There will be of plenty of nutrients available in the soil, and even coco will only need nutrients added after a week or so. If you do opt for coco or hydroponics, nutrients should be added at 0.25x their regular strength. Once the first set of leaves appear, increase this in increments of 0.25 per set of leaves. For beginners, we would always recommend using a soil medium. It allows you to get to know the intricacies of growing cannabis more efficiently, and can be the least punishing if you make mistakes.
An easy way to spot if more nutrients are needed is to observe the leaves. The serrated leaves will start to turn pale green as nutrient stores are depleted.
Left long enough, leaves will eventually turn yellow. This is a definite sign that more nutrients are needed. Your plant will not die if the leaves turn yellow, but it is a timely reminder to feed your young seedling.
Nitrogen is the most commonly needed nutrient during periods of high growth. Once the seedling has been fed, the colour of the leaves will return to normal. Depending on how long you waited to take action, this can take a few hours or a whole day.
Sit Back And Relax
The first few weeks of a seedling’s development require very little interference. Nutrients, as we have mentioned, will need minor tweaks, as will lighting. However, now that your seed has germinated, you have a few weeks of grace. Sit back, relax, and enjoy your cannabis plant taking shape.
Once those initial weeks have passed, you can treat your seedling like it is in the vegetative stage, and switch to strict lighting routines and full-intensity light. During germination, always remember the golden rules, and if in doubt, ask yourself if you have created “springtime conditions”. If you are confident everything is on track, all you need to do is observe and marvel at the creation of your very own cannabis plant.


How to Germinate?
Grow Cannabis With RQS
.jpg)
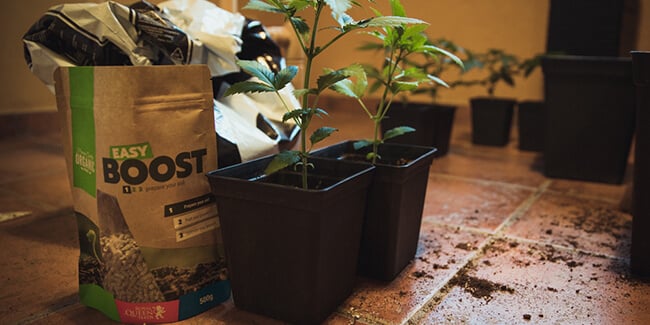
Nutrients and boosters


 Grow Guide Topic Finder
- Growing cannabis step by step
- Cannabis growing basics
- Choosing your seeds
- How to germinate seeds
- The cannabis vegetative stage
- The cannabis flowering stage
- Harvesting cannabis
- Trimming, drying, and curing
- Choosing pots and soil
-
Growing indoors
- A Complete Overview Of Growing Cannabis Indoors
- Cannabis Cultivation Tips: How To Set Up Indoor Grow Lights
- How Many Cannabis Plants Can You Grow Per Square Metre?
- Indoor Cannabis Growing: Relative Humidity and Temperatures
- Hydroponics Cannabis Growing Guide (with diagrams)
- Cannabis Micro Growing: Growing Great Weed in Tiny Spaces
- Growing outdoors
- How to grow autoflowering cannabis
- Cannabis nutrients and pH
- Cannabis troubleshooting: Nutrients
-
Cannabis troubleshooting: Growing
- Cannabis Seed Germination — Troubleshooting Guide
- How to Deal With Pythium (Root Rot) in Cannabis Plants
- Slow Cannabis Plant Growth And What You Can Do About It
- How to Prevent and Fix Stretching in Cannabis Seedlings
- Watering Your Cannabis: How To Fix Over And Underwatering
- Understanding Male, Female, And Hermaphrodite Cannabis
- Identifying and Treating Common Cannabis Ailments
- How To Revive a Sick Cannabis Plant
- How to Avoid Mouldy Weed During Drying and Curing
- How to Prevent and Treat Dry and Crispy Cannabis Leaves
- What Cannabis Leaves Can Tell You
- Yellow Cannabis Leaves
-
Cannabis Strains Grow Report
- HulkBerry Automatic Grow Report
- Blue Cheese Auto Grow Report
- Purple Punch Automatic Grow Report
- Triple G Automatic Grow Report
- Do-Si-Dos Automatic Grow Report
- Green Gelato Automatic Grow Report
- Haze Berry Automatic Grow Report
- Purple Queen Automatic Grow Report
- Cookies Gelato Automatic Grow Report
- Sherbet Queen Automatic Grow Report
- Sweet Skunk Automatic Grow Report
- Medusa F1 Grow Report
- Cannabis plant training
-
Weed growing tips
- The Cannabis Plant Anatomy
- How to preserve seeds
- How Much Sunlight Do Outdoor Cannabis Plants Need To Grow?
- How to Control and Prevent Stretching in Cannabis Plants
- How And When To Transplant Your Cannabis Plants
- My Cannabis Plants Are Growing Too Tall: What Should I Do?
- Should You Worry About Purple Or Red Cannabis Stems?
- What To Do When Your Indoor Cannabis Won’t Flower
- How To Protect Your Cannabis Plants From Heat Stress
- How To Tell If Your Female Cannabis Plant Has Been Pollinated
- Growing Medical Marijuana
- Bud Washing: How to Clean Your Weed
Categories

How to Germinate?
Grow Cannabis With RQS
Nutrients and boosters


