Included FREE items


Cannabis Micro Growing: Growing Great Weed in Tiny Spaces
- Growing cannabis step by step
- Cannabis growing basics
- Choosing your seeds
- How to germinate seeds
- The cannabis vegetative stage
- The cannabis flowering stage
- Harvesting cannabis
- Trimming, drying, and curing
- Choosing pots and soil
-
Growing indoors
- A Complete Overview Of Growing Cannabis Indoors
- Cannabis Cultivation Tips: How To Set Up Indoor Grow Lights
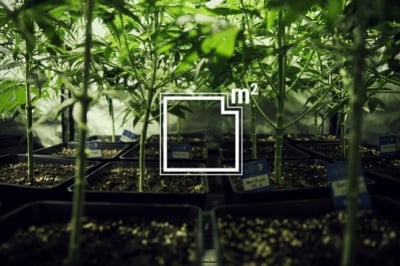
- How Many Cannabis Plants Can You Grow Per Square Metre?
- Indoor Cannabis Growing: Relative Humidity and Temperatures
- Hydroponics Cannabis Growing Guide (with diagrams)
- Cannabis Micro Growing: Growing Great Weed in Tiny Spaces
- Growing outdoors
- How to grow autoflowering cannabis
- Cannabis nutrients and pH
- Cannabis troubleshooting: Nutrients
-
Cannabis troubleshooting: Growing
- Cannabis Seed Germination — Troubleshooting Guide
- How to Deal With Pythium (Root Rot) in Cannabis Plants
- Slow Cannabis Plant Growth And What You Can Do About It
- How to Prevent and Fix Stretching in Cannabis Seedlings
- Watering Your Cannabis: How To Fix Over And Underwatering
- Understanding Male, Female, And Hermaphrodite Cannabis
- Identifying and Treating Common Cannabis Ailments
- How To Revive a Sick Cannabis Plant
- How to Avoid Mouldy Weed During Drying and Curing
- How to Prevent and Treat Dry and Crispy Cannabis Leaves
- What Cannabis Leaves Can Tell You
- Yellow Cannabis Leaves
-
Cannabis Strains Grow Report
- HulkBerry Automatic Grow Report
- Blue Cheese Auto Grow Report
- Purple Punch Automatic Grow Report
- Triple G Automatic Grow Report
- Do-Si-Dos Automatic Grow Report
- Green Gelato Automatic Grow Report
- Haze Berry Automatic Grow Report
- Purple Queen Automatic Grow Report
- Cookies Gelato Automatic Grow Report
- Sherbet Queen Automatic Grow Report
- Sweet Skunk Automatic Grow Report
- Medusa F1 Grow Report
- Cannabis plant training
-
Weed growing tips
- The Cannabis Plant Anatomy
- How to preserve seeds
- How Much Sunlight Do Outdoor Cannabis Plants Need To Grow?
- How to Control and Prevent Stretching in Cannabis Plants
- How And When To Transplant Your Cannabis Plants
- My Cannabis Plants Are Growing Too Tall: What Should I Do?
- Should You Worry About Purple Or Red Cannabis Stems?
- What To Do When Your Indoor Cannabis Won’t Flower
- How To Protect Your Cannabis Plants From Heat Stress
- How To Tell If Your Female Cannabis Plant Has Been Pollinated
- Growing Medical Marijuana
- Bud Washing: How to Clean Your Weed
Contents:
- Understanding the basics of micro growing
- Using the right amount of soil
- Finding the right grow light
- How to manage ventilation and smell in a micro cannabis grow
- How to water cannabis plants in a micro grow
- How to use growing techniques in a cannabis micro grow setup
- When to switch your micro grow room to bloom
- Micro growing cannabis: expect realistic results
- Choosing a suitable strain
- Great strains for micro growing
The new trend of micro growing weed is challenging the norms of how much space it takes to grow great cannabis at home.
Thanks to new and improved grow gear (especially grow lights) and an increase in knowledge concerning the cannabis plant, micro growers are able to churn out great harvests in extremely small spaces.
In this article, we’ll walk you through everything you need to know about micro growing, and set you up to grow great weed in (almost) any space.
Understanding the Basics of Micro Growing
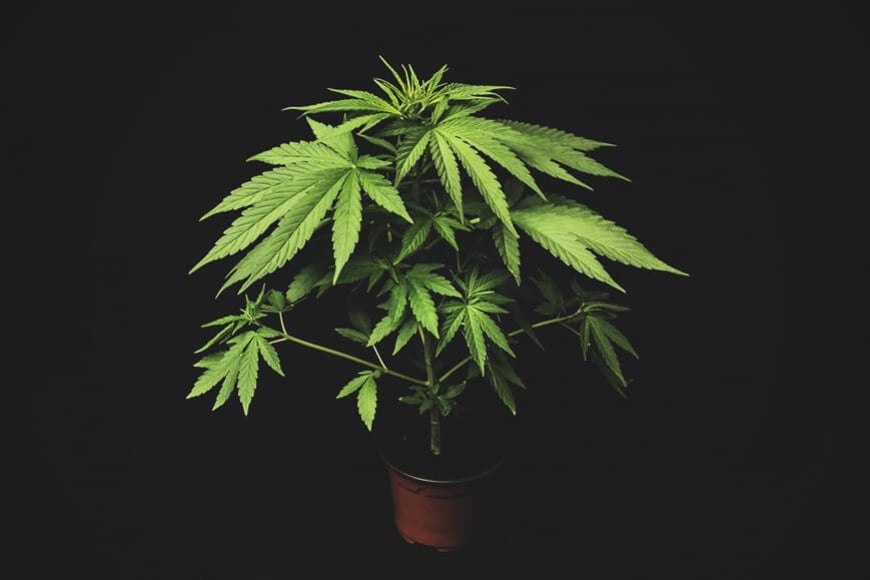
Micro growing is regular indoor growing, but on a smaller scale. It’s all about producing top-shelf bud with all the flavour, aroma, and potency you want, but in confined spaces (such as small DIY tents, cupboards, bar fridges, or even hulled desktop computer towers). Alternatively, some growers opt to buy ready-made stealth grow boxes.
The minimum amount of space you’ll need to grow weed in a micro setup is 35 × 35 × 75cm. To accommodate the lack of space in a micro grow, you’ll have to make minor adjustments to your lighting and ventilation, the strains you choose to grow, your medium, and your watering/feeding schedule.
Using the Right Amount of Soil
Micro growing is usually done using soil, as setting up a soilless or hydro system in a space as small as a mini-fridge can be very difficult. So, to accommodate the lack of space that qualifies a micro grow, you’ll want to use less soil to prevent your plants from outgrowing their small room or tent.
The root system is a crucial part of the plant, and its size has a great influence on how tall the plant will grow. Most plants tend to occupy the same amount of space below the ground as they do above. In a micro grow, we can use this correlation between the size of the root system (thus, the amount of medium) and plant size to control the growth of our cannabis plants and match it to our spatial limitations.
Below you’ll see how different pot sizes will impact the height of your cannabis plants:
- 12l pots: ~1–1.5m
- 5l pots: ~60cm
- 2–3l pots: ~24cm
- 500ml pots: ~13cm
Note that these figures are just estimates, and the exact size of your cannabis plants will vary depending on their genetics. Also, keep in mind that plants grown in small containers will need to be fed and watered more regularly than plants grown in larger containers with access to more soil.
For micro growing, we generally recommend sticking to 3l pots. However, we’ve seen some growers working with slightly larger spaces use up to 9l pots. How big or small you choose to go with your pots is up to you; just keep in mind that using bigger pots will likely restrict the number of plants you can grow (but more plants won’t necessarily translate to a bigger micro grow yield).


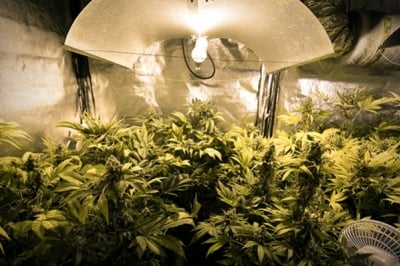
Finding the Right Grow Light
First and foremost, you’ll want to turn to LEDs for micro grows. HPS and HPI lights simply aren’t suited to these small grows as they produce far too much heat.
For the best results, we recommend using LED panels. A 15W panel is capable of producing op to 3000 lumens while producing almost no heat and taking up virtually no space (the panel measures just 130 × 110mm).
Alternatively, we recommend using any small 60W LED panel for your micro grow. Depending on just how small of a space you’re growing in, you’ll likely never need to keep this panel running at 100% capacity. We recommend keeping it at 25–50% to help control your plant’s stretch during veg, then turning it up to 50–75% during bloom, depending on the plant’s stretch. You can also control the panel’s light schedule using a controller, which is app-operated.
Properly Placing Your Grow Light
One common question micro growers face is this; where do I place my grow lights?
Traditional indoor grow setups place the main grow light directly above the canopy. But, since micro growers are often working with extremely small spaces, this setup might not always be the best option.
In small vertical spaces (like a grow box, small cupboard or furniture piece, or computer tower), you’ll usually be better off placing your main grow lights along one or multiple sides of your plant. This will allow you to grow a bigger canopy, improve light penetration through the canopy, and prevent plants from stretching towards the top of your grow space.
For even more control, you may want to consider building two separate grow boxes; one for veg and another for bloom. In the veg box, you may be able to get away with placing your grow light right above your plant, as light penetration isn’t as much of an issue during veg as it is during flowering. Remember to keep in mind the speed at which your plants grow, and try to find strains that grow at a speed that suits the size of your space.
If you do opt to install your veg light above your plants, remember to keep it at the right distance and intensity. If your grow light is too close or too strong, plants are likely to develop very short internodes and might show signs of light stress. If, on the other hand, your light is too far or too weak for your plants, they’re going to stretch and develop long internodes.
In your bloom box, however, we recommend placing your grow light along the sides of your plants. This will provide the best light penetration and allow you to grow a longer vertical canopy of buds. We also recommend using a vertical net to keep your plants centreed. You can also use this net to train your plants gently and control their growth as you see fit, given your space.


How to Manage Ventilation and Smell in a Micro Cannabis Grow
While it might seem like a trivial detail, properly ventilating your cannabis micro grow is a must. When working with such a small space, air can quickly become stagnant and start creating a lot of problems for your plants. This is because plants consume the CO₂ in their environment for photosynthesis. When growing in such small spaces, your plants have very limited access to fresh, CO₂-rich air, making proper ventilation a must for healthy plants.
Luckily, ventilating a cannabis micro grow space is easy.
If you decide to build your own micro grow setup, all you’ll need to keep your space ventilated is a small outtake fan, like this 24V Brushless Centrifugal Blower. While it might not look like much, this tiny fan will do a perfect job at removing old, stagnant air from your grow space. For the best results, we recommend installing it directly above your plants.
If you’ve got enough space, you may even want to consider keeping a small hand-held fan inside your space to keep air circulating properly around your plants.
For even better ventilation and air circulation, we recommend installing a small intake fan at the bottom of your micro grow setup. A high-speed cooling fan, for example, will let a constant influx of fresh air into your micro grow space.
Because micro grows usually only allow you the space to grow one small weed plant (or two), you shouldn't need to use carbon filters to manage the smell of your operation. However, if you want to be extra safe, installing a carbon filter to the outtake fan we mentioned above is simple. The filter needs to be installed in front of your outtake fan, and therefore may rob you of some space inside your mini grow room/box.
How to Water Cannabis Plants in a Micro Grow
Watering your cannabis plants in a micro indoor setup can be tricky due to the lack of space. If you’re building your own micro setup, take this into consideration and try to leave enough space around the base of your plants so you can water them comfortably. Remember that water splashing up onto the foliage and buds of your plants can cause fungal issues, so you’ll want to avoid it at all costs.
If you're growing in a truly tiny space—one where you can't walk around or get a good position over your plants—make sure you can remove your plants for watering so you don't end up making a mess of your space.
Given the small scale of a micro grow, we generally don’t believe they warrant the installation of any automatic watering systems. Just have the patience to manually water your plants using a small watering can or bottle.
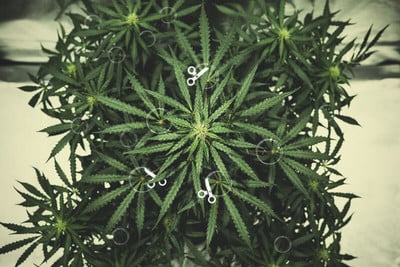
How to Use Growing Techniques in a Cannabis Micro Grow Setup
Micro grows typically call for smaller, bushier plants. In order to achieve this kind of structure and produce decent harvests in such small spaces, you’ll want to employ some growing techniques like LST, HST or ScrOG, and Defoliation. Below, we’ll share some basic tips on how to adapt these techniques to a micro grow setup.
LST
LST is easily one of our favourite grow techniques, and can come in super handy when growing in small spaces. The only way your LST technique might vary when micro growing is in how you direct your plant’s growth. Remember, the goal of LST is to open up your plant and improve light penetration. Think about how you’ll achieve that given the lighting in your micro grow room.

HST (Topping, Super Cropping, FIM, etc.)
High-stress techniques may be a little trickier to apply to a micro grow. Topping or fimming, for example, create multiple dominant colas, which may not be ideal in small, narrow vertical indoor gardens.
If you’re growing in a short yet wide space (like a shelf, for example), you may want to use super cropping or fimming early on to create a short canopy packed with thick colas. In fact, super cropping may come in handy in either case, as it strengthens your plant in time for bloom and, like LST, can direct growth in the right direction to make better use of your lights.
")
ScrOG
Screen of green is another of our favourite training techniques, and you’ll be glad to know you can take advantage of it even in small micro cannabis gardens. If you’re working with a narrow vertical space with lateral lights, for example, using a vertical screen can be one of the best ways to create a big canopy that receives a ton of light.
In a short, horizontal micro grow cabinet, on the other hand, you can use ScrOG as you would in a regular indoor garden to create a thick, even canopy that, come harvest time, will be loaded with sticky buds.

Defoliation
Defoliation is essential to micro growing. In a narrow, vertical grow room with lateral lights, defoliation will help you clear unnecessary foliage and ensure all parts of your plant get enough light to develop big, thick buds.


When to Switch Your Micro Grow Room to Bloom
In general, we recommend you flip your vegetative cannabis plants to bloom once they’ve grown to half of the height of your micro grow box. This will ensure they’ve still got enough space to accommodate their pre-bloom stretch without growing too close to the top of your box/room.
Remember that the rate at which your plants grow is directly related to the amount of light they receive. More light will result in shorter internodes, while plants grown with less light will stretch, resulting in larger spaces between each node. You may need to play around with the lighting in your micro grow room to find the sweet spot for each of your strains.
Micro Growing Cannabis: Expect Realistic Results
As with any cannabis grow, it’s important to set yourself some realistic expectations regarding the size and quality of your harvest, as well as the amount of time it’ll take you to get from seed to harvest.
In general, growing in a small 35 × 35 × 75cm space using a rough average of 30W of light throughout your entire grow, you can expect to harvest between 25 and 45g, depending on the strain, your feeding routine, training techniques, and skill. You’ll usually be able to go from seed to harvest within 3–4 months, depending (obviously) on your light cycle and the genetics of your plants.
Finally, the cost of setting up your micro grow box/room will vary greatly. If you choose to build your own micro grow space, you may be able to do so relatively cheaply (keep in mind that your LED panel will easily be the biggest upfront cost).
Choosing A Suitable Strain
When it comes to micro growing, choosing the right strain is very important due to the limited space available. One of the things to watch out for is the height of your cannabis strain. Sativas grow higher and more slender than indicas, which tend to be short and bushy.
Furthermore, during the flowering phase sativas undergo a 200-300% increase in height, while Indicas increase only by 50-100%, which shows that indicas are more compatible with micro growing.
Another reasonable option would be autoflowering strains. No matter what the conditions, autoflowering strains stay small due to their genetics (a great many of them even smaller than indicas) and aren't dependent on the light regime, which means they will have a shorter harvest time.
3 Great Strains for Micro Growing
Of course, some genetics are more suited to micro growing than others, and the following three are prime examples of quality picks. You’ll notice these strains all have something in common: they’re autoflowering.
ROYAL DWARF
Royal Dwarf truly is a miniature cannabis specimen that can remain at tiny sizes of 40cm tall when trained in the ways mentioned above. This plant was bred for one reason and one reason only: stealth. Growers can easily cultivate multiple Royal Dwarf plants in their home without a single suspicion being raised. She can easily be grown within modified kitchen cupboards, wardrobes, boxes, and computer towers. Small LED lights can also be used within these tiny spaces to avoid giving off too much heat. Royal Dwarf is essentially the autoflowering version of the legendary Skunk, and was made using a Skunk strain along with a specific ruderalis cultivar. She offers stimulating but subtle sativa highs fuelled by THC quantities of 13%. She can therefore be smoked all day long whilst allowing the user to stay on top of their game and not get too high. Her small yet compact flowers offer sweet and citrus tastes.
Royal Dwarf will be ready to harvest a mere 8–9 weeks after seeds have been germinated. Plants grown indoors will provide yields of up to 200g/m² and won’t exceed 70cm in height. Plants grown outdoors within garden beds or guerrilla grow spots will produce harvests of 30–80g/plant and reach heights of between 50–90cm.

Royal Dwarf

|
|
Skunk x Ruderalis |
|
|
150 - 200 gr/m2 |
|
|
40 - 70 cm |
|
|
6 - 7 weeks |
|
|
THC: 13% |
|
|
Sativa 10% Indica 60% Ruderalis 30% |
|
|
30 - 80 gr/plant |
|
|
50 - 90 cm |
|
|
9 - 10 weeks after sprouting |
|
|
Creative, Motivating |
EASY BUD
It doesn’t take a genius to figure out how this strain received her name. Easy Bud is the perfect beginner strain, and even better for those wanting to start out low-key, gaining as little attention as possible. This strain goes mostly unnoticed wherever she is grown, reaching an average height of 50cm. This makes it possible to grow her within down-low attic spaces, empty cupboards, and hidden corners of the garden. Easy Bud features primarily indica genetics and provides a very subtle and mellow effect that chills users out and stimulates the appetite. A THC level of 12% makes Easy Bud even more suitable for beginners. Her flowers are loaded with tastes of citrus and herbs, making her a fine addition to some low-intensity edibles.
Formed using parent strains White Indica and ruderalis, Easy Bud is able to produce significant yields relevant to her small stature. Indoor plants offer yields of up to 325g/m² and reach heights of between 50–60cm. Plants grown outdoors serve up yields of 30–80g/plant and grow to taller heights of 60–110cm. Easy Bud will be ready to try after only 8–9 weeks after putting seeds into soil.

Easy Bud

|
|
White Indica x Ruderalis |
|
|
275 - 325 gr/m2 |
|
|
50 - 60 cm |
|
|
5 - 7 weeks |
|
|
THC: 12% |
|
|
Sativa 15% Indica 55% Ruderalis 30% |
|
|
30 - 80 gr/plant |
|
|
60 - 110 cm |
|
|
9 - 10 weeks after sprouting |
|
|
Physically Relaxing |
QUICK ONE
Quick One is another compact cannabis strain that can be grown in complete privacy. Most autoflowering varieties have fast flowering times, but Quick One has a real lust for speed. This child of Lowryder 1 and Old School Indica is capable of erupting into a fully mature specimen only 8 weeks after germination. If you want rapid turnover of indica-dominant flowers, then she’s your strain. A THC content of 13% offers a chilled body high this is great for relaxing in the evening without becoming stoned out of your mind. These pleasant effects go hand-in-hand with flavours of sweetness and citrus.
Don’t let Quick One’s size fool you; she’s more than capable of pumping out enough buds for personal use for quite some time. Indoor plants provide 275–325g/m² and grow to heights of 50–60cm. Plants grown outdoors, easily kept hidden by other plant species, offer 100–150g of fruity flowers per plant.

Quick One

|
|
Lowryder 1 x Old School Indica |
|
|
275 - 325 gr/m2 |
|
|
50 - 60 cm |
|
|
5 - 6 Weeks |
|
|
THC: 13% |
|
|
Sativa 10% Indica 60% Ruderalis 30% |
|
|
100 - 150 gr/plant |
|
|
60 - 100 cm |
|
|
9 - 10 weeks after sprouting |
|
|
Physically Relaxing |