Included FREE items


The Flowering Stage Of Cannabis Week By Week
- Growing cannabis step by step
- Cannabis growing basics
- Choosing your seeds
- How to germinate seeds
- The cannabis vegetative stage
- The cannabis flowering stage
- Harvesting cannabis
- Trimming, drying, and curing
- Choosing pots and soil
-
Growing indoors
- A Complete Overview Of Growing Cannabis Indoors
- Cannabis Cultivation Tips: How To Set Up Indoor Grow Lights
- How Many Cannabis Plants Can You Grow Per Square Metre?
- Indoor Cannabis Growing: Relative Humidity and Temperatures
- Hydroponics Cannabis Growing Guide (with diagrams)
- Cannabis Micro Growing: Growing Great Weed in Tiny Spaces
- Growing outdoors
- How to grow autoflowering cannabis
- Cannabis nutrients and pH
- Cannabis troubleshooting: Nutrients
-
Cannabis troubleshooting: Growing
- Cannabis Seed Germination — Troubleshooting Guide
- How to Deal With Pythium (Root Rot) in Cannabis Plants
- Slow Cannabis Plant Growth And What You Can Do About It
- How to Prevent and Fix Stretching in Cannabis Seedlings
- Watering Your Cannabis: How To Fix Over And Underwatering
- Understanding Male, Female, And Hermaphrodite Cannabis
- Identifying and Treating Common Cannabis Ailments
- How To Revive a Sick Cannabis Plant
- How to Avoid Mouldy Weed During Drying and Curing
- How to Prevent and Treat Dry and Crispy Cannabis Leaves
- What Cannabis Leaves Can Tell You
- Yellow Cannabis Leaves
-
Cannabis Strains Grow Report
- HulkBerry Automatic Grow Report
- Blue Cheese Auto Grow Report
- Purple Punch Automatic Grow Report
- Triple G Automatic Grow Report
- Do-Si-Dos Automatic Grow Report
- Green Gelato Automatic Grow Report
- Haze Berry Automatic Grow Report
- Purple Queen Automatic Grow Report
- Cookies Gelato Automatic Grow Report
- Sherbet Queen Automatic Grow Report
- Sweet Skunk Automatic Grow Report
- Medusa F1 Grow Report
- Cannabis plant training
-
Weed growing tips
- The Cannabis Plant Anatomy
- How to preserve seeds
- How Much Sunlight Do Outdoor Cannabis Plants Need To Grow?
- How to Control and Prevent Stretching in Cannabis Plants
- How And When To Transplant Your Cannabis Plants
- My Cannabis Plants Are Growing Too Tall: What Should I Do?
- Should You Worry About Purple Or Red Cannabis Stems?
- What To Do When Your Indoor Cannabis Won’t Flower
- How To Protect Your Cannabis Plants From Heat Stress
- How To Tell If Your Female Cannabis Plant Has Been Pollinated
- Growing Medical Marijuana
- Bud Washing: How to Clean Your Weed
Contents:
When the light cycle provides your cannabis plants with longer hours of uninterrupted darkness, they enter the flowering stage. Your plants will stop growing and instead put their energy into producing buds (flowers). Outdoors, this will normally happen when the days get shorter around the end of summer. When you grow indoors, flowering will begin once you switch your lights to 10-12 hours of darkness.
For most cannabis strains, the flowering period will last about 7-9 weeks, although some sativas require even longer for their buds to mature.
What happens during flowering and at what exact time can somewhat vary depending on the particular strain you are growing. So don’t expect your plants to follow this schedule to the T; see it more as a general guideline that you can go by. Let us look at the flowering phase of cannabis week by week.
The First Few Flowering Weeks (Weeks 1, 2 and 3)
When the flowering period starts, it isn't an abrupt change in your plants’ growth. Cannabis won’t just stop growing and then go into flowering right away. In these first weeks of flowering, many cannabis strains may indeed undergo a considerable growth stretch. This is important to know when it comes to feeding your plants properly, but also if you want to give them sufficient space to grow.
 |
 |
 |
| (Week 1) | (Week 2) | (Week 3) |
Week 1 (Transition Stage and Stretch)
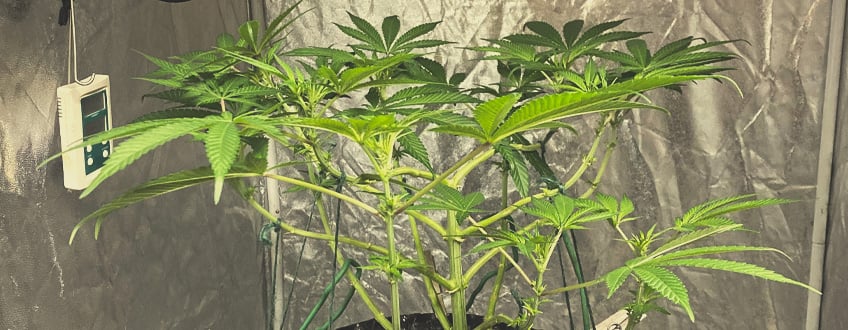
In the very first weeks of flowering, your cannabis plants will be in the transition stage. Thinking that winter is not far away and that she will soon have to carry a big load of bud, your plant will likely grow rapidly. Some strains can almost double in height during this time. Because of the fast growth that your plant is undergoing now, this early flowering phase is also known as the stretch phase.
While your plant is putting in quite some overtime to gain size and height, she will grow a number of new leaves mostly at the top of the main colas. Your cannabis plant is busy growing “green stuff,” like leaves and stems so she can become stronger and sturdier.
Important things to know in this early stage of flowering.

Although your plant has officially entered the flowering phase, she will now have an increased need for growing nutrients. You should not abruptly change your nutrient schedule and use flowering nutrients from one day to the next. It is usually recommended that you continue to give growing nutrients for at least one more week once flowering starts.
With the stretching of cannabis in early flowering, you may possibly want to think about training techniques such as low stress training (LST). This is where you bend the stems down and away from the centre of the plant so you can get an even canopy for a more efficient use of your grow lights. This can help you obtain much better yields later on.
(Week 1)
Week 2
In week 2 of flowering, you may spot the first white pistils growing on your female cannabis plants. These fine and wispy white hairs will develop at those locations where the big fan leaves meet the main stem. It is these fine hairs that will later become buds.
If your cannabis plant happens to be a male, it won’t grow these “hairs,” but will instead grow small pollen sacs. Should you grow regular, non-feminized plants where you don’t know their gender, now is the time when you should “sex” your plants so you can separate the males from the females. The males won’t grow buds and will also pollinate your females, causing them to grow seeds. This is something you do not want to happen.
To properly feed your plants once they start to flower and to initiate the first signs of growing buds, you should check your nutrient manufacturer’s schedule. It is normally around this time at week 2 where you will have to increase flowering nutrients to help your plants reach their maximum yield potential.

(Week 2)
Week 3
Your cannabis plants have still not entirely stopped growing and will now be about 50% bigger than what they were just three weeks earlier. Although still stretching a bit, the stretch will now gradually slow down and soon come to a complete halt.
At the locations on the plant where you previously saw some hairs, you can now see the first signs of real buds developing. There still won’t be many resin glands and trichomes on your plants, which means that the smell won’t be too pungent yet either.
This phase of flowering where your plant is starting to spend increasingly more energy on growing flowers is particularly critical. Make sure that the nutrients you give are appropriate and check the labels for the recommended dosages.
As your plants become more picky, you should check for potential deficiencies that could manifest in various ways, such as discoloured, yellowing leaves or loss of leaves entirely. At the same time, you should also check your plants for signs of possible overfeeding (“nutrient burn”) that could show up around this time as well. Nutrient burn will usually show in the tips of the leaves becoming discoloured. If this happens, you need to cut down on feeding.
(Week 3)
 |
 |
| (Week 4) | (Week 5) |
Week 4
At week 4 of the flowering stage, your cannabis plants will likely have stopped growing altogether and are now spending all their energy on growing buds. There will still be white hairs sticking out from the buds, but the buds themselves will become bigger and fatter with each day. With more and larger buds growing, your plants will now produce more trichomes, making the odour a lot more noticeable at this stage.
Since your cannabis plant will have stopped growing, you won’t have to pay attention to training your plants any longer. Where you bent down branches before, now you may possibly consider holding them up should they require structural support.
(Week 4)

Week 5
In week 5 of flowering, you can observe the buds all over your plant becoming thicker. You may also spot new buds growing in new places such as along the main cola. With buds abounding, your cannabis plants will get fatter every day. This is a surefire sign you are in full flowering mode. At this point, your plant will have a very intensive odour. Ensure that you have a good ventilation system in place if you grow indoors or in a region that doesn’t allow for legal cultivation.
Some of your cannabis plants’ previously white pistil hairs may now be turning darker into a brownish or amber colour. At the same time, when you check the trichomes of your plant, you may spot some of them becoming opaque. The trichomes becoming milky white and the hairs turning darker are all signs of your plants not being too far from harvest.
(Week 5)
 |
 |
 |
| (Week 6) | (Week 7) | (Week 8) |
Weeks 6, 7 and 8 (Late Flowering Stage, Right Before Harvest)
Not all cannabis strains require the same amount of time for their flowering, but many varieties will be ready to harvest in these last three weeks. There are, however, not too many strains that will be ready before week 8.
(Week 6)
-
Flushing Your Cannabis Plants
Depending on the flowering time of your particular strain, the time for flushing your cannabis plant is normally two weeks before harvest. When you “flush,” you stop administering nutrients and give the plant only plain, pH-balanced water in these final weeks. This will get rid of (flush out) salts and minerals in the soil which will make for a better and more pure-tasting bud. Otherwise, your smoke will be quite harsh and can have an unpleasant, chemical taste.
(Week 7)
-
Check Your Plants For The Right Harvest Time
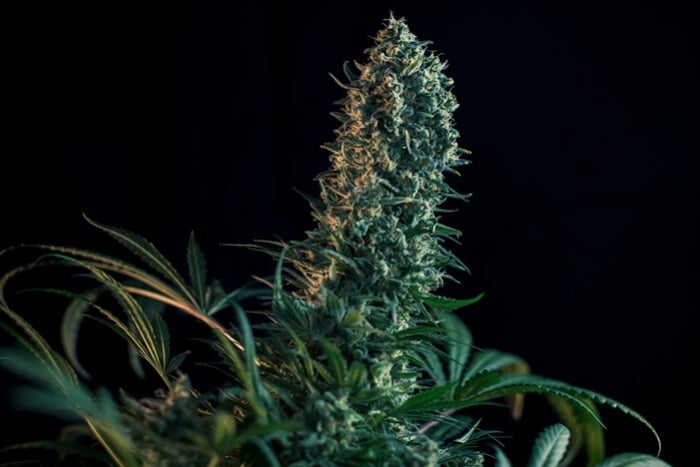
To find out when it’s time to harvest your plant, you can use a jeweller’s loupe or a small microscope to regularly check your plants’ trichomes. You can observe whether the trichomes turn from clear to a milky white colour. If many of the trichomes you see are still clear and transparent, it means it’s still too early for harvest. But when most of the trichomes have an amber colour and an opaque clarity, this means that the THC content of the buds is at its maximum and the plant is ready for harvest.
(Week 8)
Pro Tips For A Better Harvest
Guiding cannabis plants through their flowering phase can be intimidating, especially for rookie growers. Follow these simple tips to ensure you always end up with a great harvest:
-
Sexing Your Plants
Most growers identify the sex of their plants in the final week of vegging or the early weeks of flowering. Remember, males develop pollen sacs that look like small balls, and need to be culled or separated from your females if you want to avoid them getting pollinated.
Also, keep an eye on your female plants as they flower to catch any hermaphrodites. While it’s not common, some cannabis plants may develop both female and male flowers, while others may develop stamen (colloquially known as “bananas”) as a final attempt to create seeds in response to heavy stress.
-
Fix Problems Before Flowering
If you’re an indoor grower, you have the advantage of controlling when your plants start to flower. Make sure to use this to your advantage and only ever flip your plants to flowering when they’re 100% healthy. You don’t want to be correcting nutrient deficiencies or fighting pests and diseases while your plants are budding.
If you’re growing outdoors, you have less control over when your plants start to flower. Instead, you’ll want to pay close attention to the calendar and fix any issues before the end of summer.
-
Make The Transition Into Flowering As Smooth As Possible
Flowering plants require different humidity levels and temperatures than vegging plants. Rather than changing the temperature, humidity, and light cycle at the same time, we recommend gradually changing the temperature and humidity over two days, then letting your plants grow accustomed to these changes by leaving them in veg for just a few extra days before flipping your lights.
-
Get Your Lighting Right
Cannabis plants like red and orange wavelengths during flowering (between 580–700nm) to encourage the ripening of their flowers. For best results, use a grow light with this spectrum during the bloom phase.
-
Don’t Transplant Close To Bloom
Transplanting shocks your cannabis plants. Always avoid transplanting right before or during the flowering phase to avoid damaging your yield potential.
-
Trim Excess Foliage
Before flowering, make sure to train and trim your cannabis plants a bit to allow as much light as possible to reach its bud sites. Now, every grower has their own approach to trimming, but we like Kyle Kushman’s recommendation: “If the tip of a branch doesn’t break at least 50% of the height of the plant, it’s gone”. The idea here is to help your plant concentrate its energy only on the bud sites that’ll produce the best product.
Also, remember to always trim yellow or dead foliage during flowering. While your plants should stay lush and green up until about week four, some of their foliage will stop thriving as they devote more energy to bud production. This is completely normal, and you can safely remove any leaves that turn yellow or dry out completely.
-
Keep Humidity At 45%
Bud rot is a serious issue that can ruin an entire harvest. To protect your plants and optimise their growth, keep the relative humidity of your grow room at 45%.
-
Closely Monitor Temperature
Flowering cannabis plants like daytime temperatures of 20–23°C and nighttime temperatures of around 15–18°C. Make sure to watch out for sudden drops or spikes in temperature when you turn your lights on/off. Sudden drops can shock your plants, while sudden rises can cause condensation to form on the surfaces of your buds, leading to bud rot.
-
Use A Carbon-filtered Airflow System
Supplementing with CO₂ during the bloom phase can enhance growth and yield. If you can, aim to keep CO₂ levels at 1,000–1,200ppm during flowering.
-
Avoid Nutrient Bur
You can’t compensate for nutrient burn during flowering. Make sure to follow a strict feeding calendar and remember to stop feeding two weeks before harvest and flush your plants.
-
Support Heavy Buds
It’s not uncommon for flowering plants to buckle under the weight of their buds. Use bamboo stakes and string to support heavily loaded branches and ensure they get as much light as possible.
-
Avoid Light Burn
Like with nutrient burn, you can’t compensate for light burn during flowering. Remember to keep your lights a good distance from the top of your canopy. Light burn not only damages healthy foliage but can cause calcium deficiencies in the early flowering phase. If the tops of your plants start to bleach during flowering, it's likely you need to lift your lights!
-
Use Fulvic Acid During Preflowering
Using fulvic acid in the late veg/early bloom phase can help increase the size of your buds early on. Also, remember to give your plants more calcium during bloom in both hydro and soil setups.
Happy Budding!
Growing weed can seem complicated and challenging. Cannabis plants, after all, are sensitive, and a single slip-up during the bloom phase can significantly impact the size and quality of your yield. To guarantee a great harvest every time, remember to bookmark this guide to the flowering phase and read it over before you flip the lights on your next batch of plants!