Included FREE items


Learn How To Grow Autoflowers: Week-By-Week Guide
- Growing cannabis step by step
- Cannabis growing basics
- Choosing your seeds
- How to germinate seeds
- The cannabis vegetative stage
- The cannabis flowering stage
- Harvesting cannabis
- Trimming, drying, and curing
- Choosing pots and soil
-
Growing indoors
- A Complete Overview Of Growing Cannabis Indoors
- Cannabis Cultivation Tips: How To Set Up Indoor Grow Lights
- How Many Cannabis Plants Can You Grow Per Square Metre?
- Indoor Cannabis Growing: Relative Humidity and Temperatures
- Hydroponics Cannabis Growing Guide (with diagrams)
- Cannabis Micro Growing: Growing Great Weed in Tiny Spaces
- Growing outdoors
- How to grow autoflowering cannabis
- Cannabis nutrients and pH
- Cannabis troubleshooting: Nutrients
-
Cannabis troubleshooting: Growing
- Cannabis Seed Germination — Troubleshooting Guide
- How to Deal With Pythium (Root Rot) in Cannabis Plants
- Slow Cannabis Plant Growth And What You Can Do About It
- How to Prevent and Fix Stretching in Cannabis Seedlings
- Watering Your Cannabis: How To Fix Over And Underwatering
- Understanding Male, Female, And Hermaphrodite Cannabis
- Identifying and Treating Common Cannabis Ailments
- How To Revive a Sick Cannabis Plant
- How to Avoid Mouldy Weed During Drying and Curing
- How to Prevent and Treat Dry and Crispy Cannabis Leaves
- What Cannabis Leaves Can Tell You
- Yellow Cannabis Leaves
-
Cannabis Strains Grow Report
- HulkBerry Automatic Grow Report
- Blue Cheese Auto Grow Report
- Purple Punch Automatic Grow Report
- Triple G Automatic Grow Report
- Do-Si-Dos Automatic Grow Report
- Green Gelato Automatic Grow Report
- Haze Berry Automatic Grow Report
- Purple Queen Automatic Grow Report
- Cookies Gelato Automatic Grow Report
- Sherbet Queen Automatic Grow Report
- Sweet Skunk Automatic Grow Report
- Medusa F1 Grow Report
- Cannabis plant training
-
Weed growing tips
- The Cannabis Plant Anatomy
- How to preserve seeds
- How Much Sunlight Do Outdoor Cannabis Plants Need To Grow?
- How to Control and Prevent Stretching in Cannabis Plants
- How And When To Transplant Your Cannabis Plants
- My Cannabis Plants Are Growing Too Tall: What Should I Do?
- Should You Worry About Purple Or Red Cannabis Stems?
- What To Do When Your Indoor Cannabis Won’t Flower
- How To Protect Your Cannabis Plants From Heat Stress
- How To Tell If Your Female Cannabis Plant Has Been Pollinated
- Growing Medical Marijuana
- Bud Washing: How to Clean Your Weed
Learn to grow autoflowering cannabis.
Contents:
Autoflowering cannabis plants are hardy, fast, and easy to cultivate in confined spaces. What’s not to love? Learn how to grow them week by week below.
How Long Do Autoflowers Take From Seed To Harvest?
Autoflowering strains typically move from seed to harvest in 8–10 weeks. However, some varieties can take up to 12 weeks to fully mature. Strains such as Bubble Kush Automatic and Quick One autumn towards the faster end of the spectrum, whereas varieties like Royal Creamatic and Royal Haze Automatic take a few more weeks to ready their buds for harvest.
Many growers elect to cultivate autoflowers because of their speedy growing rate. Their hardy genetics and forgiving nature also make them easier to grow and therefore more beginner-friendly.
Their impressive resistance to pathogens and pests allows them to withstand the challenges of outdoor growing.
However, their yields aren’t as spectacular as those obtained from photoperiod giants, but, the trade-off for brevity makes the decision worthwhile for most growers.
Light Schedule For Autoflowering Strains
As the name suggests, autoflowering strains don’t require a change in the light cycle to enter the flowering stage. Many growers choose to keep their autoflowers on a light schedule of 18 hours on and 6 hours off during the entire growing cycle. Other cultivators choose to keep their lights on around the clock in hopes of maximising photosynthesis and growth rate, however, this can get quite expensive.
Because of this unique trait, outdoor growers can achieve multiple harvests during a single growing season. By germinating seeds week after week in early spring, you can theoretically rake in your first harvest after ~8 weeks, with subsequent weekly harvests when growing fast strains.
A Note On PH
The pH value of your soil will determine how well your plants can access the nutrients within. If the pH becomes too high (alkaline) or too low (acidic), nutrient lockout will occur and deficiencies will set in. Cannabis plants thrive in a soil pH of between 6.0 and 6.5. Use a pH tester to track pH throughout your grow.
Autoflowering Grow Guide: How To Grow Autoflowers Week By Week
Follow the fail-safe week-by-week grow guide below for a quick and easy route to harvest time. We cover all of the parameters and variables you need to consider—at the correct times—to ensure your plants remain healthy, vigorous, and productive.
 |
 |
 |
 |
 |
| (Week 1) | (Week 2) | (Week 3) | (Week 4) | (Week 5) |
 |
 |
 |
 |
 |
| (Week 6) | (Week 7) | (Week 8) | (Week 9) | (Week 10) |
Week 1: Germination And Early Seedling Stage
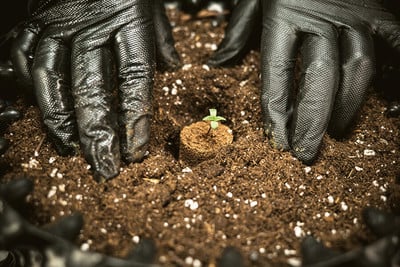
Germination usually takes 1–3 days. During this time, your seeds will activate and send a root down into the soil and a shoot above the surface. To begin the germination process, you’ll need to prepare a suitable soil mix. Autoflowers don’t need as much nutrients as photoperiod varieties and prefer light and airy soil.
You can make your own potting mix using the following formula:
- 3 parts peat moss
- 3 parts compost
- 2 parts perlite, moistened
- 1 part vermiculite, moistened
After you’ve prepared the mix, add some Easy Boost Organic Nutrition to the blend. These pellets will slowly release adequate levels of nutrition into the soil, providing foundational elements and minerals for the entire growing cycle. Add some mycorrhiza to the soil to help your plants flourish later down the line. These symbiotic fungi will bind to the root system and help your plants uptake nutrients more effectively.
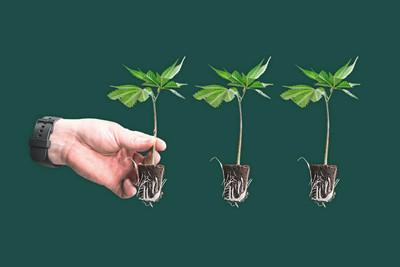
Next, poke a 10–15mm hole into a pot with your soil mix. Sow your seed directly into its final pot to avoid the stress of repotting later down the line. Transplanting causes plants to go into shock, and autoflowers grow so fast that they’ll struggle to recover. Place a seed in the hole and cover lightly with soil. You’ll see your seedling emerge in the next few days.
Environmental factors play a key role in optimal germination. Aim for the following to boost your success rate:
- 70–90% relative humidity (RH)
- 22–25°C air temperature

Week 2: Late Seedling Stage
Your seedling has now emerged and the process of photosynthesis has started. A 250W LED light will provide enough power to fuel an indoor grow. Using this setup, you’ll be able to grow one large plant per square metre. However, if you use low-stress training, you’ll be able to cultivate four plants under a light of this power.
LEDs are energy-efficient, produce less heat, and allow users to switch between light spectrums. Switch your light to the blue setting during the vegetative phase and set the timer to meet your chosen light schedule.
Now you should start applying nutritional formulas specifically designed for the seedling and vegetative phases. Easy Grow Booster Tablets provide everything plants need to optimise vegetative growth, and complement Easy Boost Organic Nutrition perfectly. Because autos don't need as many nutrients as photoperiods, you'll only need to use ¼–½ of the normal dose. Simply add half a tablet into 3–5 litres of water and administer the solution twice per week.


Week 3: Vegetation Well Underway
Week 3 will consist of low-stress training and maintaining optimal conditions. At this point, your autoflower will be well into the vegetative phase. You’ll notice new fan leaves forming, which will ramp up photosynthesis. Aim for the following environmental factors during week 3:
- 50% RH
- 20°C air temperature
- 2x feed with Easy Grow (half a tablet per 3–5 litres of water)
Your plant will be around 15cm in height at this point. Reposition your light so it hangs around 1m from the tip of the canopy. This will allow for optimal photosynthesis without risking light stress. Your plant will be thirsty enough to drink around 0.5l of water each day. However, only water once the top layer of soil has dried out.
When growing indoors, apply low-stress training during week 3 to boost productivity during the flowering stage. Simply tie a piece of soft garden wire halfway up the main stem, then gently bend the stem parallel to the ground and secure it in position by attaching the other end of the wire to the rim of the pot. This will flatten the canopy and expose more bud sites to the light source.


Week 4: Late Vegetative Phase
During week 4, your plant will be nearing the beginning of the flowering stage. This week will consist of making some minor training adjustments and gearing up for flowering. Aim for the following environmental conditions for optimal growth:
- 45% RH
- 20°C air temperature
- Light 70cm from the canopy
- 0.5l water per 24 hours
- 2x feed with Easy Grow (half a tablet per 3–5 litres of water)
You may start to notice some pre-flowers forming at the nodes on your plant. With the flowering phase right around the corner, you’ll need to finish off any training to avoid stressing your plant during bloom. Use garden ties to pin down any additional growth to flatten out the canopy and keep all future bud sites at the same level.


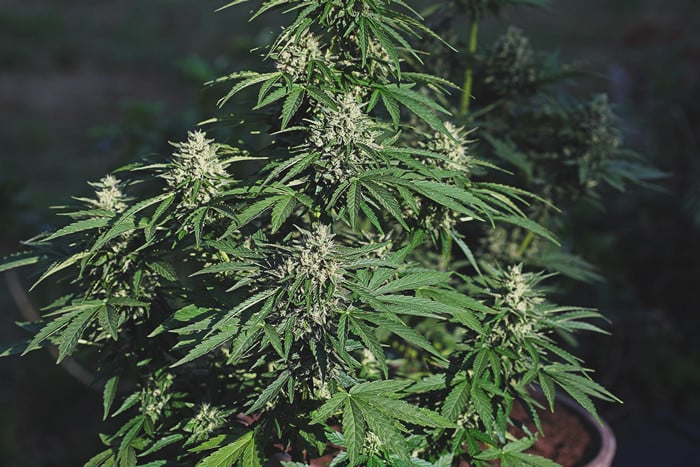
Week 5: Flowering Begins
Flowering has begun! During week 5, you’ll start to see small sacs topped with hairs emerging at the nodes. These will gradually turn into sticky and resinous buds. This week, you’ll want to continue dialling in environmental conditions and adjusting the lighting. Your plant will be roughly 30cm tall at this point. Aim for the following parameters if you’re growing indoors:
- 45% RH
- 23°C air temperature
- Light 65cm from the canopy
- 1l of water per 24 hours
- 2x feed with Easy Bloom (half a tablet per 3–5 litres of water)
Change the settings of your LED light from blue to red. This spectrum of light encourages the budding process and helps plants stretch and expand during the early flowering stage.
Your plants will require amendments to their nutrition during the flowering phase. Higher demands for phosphorus, potassium, calcium, and magnesium, and less need for nitrogen, calls for Easy Bloom Booster Tablets. Simply dissolve ½ a tablet into 3–5 litres of water and administer the mix when watering your plants.


Week 6: Things Start To Smell
Flowers will be proliferating at each bud site now. You’ll notice your training start to pay off as the even canopy develops a consistent spread of evenly sized buds. During week 6, drop the humidity slightly to minimise the risk of mould. Aim for these parameters:
- 40% RH
- 24°C air temperature
- Light 45cm from the canopy
- 1.5l of water per 24 hours
- 3x feed with Easy Bloom (half a tablet per 3–5 litres of water)
Keep an eye out for any odd banana-like structures protruding from buds. This signals that your plant is hermaphroditic and attempting to pollinate itself. Remove these from the grow space to stop them from pollinating nearby plants. Thankfully, hermaphrodites are rare, but they are still worth looking out for.


Week 7: Routine Checks Are Key
The goal of week seven: maintenance. Focus your time and energy on keeping the grow room in balance. Be especially cautious of letting humidity get too high, as this can cause mould issues. Conduct routine checks with a magnifying glass to search for pests like thrips and spider mites. Continue to check leaves for signs of nutrient deficiency (which would likely be due to pH issues). Aim to maintain the following conditions:
- 40% RH
- 24°C air temperature
- Light 45cm from the canopy
- 1.5l of water per 24 hours
- 3x feed with Easy Bloom (half a tablet per 3–5 litres of water)


Week 8: Flush And Defoliate
Your buds will be looking thick and resinous at this point. Most autoflowers will be ready to harvest soon. If your plant appears to be lagging, don’t worry! Simply treat it as though it is still in week 7 and proceed after the buds have gained more size.
Environmental conditions for week 8:
- 40% RH
- 25°C air temperature
- Light 45cm from the canopy
- 1.5l of water per 24 hours
At the start of week 8, you’ll want to start flushing your plant. First of all, stop feeding your plants Easy Bloom at this stage. Next, simply flood the soil with as much water as it can hold and wait for it to empty. Repeat this process several times over the next two weeks. Flushing removes excess nutrients and gives your buds a smooth taste.
Now, reach for your trimmers and start defoliating. This method works really well alongside low-stress training to further enhance yields. Cut away the small fan leaves from the lower nodes and the shabbier fan leaves near the top of the canopy. This will help increase light exposure and further reduce the risk of mould.


Week 9: The Finish Line Approaches
You're almost there! Your hard work and dedication will pay off soon in the form of juicy, resinous buds. However, there are still a couple of jobs to tend to before this epic moment. You must strive to keep these environmental factors in balance to avoid any final infestations or other issues:
- 40% RH
- 25°C air temperature
- Light 45cm from the canopy
- 1.5l of water per 24 hours
You'll also notice the fan leaves start to become discoloured and even drop off. Don't be alarmed! This means that you've successfully flushed your plants and you're one step away from harvest time.


Week 10: Harvest!
Ready to reap the fruits of your labour? Many autoflowers will be ready to harvest during week 10! You will know your buds are ready to be snipped when the majority of trichomes are milky in colour and the pistils have taken on a reddish/brown hue.
If you notice that some of your buds are ripe and others aren’t, try a progressive harvest. You’ll most likely notice the buds closer to the top of the canopy finish first. Even if you trained your plant, some buds will naturally sit closer to the light than others.
Also, don't worry if your plant seems behind or ahead at this point in the timeline. Some autos grow faster than others. Slower-growing strains such as Amnesia Haze Automatic might need a bit more time to mature, whereas others might already be finished.
After harvesting your buds, start the drying and curing process to ensure a tasty, top-shelf stash.
Which Autoflower To Choose?
With so many choices out there, things can get confusing. Check out our 10 best autoflowers in each strain category below to make this decision much easier!