Included FREE items


How And When To Transplant Your Cannabis Plants
- Growing cannabis step by step
- Cannabis growing basics
- Choosing your seeds
- How to germinate seeds
- The cannabis vegetative stage
- The cannabis flowering stage
- Harvesting cannabis
- Trimming, drying, and curing
- Choosing pots and soil
-
Growing indoors
- A Complete Overview Of Growing Cannabis Indoors
- Cannabis Cultivation Tips: How To Set Up Indoor Grow Lights
- How Many Cannabis Plants Can You Grow Per Square Metre?
- Indoor Cannabis Growing: Relative Humidity and Temperatures
- Hydroponics Cannabis Growing Guide (with diagrams)
- Cannabis Micro Growing: Growing Great Weed in Tiny Spaces
- Growing outdoors
- How to grow autoflowering cannabis
- Cannabis nutrients and pH
- Cannabis troubleshooting: Nutrients
-
Cannabis troubleshooting: Growing
- Cannabis Seed Germination — Troubleshooting Guide
- How to Deal With Pythium (Root Rot) in Cannabis Plants
- Slow Cannabis Plant Growth And What You Can Do About It
- How to Prevent and Fix Stretching in Cannabis Seedlings
- Watering Your Cannabis: How To Fix Over And Underwatering
- Understanding Male, Female, And Hermaphrodite Cannabis
- Identifying and Treating Common Cannabis Ailments
- How To Revive a Sick Cannabis Plant
- How to Avoid Mouldy Weed During Drying and Curing
- How to Prevent and Treat Dry and Crispy Cannabis Leaves
- What Cannabis Leaves Can Tell You
- Yellow Cannabis Leaves
-
Cannabis Strains Grow Report
- HulkBerry Automatic Grow Report
- Blue Cheese Auto Grow Report
- Purple Punch Automatic Grow Report
- Triple G Automatic Grow Report
- Do-Si-Dos Automatic Grow Report
- Green Gelato Automatic Grow Report
- Haze Berry Automatic Grow Report
- Purple Queen Automatic Grow Report
- Cookies Gelato Automatic Grow Report
- Sherbet Queen Automatic Grow Report
- Sweet Skunk Automatic Grow Report
- Medusa F1 Grow Report
- Cannabis plant training
-
Weed growing tips
- The Cannabis Plant Anatomy
- How to preserve seeds
- How Much Sunlight Do Outdoor Cannabis Plants Need To Grow?
- How to Control and Prevent Stretching in Cannabis Plants
- How And When To Transplant Your Cannabis Plants
- My Cannabis Plants Are Growing Too Tall: What Should I Do?
- Should You Worry About Purple Or Red Cannabis Stems?
- What To Do When Your Indoor Cannabis Won’t Flower
- How To Protect Your Cannabis Plants From Heat Stress
- How To Tell If Your Female Cannabis Plant Has Been Pollinated
- Growing Medical Marijuana
- Bud Washing: How to Clean Your Weed
How to transplant your cannabis: tips and advice.
Contents:
- Why is transplanting your cannabis important?
- How often do you need to transplant?
- When to transplant your cannabis
- How much space does cannabis need?
- Why not plant into the biggest pot?
- What type of pots should I use?
- How to transplant cannabis
- Size of pots indoors and outdoors
- What about transplanting autoflowers?
- Understanding autoflowering cannabis plants
- Can you transplant autoflowering cannabis seedlings?
- How does transplanting affect autoflowering cannabis plants?
- When is the best time to transplant autoflowering cannabis plants?
- How to transplant autoflowering cannabis plants
- Plan ahead to avoid transplanting
Healthy roots mean strong plants and fat, resin-jewelled buds on your cannabis. You want everything big—the bigger the better!
Whether you’ve decided to grow in a SOG, a ScrOG, or are keeping things super-simple, no matter what, you should transplant your cannabis into larger pots at least twice. There are, of course, some exceptions to this rule—which we will clear up later down the line—but first, let’s pose an all-important question.
WHY IS TRANSPLANTING YOUR CANNABIS IMPORTANT?
Unlike with hydroponics, growing in a solid medium like soil or coco makes transplanting into bigger pots necessary as your plants grow. Why is that?
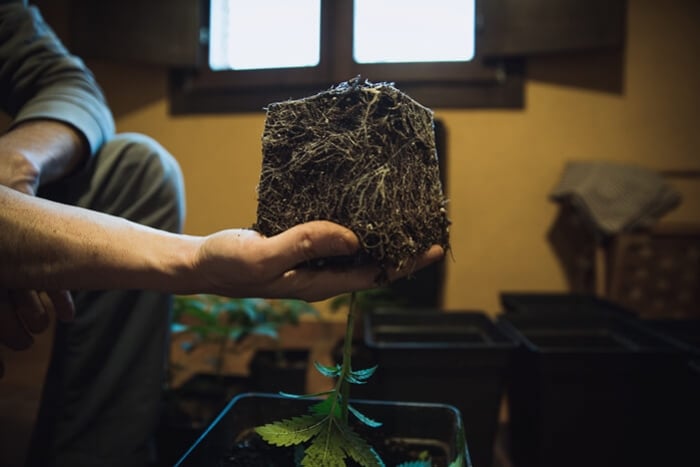
As the roots expand into the substrate and seek out nutrients, their network will grow to encompass as much space as possible. When the roots have completely filled out the volume of the pot, running circles around the inside perimeter of the container, growers refer to these plants as “root bound”. Vegetative growth will slow down, ultimately limiting the potential of your yields as well.
By transplanting to bigger pots early on, we can prevent this from happening. Transplanting ensures the roots always have space to grow freely and vigorously.
HOW OFTEN DO YOU NEED TO TRANSPLANT?
Contrary to what we said in the beginning of this article, you don’t technically need to transplant; but you should—especially if you want to max out yield.
Plants grow faster in smaller pots but are more susceptible to overwatering and overfeeding. When you start in small seedling pots or solo cups, the risk of fungus and other growing problems is largely mitigated, but new problems arise once your soon-to-be vegetative plants want to establish a strong root system.
A good way to go about transplanting is to keep your babies in seedling containers until they’ve each developed at least three nodes. At this point, you can transplant your specimens into larger pots until they double in size. Eventually, you’ll want to move your plants to their final, largest containers where they can truly flourish.
Typically, you will transplant a (photoperiod) plant 2–3 times. Re-potting more frequently isn’t recommended as transplanting causes significant stress.

WHEN TO TRANSPLANT YOUR CANNABIS
Let’s run over a list of visual indicators that can help you determine if your plants need to be moved to larger pots!
- Size of the plant: If a plant has visibly outgrown the pot, it’s time to transplant. Look to the number of nodes as a guideline.
- Speed of growth: If you see your plant’s growth accelerating in a too-small pot, transplant before growth becomes stunted. As a hint, the more fan leaves your plants have, the more they can photosynthesise, and the bigger they will become.
- Root development: If plants are rootbound or roots are coming out of the pot, they need to be transplanted.
- Problems with watering: Your growing plants are thirsty! If the pot dries out too quickly, it’s likely your cultivars need a larger vessel.
- Growing problems: If you observe slow growth or a sickly appearance from plants in undersized pots, it could be due to the size of their container.


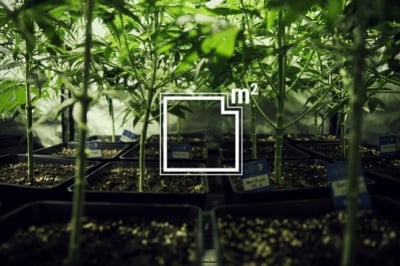
HOW MUCH SPACE DOES CANNABIS NEED?
In nature, the spacing of plants affects how they grow. When cannabis is grown for industrial purposes, it is planted very close together. The resulting root tangling releases hormones that encourage a tall plant without much side branching. This characteristic has been exploited by humans for a long time to obtain perfect fibres uninterrupted by heavy branching.
When growing marijuana for personal use, however, you generally want to allow each plant more space—not just to encourage branching and robust growth, but to keep plants healthy overall. So, how big should your containers be at each stage of growth?
As a guide to help you utilise your space and time efficiently, here is a list of standard pot sizes alongside the stage of growth they are typically used during. A very reasonable plant can be grown in a 30cm pot as its final container, and an exceptional plant in a ~60cm pot. All standard pots are alike in that their diameter at the rim is equal to their depth. A healthy cannabis plant can easily have a canopy three times the diameter of the pot.
|
For seedlings and young vegging plants |
For robust vegging plants | Beginning of final pot size threshold |
|---|---|---|
| 10cm = 0.5l | 25cm = 11l | 46cm = 57l |
| 13–15cm = 1l | 30cm = 19l | 61cm = 95l |
| 18–20cm = 4l | 36cm = 26l | 76cm = 114l |
| 22cm = 7.5l | 41cm = 38l | - |
| HOW MUCH SPACE DOES CANNABIS NEED? | |||||
|---|---|---|---|---|---|
| For seedlings and young vegging plants |
For robust vegging plants | Beginning of final pot size threshold |
|||
| 10cm = 0.5l | 25cm = 11l | 46cm = 57l | |||
| 13–15cm = 1l | 30cm = 19l | 61cm = 95l | |||
| 18–20cm = 4l | 36cm = 26l | 76cm = 114l | |||
| 22cm = 7.5l | 41cm = 38l | - | |||
WHY NOT PLANT INTO THE BIGGEST POT?
This is up to you. However, a large pot with plenty of soil that is yet to be infiltrated by roots poses a risk of waterlogging. This means you need to be careful when watering so as not to support conditions for mould, rot, or any other type of pathogen or infection.
Cannabis likes dry feet, so err on the side of caution. If planting directly in the biggest pot right away, water sparingly during the first week after potting on. Consider that smaller pots are easier to look after, particularly in the early weeks of vegetation. Small pots are also easier to move when tending to, and can be easily rotated for 360° light coverage.
WHAT TYPE OF POTS SHOULD I USE?
Most cannabis growers opt for standard white plastic pots with drainage holes in the bottom. Why white pots? Black or other dark colours will generate heat as the sun beats down, whereas white containers will help the soil stay relatively cool. Alternatively, some growers like to use air pots or fabric pots, which naturally "air-prune" the roots and allow for optimal health and development. For seedlings, growers tend to use plastic solo cups or specially designed seedling pots.
HOW TO TRANSPLANT CANNABIS
The most important rule to keep in mind when transplanting is that transplant shock causes a lot of stress to your plants. Be extremely careful; the less root damage, the better! This is not a process to rush.
Another important factor is cleanliness. Ensure your working area is clean, and wash your hands before you handle your plants. Better yet, wear gloves.
Do not transplant during the day in the bright sun or under an intense grow light. To avoid exposing your roots to undue light, transplant at night.
TRANSPLANTING: STEP-BY-STEP GUIDE
1. When transplanting your seedling, water them 1–2 days before transplanting. The soil should be moist but not wet. For later transplants, a drier soil will help the root ball stick together.
2. Prepare the new pot by filling it with good-quality soil. Don’t fill it all the way up and don’t overpack. Water the new pot. Dig a hole in the centre large enough for the new plant.
3. With your hand, cover the soil in the old pot (with your plant) and carefully flip it over. The plant should stick out between your fingers.
4. Carefully slide out the root ball and remove the old container. If the root ball doesn’t come right out, gently squeeze and pat the sides of the pot to loosen the soil. If still stuck, lay the pot horizontally on the floor and try to slide out the root ball. If it still won’t come out, use a knife and cut around the outer rim of the soil to free it (use this only as a last resort). Do not grab the plant and try to pull it out with force!
5. When the plant is finally freed, keep a hand under the root ball and transfer the plant to its new hole in its new container. Use extra soil and fill in the gaps. Pat down the soil just slightly to keep your plant in place.
6. Lightly water the plant to help it settle into its new home. This is a good time to use a root stimulator. Root stimulators help ease transplant shock and promote root development.


Pro Tips:
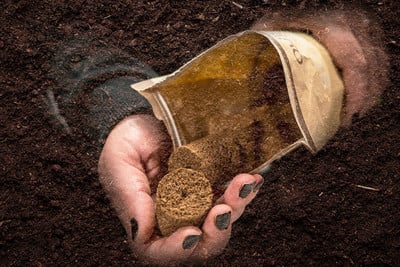
- We recommend preparing your new soil with Easy Boost organic plant nutrition. Add about 50–100g Easy Boost per 20l of soil. Easy Boost is an organic fertiliser that provides your plants with food for 10–12 weeks.
- How long does transplant shock last? It depends, but a few days of slow or stunted growth after transplanting is normal. Allow plants to recover for at least two weeks before inducing bloom or carrying out high-stress training methods.
- If plants are looking weak right after transplanting, support them with stakes.
- Sterilise old containers to reuse in the future.
SIZE OF POTS INDOORS AND OUTDOORS
When it comes to recommended pot sizes, this will vary based on whether you are growing indoors or outdoors.
Indoors, you’re constrained by the size of your growing area and the number and expected size of your plants. When growing outdoors, there are often fewer limitations.
Outdoors, you could, in principle, grow as large a plant as you want. This ensures the roots of your cannabis can grow extensively for the biggest possible yields. On the other hand, pots that are too big are not optimal either: If the roots can’t fill an oversized pot, you will end up wasting nutrients.
Large and heavy outdoor pots can also be an issue should you need to move them around. Alternatively, if you’re growing in the wild, you can just plant directly in the ground. This way, plants are not limited by pot size and can reach their full potential.

WHAT ABOUT TRANSPLANTING AUTOFLOWERS?
We generally suggest you avoid transplanting autos and instead plant your germinated autoflowering seeds directly into their final pots. Here’s why:
Understanding Autoflowering Cannabis Plants
Autoflowering cannabis strains flower based on age rather than changes in their light cycle. They get this trait from Cannabis ruderalis, a unique cannabis variety native to certain areas of Eastern Europe and Russia.
Hence, whereas photoperiod strains flower once the days get shorter (or you flip their lights from 18/6 to 12/12), autoflowering strains will flower automatically after about four weeks, although this can vary from one strain to another.
Can You Transplant Autoflowering Cannabis Seedlings?
Yes, you can technically transplant an autoflowering cannabis seedling. However, there is a downside to doing so.
When you transplant a photoperiod strain, you’ll typically keep it in veg for an extra week to help the plant recover from the stress of being transplanted. When transplanting an auto, you don’t have that same luxury, and the stress of the transplant will typically have a bigger impact on the plant’s growth and yield.
How Does Transplanting Affect Autoflowering Cannabis Plants?
A plant’s roots are super sensitive. No matter how gentle you are when transplanting, you’re going to cause your plants some stress when moving them into a new pot.
On average, cannabis plants can take up to 7 days to completely overcome that stress, although this can vary depending on the overall health of a plant (healthier plants will take less time to recover).
Because you have no way to compensate for this stress when growing autos, your plants will typically show signs of stunted growth following the transplant, which will ultimately translate into lighter, lower-quality yields.
When Is the Best Time to Transplant Autoflowering Cannabis Plants?
If you must transplant an auto, timing is absolutely crucial to minimise the impact on your yields. Try to transplant your autos once they’ve developed strong roots and at least 4–5 true leaves.

How to Transplant Autoflowering Cannabis Plants
When transplanting an autoflowering cannabis plant, remember to follow these steps to minimise the shock to your plant’s roots.
Equipment
- A clean work area
- Gardening or surgical gloves
- New pot and soil
Prepare Your Plants, Pots, and Work Area
Avoid watering your plants the day you transplant them, as it’ll be easier to remove dry soil from the container. Also, prepare a clean work area where you’ll perform the transplant. A big, clean table works great.
Finally, prepare your plant’s new pot. You may need to fill the bottom of the new pot with some soil to get your plant to the right height. Also, remember to make sure your new pot has drainage holes.
Remove Your Auto From Its Old Pot
To remove a plant from its pot, tip it over and gently push, massage, or slap the bottom and edges of the pot. Don’t pull at your plant’s stem, as you’ll risk damaging or breaking it!
Place Your Auto in Its New Pot
Place your plant inside the new pot and fill it roughly 2cm from the top with soil. Water generously and, if need be, top up with more soil. Keep a close eye on your plant over the next 3–7 days to check how it is recovering from the transplant.
Plan Ahead to Avoid Transplanting
To get the best results when growing autos, we recommend you plant them directly in their final pots. Most auto varieties will do great in 11–12l pots.
While they’re young, avoid overwatering your autoflowers to prevent drowning their small, delicate roots. Instead, mist their leaves regularly. Once they’ve developed a few true leaves, water them as needed.