Included FREE items


How To Create Your Own Cannabis Super Soil Mix
- Growing cannabis step by step
- Cannabis growing basics
- Choosing your seeds
- How to germinate seeds
- The cannabis vegetative stage
- The cannabis flowering stage
- Harvesting cannabis
- Trimming, drying, and curing
- Choosing pots and soil
-
Growing indoors
- A Complete Overview Of Growing Cannabis Indoors
- Cannabis Cultivation Tips: How To Set Up Indoor Grow Lights
- How Many Cannabis Plants Can You Grow Per Square Metre?
- Indoor Cannabis Growing: Relative Humidity and Temperatures
- Hydroponics Cannabis Growing Guide (with diagrams)
- Cannabis Micro Growing: Growing Great Weed in Tiny Spaces
- Growing outdoors
- How to grow autoflowering cannabis
- Cannabis nutrients and pH
- Cannabis troubleshooting: Nutrients
-
Cannabis troubleshooting: Growing
- Cannabis Seed Germination — Troubleshooting Guide
- How to Deal With Pythium (Root Rot) in Cannabis Plants
- Slow Cannabis Plant Growth And What You Can Do About It
- How to Prevent and Fix Stretching in Cannabis Seedlings
- Watering Your Cannabis: How To Fix Over And Underwatering
- Understanding Male, Female, And Hermaphrodite Cannabis
- Identifying and Treating Common Cannabis Ailments
- How To Revive a Sick Cannabis Plant
- How to Avoid Mouldy Weed During Drying and Curing
- How to Prevent and Treat Dry and Crispy Cannabis Leaves
- What Cannabis Leaves Can Tell You
- Yellow Cannabis Leaves
-
Cannabis Strains Grow Report
- HulkBerry Automatic Grow Report
- Blue Cheese Auto Grow Report
- Purple Punch Automatic Grow Report
- Triple G Automatic Grow Report
- Do-Si-Dos Automatic Grow Report
- Green Gelato Automatic Grow Report
- Haze Berry Automatic Grow Report
- Purple Queen Automatic Grow Report
- Cookies Gelato Automatic Grow Report
- Sherbet Queen Automatic Grow Report
- Sweet Skunk Automatic Grow Report
- Medusa F1 Grow Report
- Cannabis plant training
-
Weed growing tips
- The Cannabis Plant Anatomy
- How to preserve seeds
- How Much Sunlight Do Outdoor Cannabis Plants Need To Grow?
- How to Control and Prevent Stretching in Cannabis Plants
- How And When To Transplant Your Cannabis Plants
- My Cannabis Plants Are Growing Too Tall: What Should I Do?
- Should You Worry About Purple Or Red Cannabis Stems?
- What To Do When Your Indoor Cannabis Won’t Flower
- How To Protect Your Cannabis Plants From Heat Stress
- How To Tell If Your Female Cannabis Plant Has Been Pollinated
- Growing Medical Marijuana
- Bud Washing: How to Clean Your Weed
Making a homemade cannabis super soil mix is much more rewarding than buying store-bought soil and bottled nutrients—and it’s not that difficult to make.
Contents:
Some garden centre-bought soil works fine for growing cannabis, but it’ll only get you so far. To grow the best cannabis at home, we recommend using soil developed for cannabis specifically, or preparing your own soil. Keep reading for step-by-step instructions on how to prepare your own cannabis soil mix.
WHAT ARE THE PROS AND CONS OF CREATING YOUR OWN SUPER SOIL?
Like many aspects of growing, there are a number of pros and cons to creating your own cannabis soil. The pros, however, far outweigh the cons, and we encourage every grower to try preparing their own soil at least once.
| Pros | |||||||
|---|---|---|---|---|---|---|---|
| Good-quality homemade soil is rich in both macro and micronutrients, meaning you’ll be less reliant on chemical fertilisers. | Growing with homemade soil gives you complete control over where your plants get their nutrients from. If you’re looking to grow organically, this is the way to go. | ||||||
| Bud grown without chemical nutrients delivers a big, natural flavour like no other. A tastier, smoother smoke can be expected. | The chemicals found in nutrient solutions create harsh runoff that can have a devastating effect on the local environment. On the other hand, using your own, homemade soil is completely sustainable and environmentally friendly. | ||||||
| Cons | |||||||
| Preparing your own soil takes time, which is a luxury not all growers have. If you prepare a poor mixture, plants will not thrive. A poor mixture is one that contains too much or too little nutrients. Luckily, you will find out how to prepare a proper mixture in this article. | Preparing your own soil requires a larger initial investment than if you simply bought regular soil and a few nutrient solutions. Keep that in mind if you’re growing on a budget, but also remember that the results are definitely worth it. | ||||||
| Pros |
|
Good-quality homemade soil is rich in both macro and micronutrients, meaning you’ll be less reliant on chemical fertilisers. |
|
Growing with homemade soil gives you complete control over where your plants get their nutrients from. If you’re looking to grow organically, this is the way to go. |
|
Bud grown without chemical nutrients delivers a big, natural flavour like no other. A tastier, smoother smoke can be expected. |
|
The chemicals found in nutrient solutions create harsh runoff that can have a devastating effect on the local environment. On the other hand, using your own, homemade soil is completely sustainable and environmentally friendly. |
| Cons |
|
Preparing your own soil takes time, which is a luxury not all growers have. If you prepare a poor mixture, plants will not thrive. A poor mixture is one that contains too much or too little nutrients. Luckily, you will find out how to prepare a proper mixture in this article. |
|
Preparing your own soil requires a larger initial investment than if you simply bought regular soil and a few nutrient solutions. Keep that in mind if you’re growing on a budget, but also remember that the results are definitely worth it. |
UNDERSTANDING SOIL AND CANNABIS NUTRITION
When you prepare your own super soil for cannabis, you have the opportunity to prepare a rich medium for your plants ahead of time, rather than feeding your plants on an as-needed basis using mineral or organic fertilisers. Soil plays two key roles in the cannabis cultivation process. First of all, it weighs down your cannabis plants, keeping them rooted and protected against the wind. Secondly, and more importantly, it serves as a medium to transport nutrients and water to your plants’ roots. To better understand soil and how we can use a homemade mix to fertilise and nurture our cannabis plants, it helps to understand the basic nutrients cannabis plants need to survive and thrive.
Besides water, cannabis needs three main nutrients or _macronutrients_: nitrogen (N), phosphorus (P), and potassium (K). When you buy fertilisers, you’ll find products with varying concentrations of these nutrients designed to be used during different stages of the grow cycle. Here’s a brief rundown on how these nutrients help cannabis plants grow:
| Nitrogen | Is one of the main components of chlorophyll, and an essential building block of important amino acids. |
| Phosphorus | Is essential for the production of ATP and phospholipids, which are used to build cell membranes. |
| Potassium | Helps enable photosynthesis, regulates CO₂ uptake via stomata in a plant's leaves, and helps strengthen cell walls. |
| Nitrogen |
|
Is one of the main components of chlorophyll, and an essential building block of important amino acids. |
| Phosphorus |
|
Is essential for the production of ATP and phospholipids, which are used to build cell membranes. |
| Potassium |
|
Helps enable photosynthesis, regulates CO₂ uptake via stomata in a plant's leaves, and helps strengthen cell walls. |
Nitrogen, phosphorus, and potassium make up the bulk of the nutrients in most fertilisers you’ll find at a gardening store or grow store. However, there are many other nutrients, known as micronutrients, that also play key roles in keeping your plants healthy and helping them produce the best possible buds.
Some of these micronutrients include calcium, iron, sulfur, zinc, boron, manganese, and copper, which you’ll find naturally in things like bat guano, worm castings, molasses, kelp, coffee grounds, and more.


When you prepare your own super soil for cannabis, you have the opportunity to prepare a rich medium for your plants ahead of time, rather than feeding your plants on an as-needed basis using chemical fertilisers. The hard work and effort you put into preparing your own natural and organic soil before sowing your seeds will pay off big time in terms of flavour and quality come harvest.

HOW TO PREPARE YOUR OWN CANNABIS SUPER SOIL MIX
Preparing your own super soil might sound daunting, but it really isn't. The concept is, in fact, pretty simple; you’ll start off with some good-quality organic soil and enrich it with natural ingredients ahead of time. Once it’s time to sow your seeds, you’ll have a rich growing medium ready that will provide your plants with everything they need to produce beautiful, aromatic buds.
STEP 1: BUY YOUR BASE SOIL
Picking the right base soil for your cannabis plants is super important. Remember, cannabis likes well-aerated, permeable, and slightly acidic soil (pH of 6–6.5 is ideal). If possible, you’ll want to opt for an organic soil containing natural ingredients like worm castings, compost, coco coir, sand, and more. While these soils are generally more expensive, they’ll make a notable difference to the health of your plants and the quality and size of your harvest.
Some other ingredients to look for in organic soils include:
| Peat moss | Guano |
| Manure | Rock dust |
| Sand | Coco fiber |
| Natural fertilisers (like K-Mag) |
Pine castings |
| Perlite | Vermiculite |
| Peat moss | Guano | Manure | Rock dust | Sand |
| Coco fiber | Natural fertilisers (like K-Mag) | Pine castings | Perlite | Vermiculite |
If you can’t find a good-quality organic soil with at least some of these ingredients, don’t fret. Simply go to your local nursery or gardening centre and buy a neutral potting soil. Again, opt for something slightly acidic if possible.
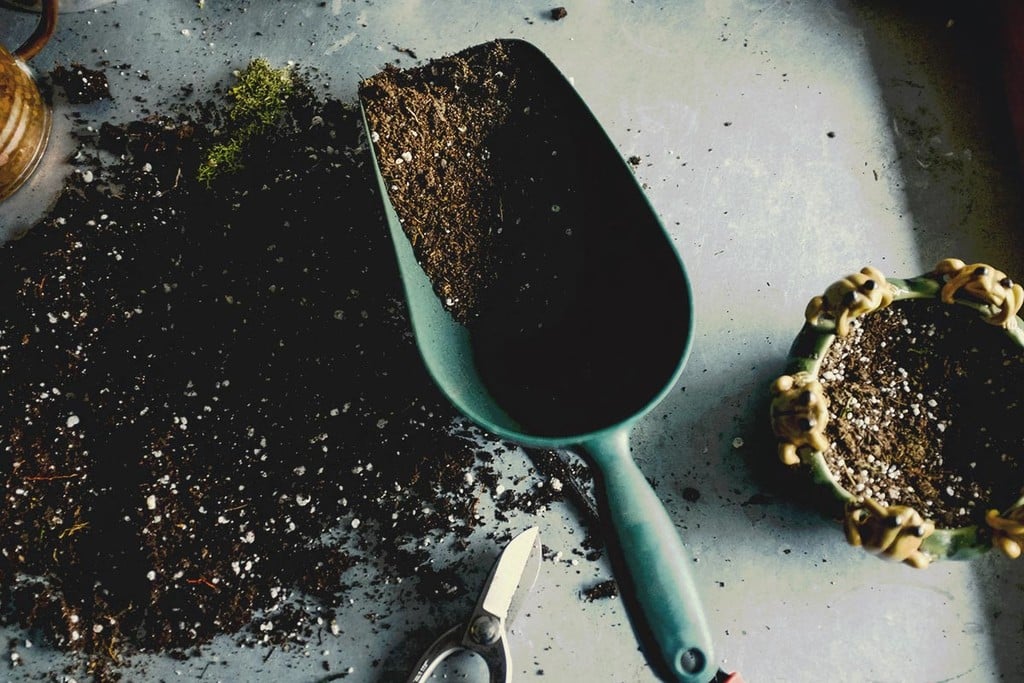
STEP 2: ENRICH YOUR SOIL
Start by placing your soil in a big container; break it up with a graip to ensure it’s well-aerated. Once it’s nice and loose, you’ll want to get to work enriching your soil with more natural ingredients to create a rich growing medium for your cannabis plants.
Some things to add to your soil include:
| Worm castings | Coffee grounds and/or tea leaves |
| Eggshells | Vegetable and fruit peels |
| Compost | Coco coir |
| Perlite | Vermiculite |
| Sand | Bone meal |
| Blood meal | Rock phosphate |
| Epsom salts | Lime |
| Dolomite | Organic fertiliser pellets |
| Worm castings | Coffee grounds and/or tea leaves | Eggshells | Vegetable and fruit peels |
| Compost | Coco coir | Perlite | Vermiculite |
| Sand | Bone meal | Blood meal | Rock phosphate |
| Epsom salts | Lime | Dolomite | Organic fertiliser pellets |
Simply add these ingredients to your soil and use your graip to combine everything properly.
The “correct” amount of each ingredient you use in your super soil will depend on the quality of your starter soil and how much time you have before planting. If possible, prepare your soil at least six months before you plant. That way, you’ll be able to use more of the ingredients listed above as they’ll have time to break down properly.
Once they do, they’ll create a rich topsoil for your plants, similar to what they’d have in nature. This super soil will be rich in nitrogen, phosphorus, and potassium, as well as all the other micronutrients we mentioned earlier.
This process, however, takes time. Compost, for example, can take anywhere from a few months to years to be ready, and you’ll need to take that into account when planning your grow. Vegetable or fruit scraps alone can take a few months to break down.
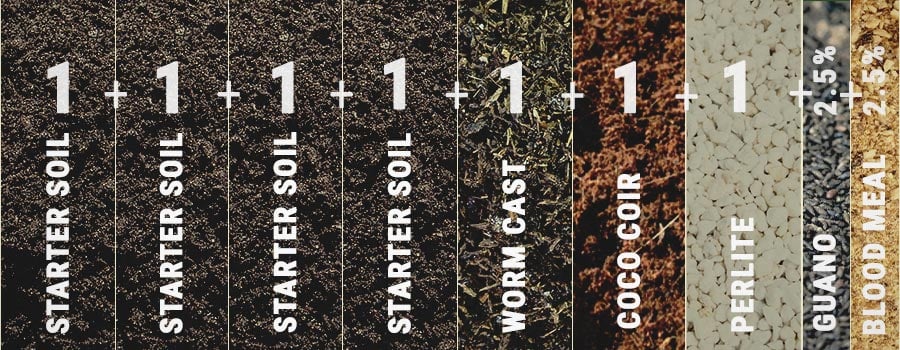
If you want to plant straight away, you can still use some of the ingredients listed above. You’ll just need to be more careful as you’ll be at risk of creating a really nutrient-rich (or “hot”) soil that can actually burn your plants. As a general rule of thumb to get you started, try using the following ratios of soil and other ingredients:
- 4 parts starter soil
- 1 part worm castings
- 1 part coco coir
- 1 part perlite/vermiculite (for extra drainage)
- 2.5–5% guano
- 2.5% bone and/or blood meal
When adding micronutrients like epson salts, azomite, lime, and dolomite to your soil, always read the package instructions. These nutrients are really strong and can cause nutrient burn when not used properly.

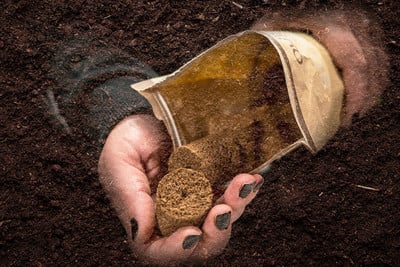
STEP 3: WASH YOUR SUPER SOIL (IF YOU WANT TO PLANT RIGHT AWAY)
If you don’t have months to prepare your own super soil, here’s a simpler, faster way to prepare your own cannabis soil at home.
In the pots you plan to grow in, combine:
- 3 parts organic starter soil
- 1 part perlite
- 1 part worm castings
- ½ cup greensand
- ⅓ cup guano
- ½ cup dolomite lime
Mix everything together using your graip, then soak the soil for at least two days in pure water, keeping it wet all throughout. This will ensure your soil isn’t too hot for your seedlings. Allow the water to run off and the soil to mostly dry before planting. Once you do plant, make sure to use just plain water for at least the first three waterings.
STEP 4: DON’T PLANT DIRECTLY INTO HOMEMADE SUPER SOIL
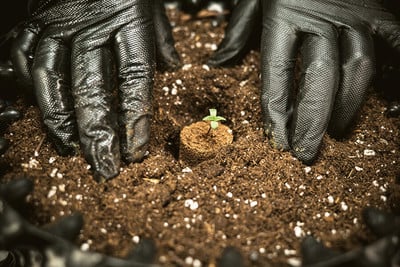
It’s really important to note that homemade super soil is very nutrient-rich and shouldn’t be used for seeds, seedlings, or clones. These young plants are very delicate and will suffer from nutrient burn in such a hot medium. Instead, you’ll want to germinate your seeds and keep your young plants in neutral soil for at least the first two weeks, only transplanting once they are well-rooted and develop three or more nodes with larger leaves.